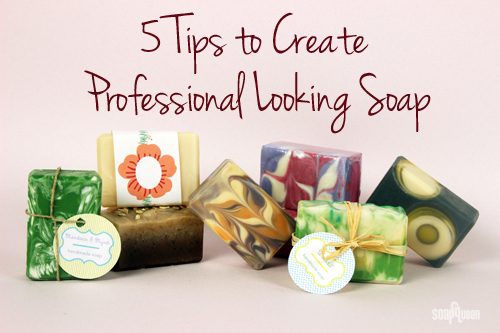
 When making soap to sell or give as a gift, it needs to look polished and professional . Unfortunately, not every batch comes straight out of the mold this way! Whether the soap has a bit of soda ash or uneven edges, there are several tricks to making each and every bar picture perfect. Here are my top five finishing touches to create soap that looks professional and finished.
[Read more…]
Search Results for: funnel pour
Soapy Social Media Roundup
I hope you are all having a great Labor Day weekend! Mine has been filled with sunshine and gardening. With summer ending, I’m trying my best to harvest summer crops and get ready for fall. Luckily, the warm weather lasts into September here in the Pacific Northwest, so there is still time to enjoy the sun before the fall chill sets in. I do need to pull most of my kale because it got powdery mildew (yes, I dried water + milk 1:9 ratio and some other things I’ve read online to try), so I’ll be replanting kale this weekend too. Speaking of fall, be sure to sign up for our Newsletter to be in the know about upcoming promotions and exclusive projects. We have some really fun and festive holiday and fall ideas, and can’t wait to share them with you. In the meantime, here are my favorite pins, tweets and instagrams from the past few weeks! Pins: 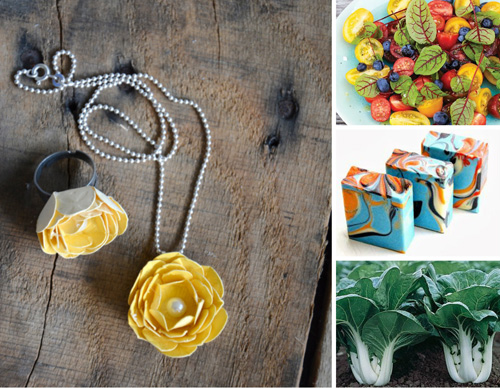 Left to right, clockwise:
- This Rose Necklace and Ring Tutorial by The Idea Room is adorable. I would love to use a deep purple color and wear the necklace during fall.
- Doesn’t this Tomato and Blueberry Salad look delicious? I have never tried blueberries in a salad before, I love the color they add.
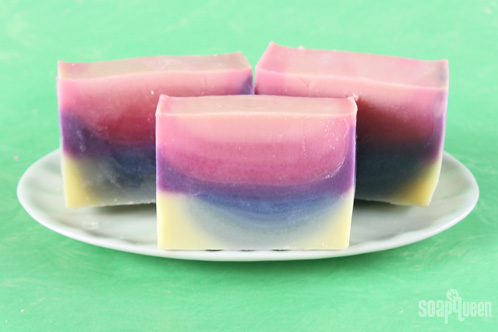
- With vibrant colors and an amazing swirl, this Dusk to Dawn Soap by Petals Bath Boutique is a showstopper. If you’d like to try a Faux Funnel Pour, check out this Soap Queen Tv video!
- As summer ends, it’s time to start planning my fall garden. Here are 10 Vegetables to Grow in Fall, I might try to grow some garlic.
Instagram: With fall on it’s way and Pumpkin Spice Lattes officially hitting stores on September 2nd, we have been busy creating pumpkin inspired projects =) Be on the look out for them next week! Creating a textured soap top is easy; simply use a spoon to make peaks! Covering it with Sparkle Gold Mica doesn’t hurt either =) Tweets:
- When trying to lose weight, it can be tempting to hop on the scale several times a day. Here are 5 reasons why you should use your scale sparingly.
- It would seem that all scientific studies offer life changing breakthroughs, but many are simply bad science. When reading a scientific study, here are things to look for to help evaluate the claims of the study.
- According to the Wall Street Journal, yoga participation only grew 4.5% in 2013, while the sales for yoga apparel increased by 45%! Seems comfortable and stylish is a winning combination.
- What does social media’s ability to make us all “microcelebrities” mean for our lives? Creating and sharing content online continues to shape how we build relationships.
- If you suffer from anxiety, here are 6 Tips for Fighting Anxiety (with one being especially important!)
Have a great rest of your holiday weekend! To keep up with the latest soapy social media throughout the week, you can follow me on Twitter, Tumblr, Instagram, Pinterest, Vine and YouTube.
Facebook Photo of the Week (Aug. 23rd ~ Aug. 29th)
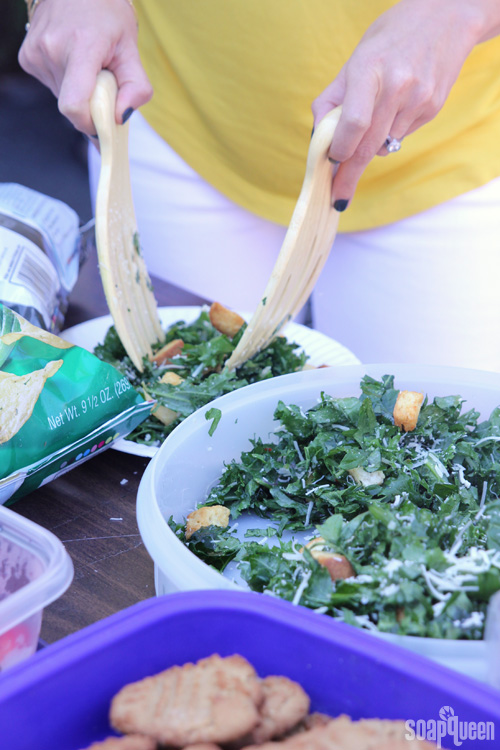
Even though it’s almost September, here at Bramble Berry we haven’t given up on summer yet! We celebrated the sunshine with a yearly barbecue. Everyone brought a dish to share and we enjoyed each other’s company.
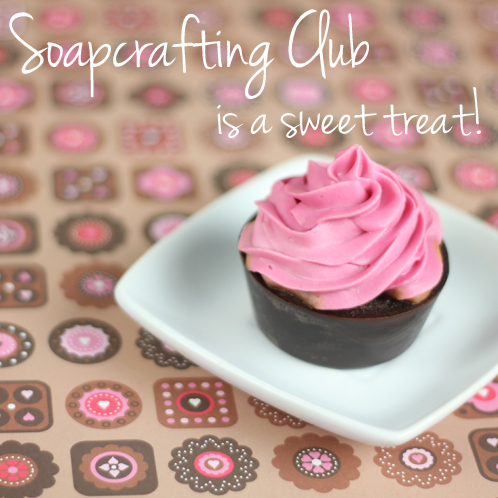
Join the Soap Crafting Club!
The only way to make soapmaking better is to have a friend craft along with you. Join the Soap Crafting club, and receive personalized attention from Amber and I, but you’ll also be able to interact with fellow soapmakers from around the country. Two Soap Crafting club sessions have been held so far, and they are fantastic places to ask questions, get advice and show off the lovely soaps you make along the way. There is a catch though – we cap the participants and over half of the subscription for the Spring Session have been reserved. The Soapcrafting Club Sprint Session starts in April and we would love to have you join us.
2013 DIY Gift Giving Guide
Gift-giving season is here and we want you to be all stoked up with a variety of soapy, DIY presents. This gift guide has everything from gifts for the family and projects for the beginner and the advanced soaper. You don’t just have to make the gift yourself. If you have a crafty friend or family member, a DIY kit might be the perfect gift.
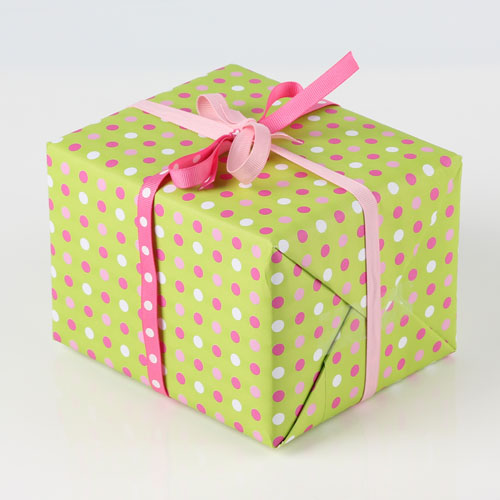
Why yes, this is Soap Queen wrapping paper. Purchase it here.
Soap Challenge: Mica Topped Cold Process
We’re hooked on the Great Cakes Soapworks Soap Challenges! They’re a great way to practice new techniques and learn from other soapers, and this particular challenge was all about finishing off the soap with a mica swirled top. It’s a relatively simple yet beautiful technique that adds the perfect finishing touch. For the base of the soap we did a simple spoon plop technique, which closely resembles the faux funnel pour. The good thing about the mica top technique is it can used with any cold process soap, no matter what technique was used in the base.
If you’d like to check out our other entries to the Soap Challenge, take a look at our Leopard Spot, Mantra Swirl or Elemental Swirl tutorials.

What You’ll Need:
33 oz. Swirl Quick Mix
4.5 oz. Sodium Hydroxide
11 oz. distilled water
1.1 oz. Blueberry Fragrance Oil
1.1 oz. Pineapple Cilantro Fragrance Oil

Click here to add everything you need for this project to your Bramble Berry shopping cart!
Don’t want to buy the Swirl Mix or want to make a recipe up from scratch? I’d recommend at least 60% liquid oils and no more than 40% (total) of solid oils and butters to give yourself a long time to work with this intricate design.
If you’ve never made Cold Process soap before, stop here! I highly recommend checking out our FREE four part SoapQueen.tv series on Cold Process Soapmaking, especially the episode on lye safety. And if you’d rather do some reading, Bramble Berry carries a wide range of books on the topic, including my newest book, Soap Crafting. You can also checkout the digital downloads for that instant gratification factor.
SAFETY FIRST: Suit up for safe handling practices! That means goggles, gloves and long sleeves. Make sure kids, pets, and other distractions and tripping hazards are out of the house or don’t have access to your soaping space. Always soap in a well-ventilated area.
COLOR PREP: Disperse 1 teaspoon of each pigment into 1 tablespoon of Olive Oil. Prepping your colors in the beginning will allow you to work quickly and give you more time to work with your soap. Use the mini mixer to get all those clumps worked out smoothly.
ONE: Slowly and carefully add the lye to the water, and stir until clear. Set aside to cool. If you’d like a harder bar of soap that lasts longer in the shower, you can add Sodium Lactate to the cooled lye water. Use 1 teaspoon of Sodium Lactate per pound of oils in the recipe.
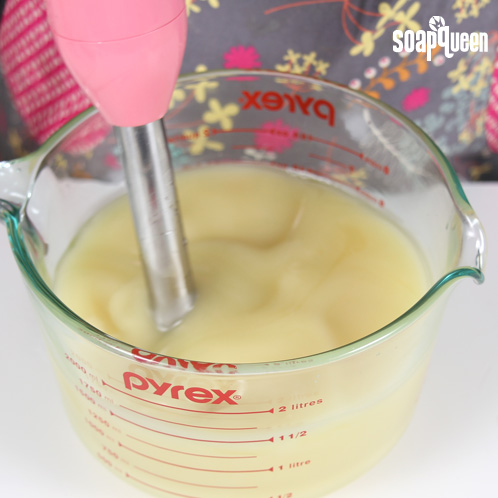
TWO: Melt the entire bag of Swirl Quick Mix and portion out 33 oz. in a large glass container. Once the lye water and the oils have cooled to 130 degrees or below (and are ideally within 10 degrees of each other), add the lye water to the oils and stick blend until thin trace. You can use any standard recipe with this design if you don’t have the Swirl Mix on hand but keep in mind that you need a lot of working time with multiple techniques.
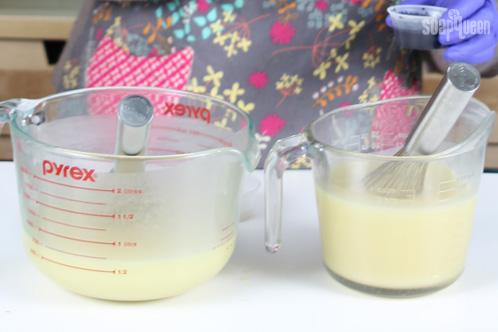
TWO: Split the batch into two equal portions. Eyeballing it is okay! After the split, you should have about three cups of batter per container.
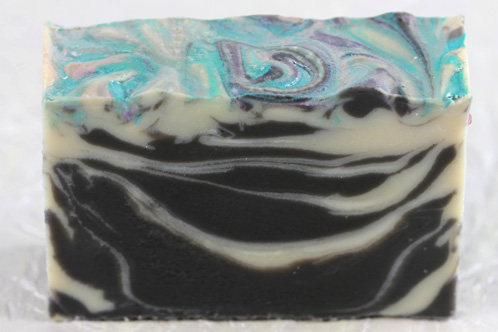
THREE: Add 3 teaspoons dispersed Titanium Dioxide to one cup and 1/2 teaspoon dispersed Black Oxide to the other. Mix the colorant into the batter with a wire whisk or spoon. After the colorant has been incorporated, mix the Pineapple Cilantro Fragrance Oil into the white batter and the Blueberry Fragrance Oil into the black batter.
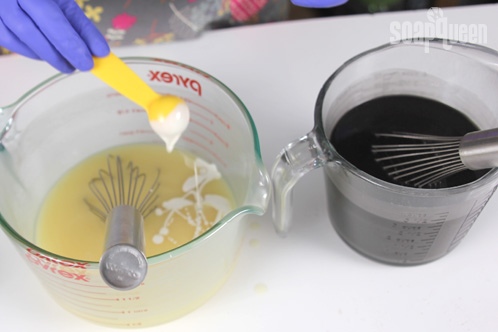
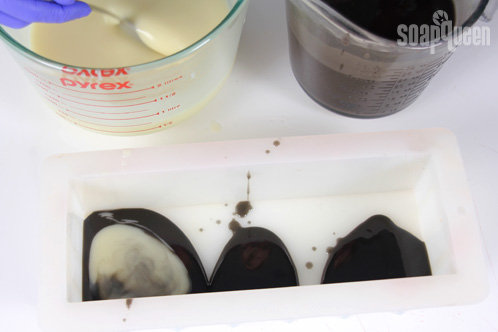
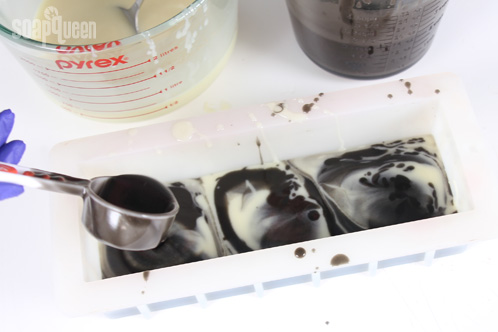
FOUR: Using a spoon, start with the black soap and plop three spoonfuls into the mold. Do the same with the white soap, layering the spoonfuls on top of the black soap. Repeat this process until you’ve emptied both containers of batter.
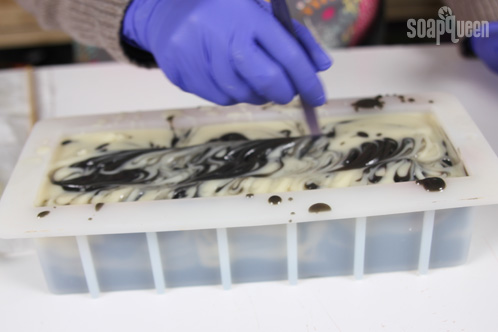
SIX: Insert a chopstick or dowel about 1/2 inch into the top of the soap. Beginning in the top left-hand corner, make a figure eight pattern through the soap, working your way across the mold.
SEVEN: Using a dropper, drizzle the Aqua Pearl Mica across the top of the soap. We drizzled the mica in loop-de-loop swirls, but you can create your own design too!
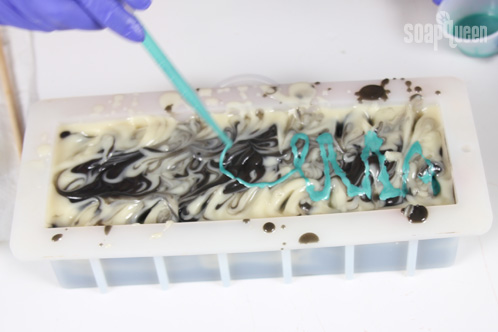
EIGHT: Repeat the process with the Amethyst Purple Mica.
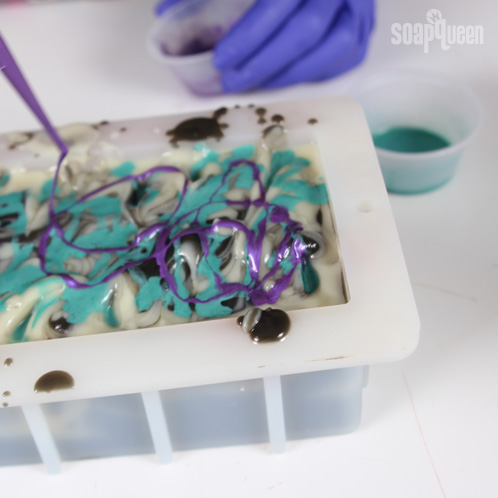
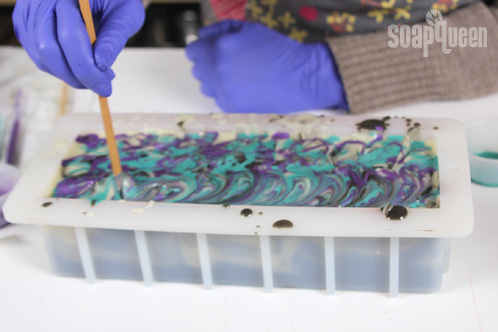
NINE: Once all the mica has been drizzled on the soap, use a chopstick or dowel to make small loop-de-loops across the length of the mold. When you reach the edge, begin your curve again and make a second set of loops under the first.
TEN: Spray the entire top with 91 or 99% Isopropyl Alcohol to reduce soda ash. Cover and insulate for 24 hours and unmold after 3-4 days, and allow to cure for 4-6 weeks and enjoy.
Soap Crafting Club is here!
I think that one of best parts of soapmaking is the amazing community we’re surrounded with — it’s a wonderful feeling to be able to meet other soapers, learn new techniques, exchange ideas, and receive encouragement and feedback to help our community learn and grow.
After meeting so many amazing soapers at the Soap Crafting release event last Thursday, I began thinking of ways to bring people together around the Soap Crafting book, and I hope you’ll all be delighted with what the team and I came up with: I am pleased to announce the Soap Crafting Club, a collaborative subscription-based group featuring techniques and recipes from the Soap Crafting book. Read on to find out more and get in on the fun!
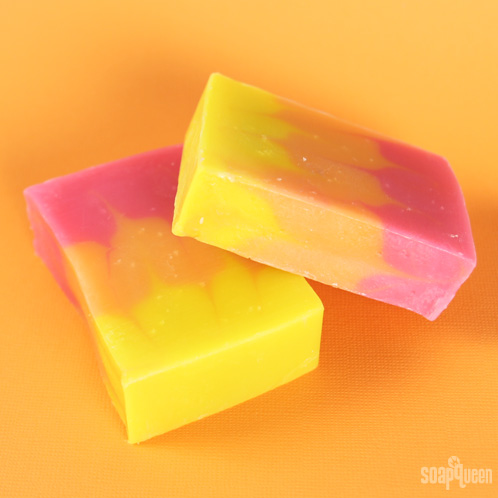
The Neon Swirl is part of the fall Soap Crafting Club session
Think of the club as a private, online classroom. When you sign up, you’ll get access to instructional videos for each recipe, be able to ask questions on a private forum and have a space to share your own soapy creations. When you purchase a subscription, you’ll receive pre-measured oils, lye colorant, fragrance and the soap mold. All you need to provide is the distilled water and the tools! The club is a great way for soapers to focus on technique because all ingredients are pre-measured, allowing lots of time for focus on technique and execution.
In the private Soap Crafting Club forum, I will be answering questions and giving feedback on the soaps. I want to give each soaper individualized attention. As a result, the number of members will be limited! If a session fills up, have no fear — we’re offering four, unique 3-month-long sessions throughout this year, as well as a subscription for the entire year. Every session features three different recipes from the book, and you can see the complete schedule below:
Fall 2013 Three Month Subscription:
September – Natural Colors Soap with Annatto p. 56
October – LabColors Ombre Soap p. 70
November -Neon Swirl Soap P. 180
2 pound wood mold with silicone liner
Winter 2014 Three Month Subscription:
January – Funnel Pour Soap p. 79
February – Avocado Moisturizing Soap p.134
March – Tie Dye Soap p. 198
5 lb Wood Mold with Sliding bottom and silicone liner
Note: You will need to provide distilled water and an avocado
Spring 2014 Three Month Subscription:
April – Black & White p.60
May – Coffee Grounds p.154
June – Wine Twist p. 147
Vertical Wood Mold
Note: You will need to provide distilled water, wine and coffee grounds
Summer 2014 Three Month Subscription:
July – Oatmeal Layers p.162
August – Psychedelic Green Tea p. 172
September – Linear Swirl p. 186
9 bar Birchwood Mold with silicone liner
Note: You will need to provide distilled water and oatmeal
The Lab Colors Ombre, also part of the fall club session
To join our merry band of soapers and fun, click here to purchase a subscription. The fall session is currently live, and those who have signed up will receive their kits by September 30. There are still spots open, so don’t hesitate to join in!
Silicone Column Oatmeal Milk and Honey
Phew! I’m sorry this blog post is a day late. We had our big Soap Crafting Book release party last night where we announced our special Soap Crafting Club. The celebration went late! =) Stay tuned to hear more about that and see photos of the cupcake laden event.
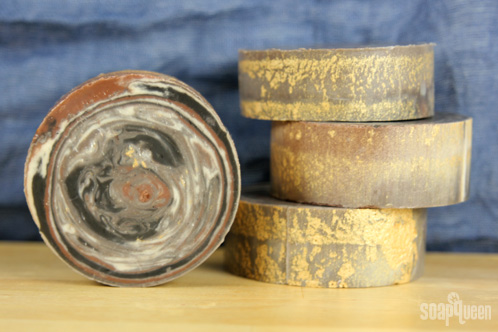
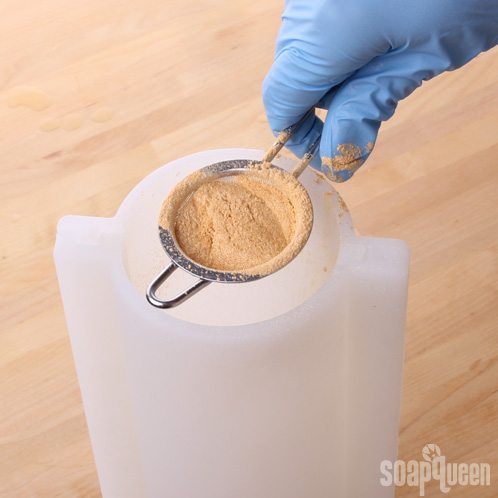
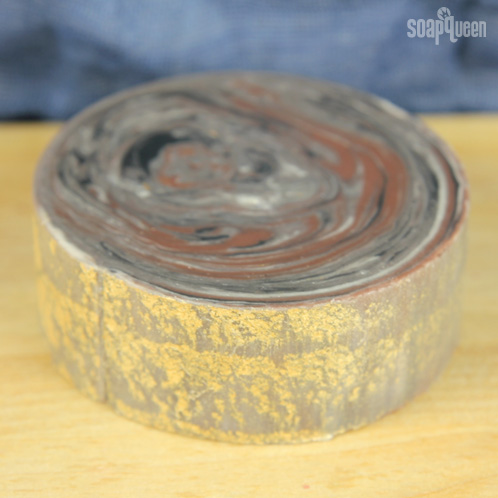
The rain has really picked up around here, and we’re once again starting to live up to our nickname as ‘Evergreen State’. But cooler temperatures and a wetter climate doesn’t have to be a bad thing — in fact, for this soap we took a cue from all the evergreen trees around here that give us our lush reputation. I love the way the brown, white and black colors swirl to look like tree rings, and the gold mica dusting on the outside mimics bark. For this technique, we used our fabulous Silicone Column Mold, which seals so tightly you can fill it with water and not worry about spilling a drop. We scented this soap with our ever popular Oatmeal Milk and Honey Fragrance Oil for a warm, comforting touch.
What You’ll Need:
3.6 oz. Canola Oil
.69 oz. Castor Oil
7.5 oz. Coconut Oil
3.4 oz. Olive Oil
7.5 oz. Palm Oil
3.3 oz. Sodium Hydroxide
7.5 oz. distilled water
1.5 oz. Oatmeal Milk and Honey Fragrance Oil
Titanium Dioxide
Brown Oxide
Black Oxide
Silicone Column Mold
Click here to add everything you need for this project to your Bramble Berry shopping cart!
Side note: This soap stayed pretty soft for a while. I wish I would have used 1 tsp of Sodium Lactate per pound of oils (added to my lye water).
If you’ve never made Cold Process soap before, stop here! I highly recommend checking out our FREE four part SoapQueen.tv series on Cold Process Soapmaking, especially the episode on lye safety. And if you’d rather do some reading, Bramble Berry carries a wide range of books on the topic, including my newest book, Soap Crafting. You can also checkout the digital downloads for that instant gratification factor.
COLOR PREP: Disperse 1 teaspoon of each colorant into 1 tablespoon of Sunflower or Sweet Almond Oil (or any other liquid oil). Use a mini mixer to get clumps worked out smoothly.
MOLD PREP: This mold is absolutely water and soap tight but you need to make sure it is FULLY CLICKED in the seam area. Run your fingers over those seams extra times just to be on the extra safe side.
SAFETY FIRST: Suit up for safe handling practices! That means goggles, gloves and long sleeves. Make sure kids, pets, and other distractions and tripping hazards are out of the house or don’t have access to your soaping space. Always soap in a well-ventilated area.
ONE: Slowly and carefully add the lye to the water and gently stir until the lye has fully dissolved and the liquid is clear. Set aside to cool.
TWO: Combine the Canola, Castor, Coconut, Olive and Palm Oils (remember to fully melt then mix your entire container of Palm Oil before portioning). Once the lye water and the oils have cooled to 130 degrees or below (and are ideally within 10 degrees of each other), add the lye water to the oils and stick blend until thin trace. If you’d like a harder bar of soap that lasts longer in the shower and releases faster from the mold, you can add Sodium Lactate to the cooled lye water. Use 1 teaspoon of Sodium Lactate per pound of oils in the recipe.
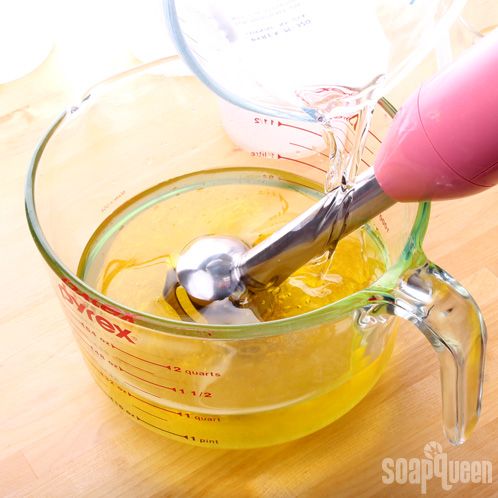
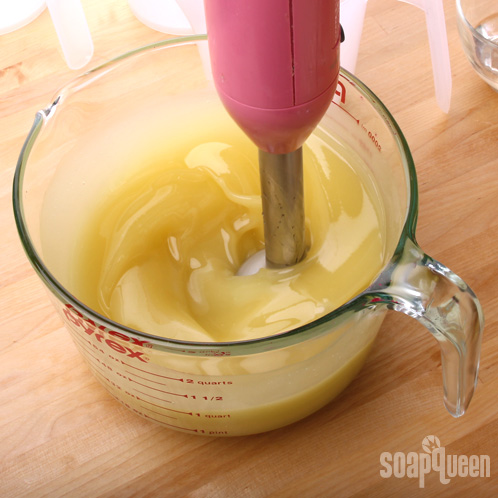
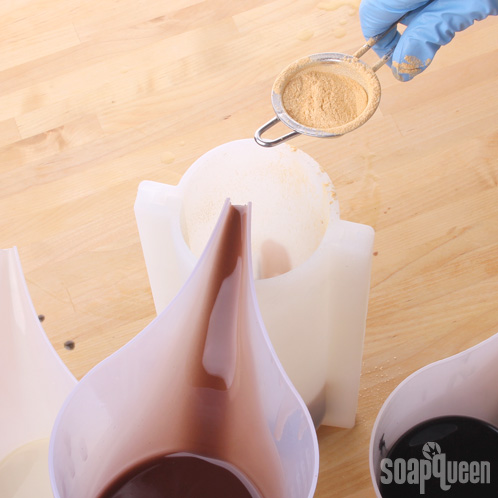
THREE: Once the batter has reached thin trace, divide it into three equal portions (each container should hold approx. 4 cups of batter). Side note: How awesomely amazing are these containers? They can even hold lye water and their long pouring spouts make for easy design work.
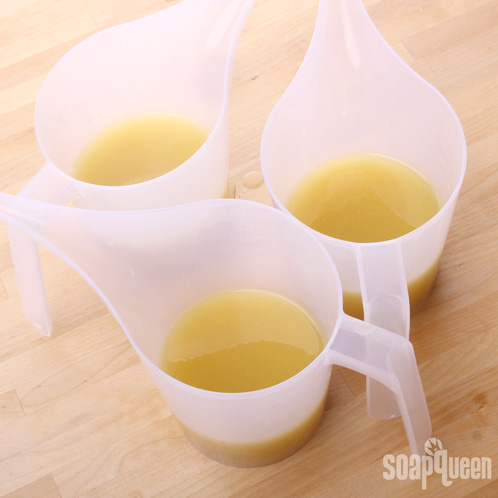
FOUR: Now add the dispersed colorants. We added 3 teaspoons of dispersed Titanium Dioxide to one cup, 1 teaspoon disperse Black Oxide to the second and 1 teaspoon dispersed Brown Oxide to the third. Whisk the colorant into the batter so as to not accelerate trace.
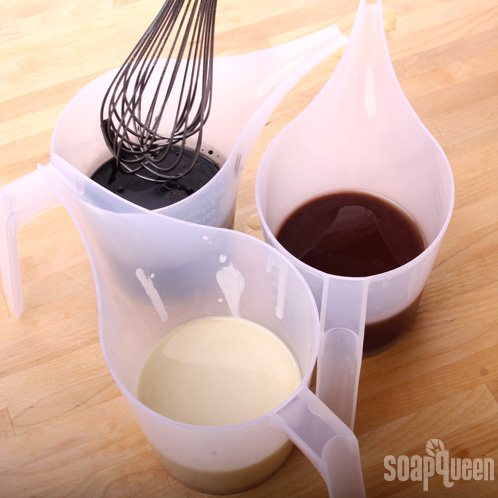
FIVE: Divide the fragrance evenly between the three cups. Use a spatula or spoon to incorporate the fragrance into the batter.
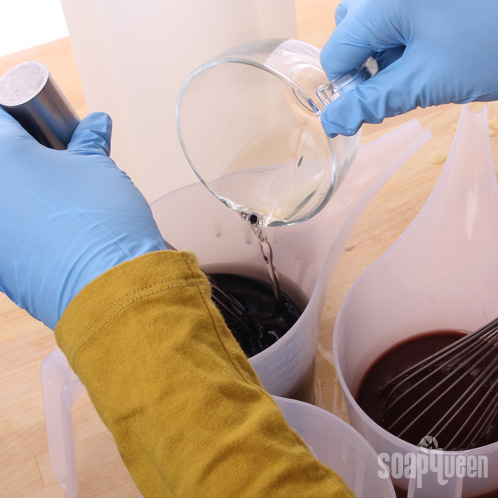
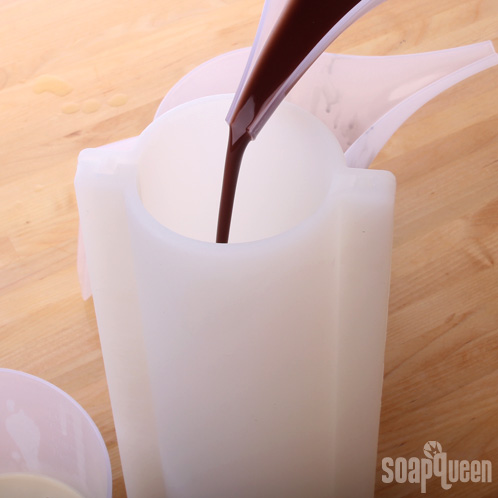
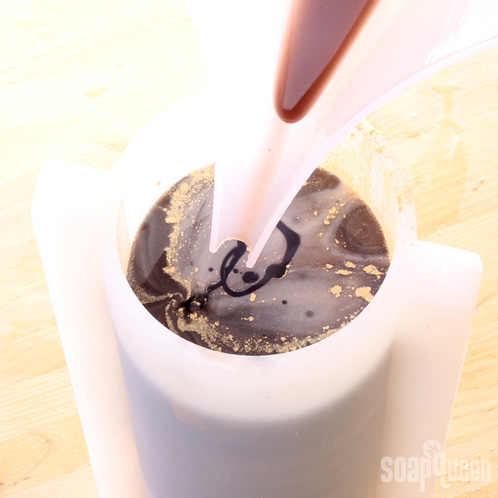
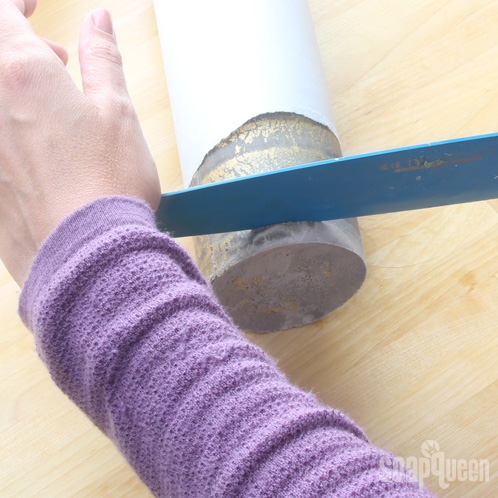
SIX: Once the fragrance and colorant have been fully mixed into the batter, pour off about 1/4 cup of one color into the mold. In between pours, use a Powder Duster to dust a thin layer of Sparkle Gold Mica directly over the opening of the silicone column mold.
You can see from the above photo how thin of a trace I’m working with. I really wanted to have the colors swirl beautifully together, rather than be a traditional faux-funnel pour (which works with slightly thicker trace to suspend the design).
SEVEN: Continue alternating between pouring each color and dusting a mica vein. Continue the pattern until the soap fills the mold. I count to ‘three’ to know when to stop with each color. It’s more accurate for me than eyeballing the pour.
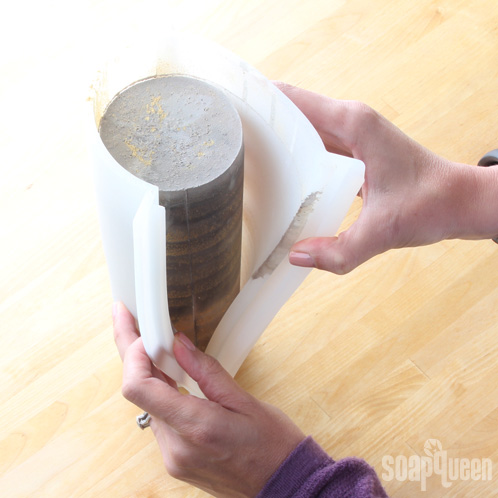
To unmold the soap:
Because this is a particularly soft soap, we recommend waiting 1-2 weeks before unmolding it and then another week after that to cut it. Really, I said “weeks”. You can freeze the soap and it will come out sooner but we just were super patient. The recipe combined with the nature of silicone molds to not release and evaporate water makes this a longer release and cutting period that most soaps.
ONE: Stand the mold up on its end and pull apart the seam on one side. If you find that the mold is pulling soap off the loaf, it is still too soft and needs to be left in the mold for a few more days. Once the seam has been opened on one side, gently pull apart the seam on the other side.
TWO: Even though you’ve unmolded the soap, it may still be soft enough to show finger prints if you touch it directly. To eliminate this, roll the loaf onto a piece of wax paper (shine-y side up!). Using a sharp knife, cut the soap between 1 – 1.5 inches thick. Place on a cookie cooling rack to dry.
Allow the soaps to dry for another 1 – 2 weeks, then enjoy!
Pinterest-iffic Soap Crafting Contest
We’re taking a pause in our week of cold process projects to announce a special contest. Have you gotten your copy of Soap Crafting yet? If not, books are in house and shipping immediately. Plus, you’ll want your book because we’ve got something super fun in the works: a Soap Crafting Club (!!). Stay tuned for details on that. If you have received your book, then it’s time to show off those fabulous Soap Crafting projects on Pinterest for a chance to win! Details below… 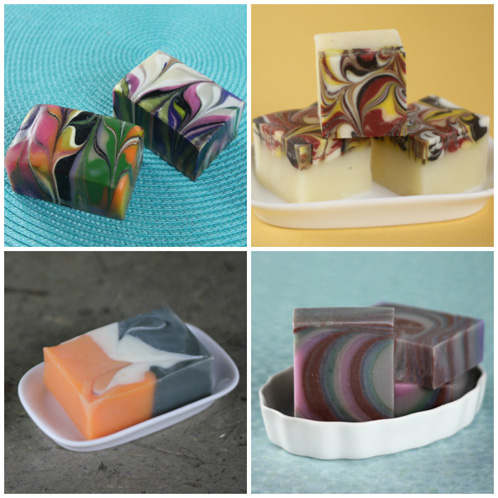
Clockwise from top left: 12 Color Linear Swirl, Firedrop Swirl, Funnel Pour, Mantra Swirl
Pin your Soap Crafting projects to any of your boards using the hashtag #soapcrafting. We’ll repin your Soap Crafting projects to our Soap Crafting Pinterest Board, and at the end of September we’ll choose three winners to receive ingredients for one of the projects in the book (including the mold!). Prefer Instagram? No problem! Use the hashtag #soapcrafting on your Soap Crafting Instagram pics and we’ll pin those too. If you’re not following me on Pinterest yet, you can find me @brambleberry here. So let’s break it down:
- Pin pictures of the soap projects you make from the Soap Crafting book using the hashtag #soapcrafting on Pinterest OR
- Post Instagram pictures of the soap projects you make from the Soap Crafting book using the hashtag #soapcrafting
- We will repin your pins or pin your Instagram photos to our Soap Crafting Pinterest board
- From those pins, we’ll randomly choose three winners to receive ingredients for three projects (of our choice) from the Soap Crafting book
- We can’t repin your pins without the hastag #soapcrafting or pin your Instagram pics without the hashtag #soapcrafting, so be sure to include those!
- You have until September 23 to pin and post your projects.
- We’ll choose the winners and make an announcement on the Soap Queen blog on September 30
Not sure what a hashtag is? Here’s an example pin just for you: 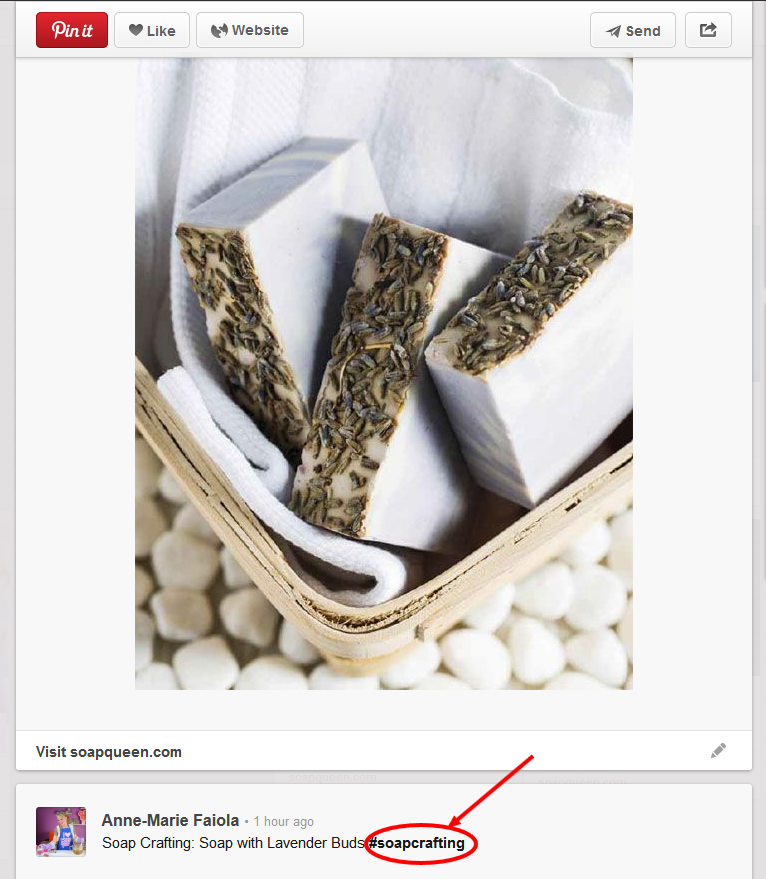 Notice the #soapcrafting circled in red? You literally type out the number sign (#) + soapcrafting and you’re good to go! That’s all you need to do. We can’t wait to see your Soap Crafting projects! If you have any questions, let us know in the comments below. Happy Soap Crafting!
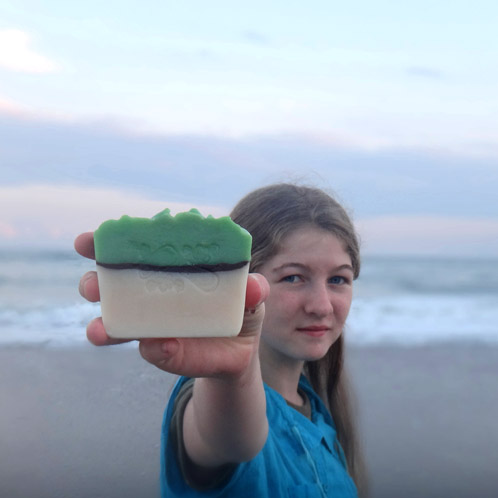
Interview with Emily from Suds by the Sea
If you haven’t heard of the newest up-and-coming young soaper from Suds by the Sea, you are in for a great interview today! I first found out about 15-year old Emily when she commented on our Facebook Photo of the Week post that featured another young soaper, Jasmine Hales. Emily told us that she was so excited to see that there were other young soapers around and I knew at that time that I wanted to learn more about her. Back in March I was able to feature some of Emily’s soaps as the Facebook Photo of the Week and since I started soaping at 16, had a special spot in my heart for her even before I learned more about her. Read on to get inspired…
Circle Swirled Soap in Column Mold
Today we’re launching our latest mold (drum roll), the Heavy Duty Column mold! To celebrate it’s debut, I’ve got a fun and fabulous tutorial that is a twist on the Faux Funnel Pour technique. This is a great recipe for an alternative to Olive Oil, for those late night soaping adventures where you realize you’re just short of an ingredient and it’s too late to hit up the store (anyone else been there? anyone?). Using contrasting colors in unexpected hues and a bright and fresh fragrance oil blend, I’m hoping you like this recipe as much as I do.

How to Label Cold Process Soap
This is the second post in my series on how to label your products. In the first post I explained how to label lip balm including how to list your ingredients using the proper terms in the correct order.

As I mentioned in that post, this is just the bare minimum; there are so many little details that I can’t possibly cover in a blog post. Thus, I highly recommend the book Soap & Cosmetic Labeling by Marie Gale. It is a concise and easy-to-read book, full of examples about labeling cosmetics with a special emphasis on soap. Also, the FDA’s website has many interesting articles and bonus, you can read the law as it is actually written. They also have a free Cosmetic Labeling Manual that addresses all of the basics of labeling.
Soap is a special case when it comes to labeling. The FDA does not require ingredient labeling for soap. That’s right! Nothing. [Read more…]
Soap Weekend Intensive 2012. Be There.
SWI 2012: June 15th -17th,
Bramble Berry’s annual Soap Weekend Intensive is an incredible opportunity to learn innovative techniques from some of the best instructors in the country. These classes are HANDS ON and you’ll leave with soap, supplies and the confidence to make projects on your own.
This year, we are proud to welcome back Debbie Chialtas of Soapylove, Erin Pikor of Naid Soap Arts, Kat Hackney of Otion, Jill Heuser of Northwest Scents, and of course, moi, Anne-Marie Faiola of Bramble Berry. Also, the very vain part of me would like to point out that in the photo below, I look a little doughier in the face than usual because I had just had a baby. Eh hem, back to the topic at hand…
 Anne-Marie cutting the CP soap project- SWI 2011 [Read more…]
