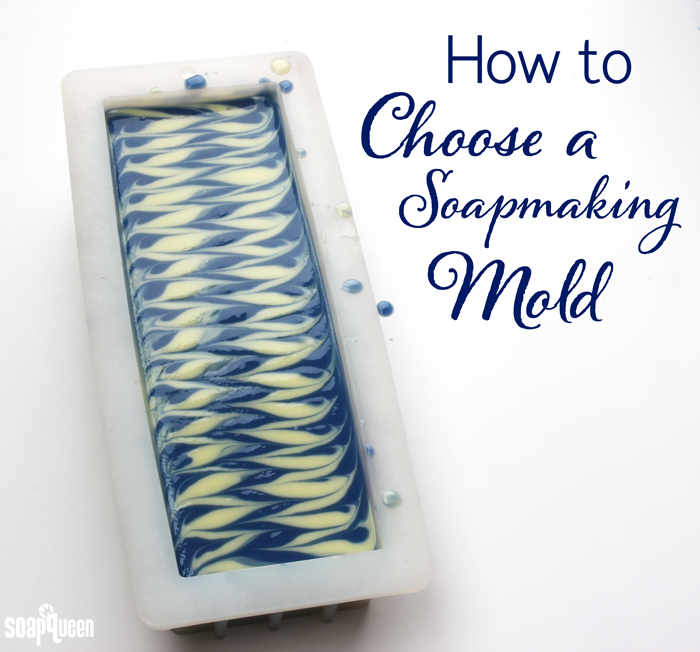
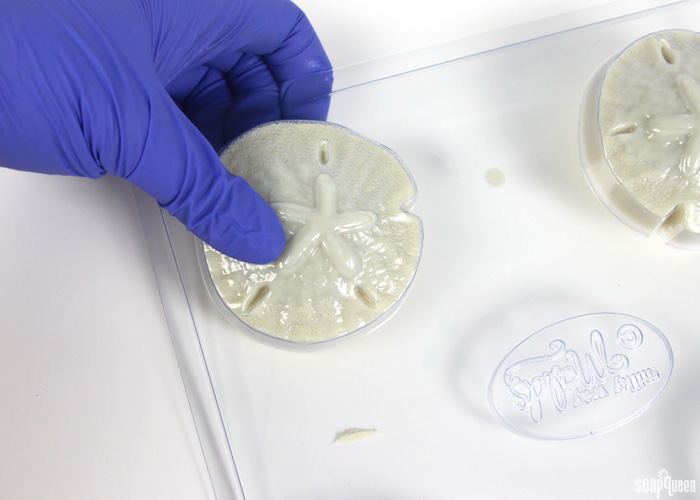
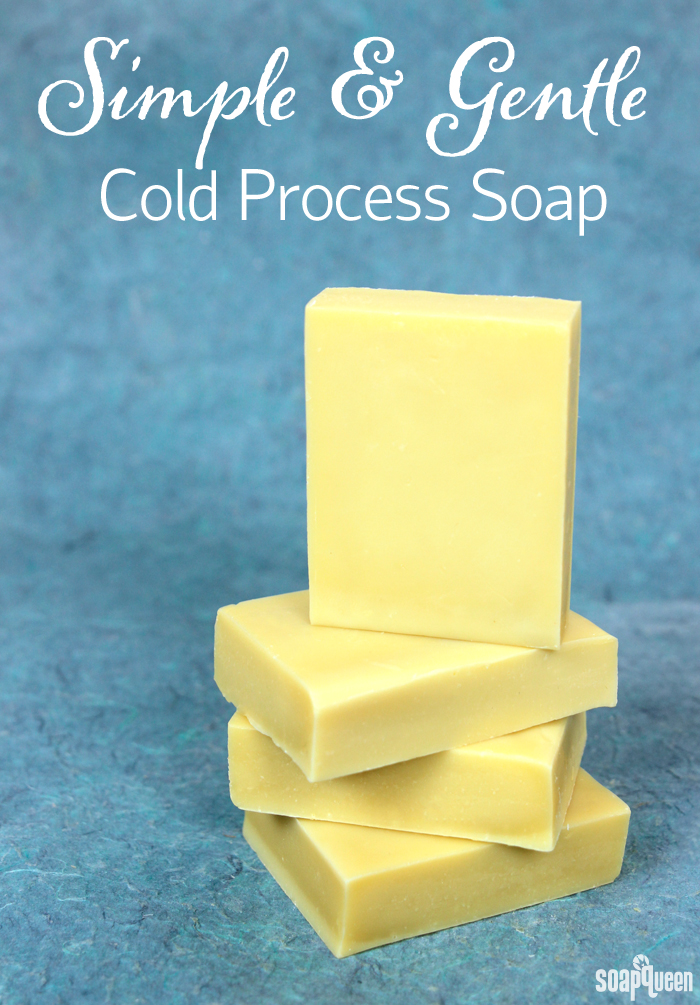
The Back to Basics series ended this week. It was nice to revisit important soapy concepts, like how to choose a mold. There are several different types of molds, including silicone and wood molds. Each type of mold has pros and cons. For instance, recyclable molds are cost effective, but you may only be able to use them once. Learn more in the How to Choose a Soap Mold post.
Archives for July 2015
Back to Basics: Crisp Cotton Swirl Cold Process
Today the Back to Basics series wraps up with the final tutorial, this Crisp Cotton Swirl Cold Process Soap. Swirls in cold process soap require a thin trace, so it’s important to not over stick blend the batter. It helps to have a recipe with a large percentage of slow moving oils, like olive or canola. If you missed the previous three Back to Basic tutorials, be sure to check them out! The tutorials are accompanied by the Back to Basic Soapmaking Kit, which includes all the ingredients (except lye) you need to make the four projects. Now, let’s get swirling!
Creating swirls in cold process soap takes a little bit of practice. Swirls require a good understanding of trace; it’s crucial that the soap does not become too thick or the soap will not swirl together. On the flip side, the soap cannot be too thin or the colors may muddle together. Learn more about trace here. The key is a recipe that contains plenty of slow moving oils, like canola or olive oil. It’s also important to choose a fragrance oil that behaves well in cold process soap, and does not cause the soap to accelerate. This recipe contains 30% olive oil and 25% canola oil to make sure you have plenty of time to work. It also uses Crisp Cotton Fragrance Oil, which does not accelerate trace.
The type of swirl used in this bar is referred to as a “drop swirl.” This means the colors are poured, or “dropped,” into the mold from varying heights. As the soap is poured, it will begin to swirl inside the mold. For this project, we also used the Hanger Swirl Tool to give the soap extra movement. This project is colored with Titanium Dioxide and Ultramarine Blue pigments. These colorants do not bleed into each other, which is the key to crisp and clean swirls. If you have never prepped colorants for cold process soap before, check out this Soap Queen TV video to learn how.
[Read more…]
Back to Basics: How to Choose a Soap Mold
Soap making molds come in various shapes, sizes and materials. It’s crucial to consider what kind of mold you’ll be using when designing a soapy project. The mold will determine how big your batch needs to be, and may influence ingredients and cure time. One of the most popular soap mold options is a silicone mold. They are easy to clean with no lining necessary and come in a variety of shapes and sizes. Other mold options include recycled containers, plastic and wood molds. Each have benefits that may affect your soaping experience.
Silicone Molds
Pros: Easy to unmold soap with flexible material, easy to clean, no need to line mold, long lasting, professional looking bars
Cons: Soap takes slightly longer to unmold, soap can speckle with bubbles if soap overheats
Silicone molds are extremely popular due to their ease of use. Sturdy yet flexible, silicone molds make unmolding both cold process and melt and pour soap easy. The key is to break the airlock by gently pulling away the sides of the mold from the soap. If you experience any resistance when removing cold process soap, stop and give it a few more days in the mold. It’s not worth it to tear the sides or bottom of your project!
Soap does take longer to harden in silicone molds because there is no air in contact with the soap. Sodium lactate is a key additive to use when working with silicone molds. Sodium lactate is a liquid salt that helps produce a harder bar of soap that lasts longer in the shower. Sodium lactate also helps the soap harden faster in the mold. This means that instead of waiting 3-4 days to unmold your project, you can often unmold the very next day! We recommend adding 1 tsp. of sodium lactate per pound of oils in your recipe to cooled lye water. Click here to read more about sodium lactate, and how to use it in your projects.
In addition to easy unmolding, silicone molds are easy to care for. After removing your soap from the mold, hand wash the silicone mold with hot water and dish soap. Allow to dry and the mold is ready to use for your next project! While silicone molds are sturdy, we do not recommend placing them in the dishwasher. Also avoid any harsh scrubbing materials such as copper sponges, as they may scratch the glossy finish inside. Click here to read more about caring for molds.
Recycled Molds
Pros: Create unique shapes, cost effective, eco friendly
Cons: Shapes not consistent, may need to line mold, mold may only be good for one use
Just about any container can be turned into a soap mold with proper lining. If the container is plastic, the soap can be poured directly without lining. Popular options include yogurt containers, pudding cups and tofu containers. Cardboard milk containers are also a good option, as the inside is normally lined with a nonstick coating. Check out the How to Recycle Your Recyclables post for more ideas. Recycling objects and boxes in your home is a great way to save money on molds and create eco-friendly and unique looking bars.
One negative aspect of recycled molds is they may not be very sturdy, and may produce bars that are not completely straight or uniform. If you are looking to create professional looking bars consistently, other mold options are better choice. The container should not be used for food storage once used to make soap. Depending on the sturdiness of the container, it may only be good for one soaping recipe.
Most recycled containers will need to be lined with freezer paper to ensure the soap does not stick. Lining also helps ensure the soap does not leak. For example, both the Creamy Orange Cold Process Soap and the Simple & Gentle Cold Process Soap tutorials were created in a USPS Medium Flat Rate Box. If the soap was poured directly into the cardboard, the soap would stick to the box. To prevent this, freezer paper was used to line the box. The How to Line Any Mold blog post has tips on turning any box into a proper soap making mold.
Metal or glass containers are not recommended for cold process soap molds. One reason is they are extremely hard to remove your soap from. If using rigid molds, they should be lined with freezer paper…otherwise you may never get the soap out! The other reason is that lye reacts with many metals, including aluminum, tin and zinc. The sodium hydroxide lye reacts with the metal releasing hydrogen gas which is very dangerous. Avoid all metal containers for soaping with.
Wood Molds
Pros: Easy to insulate/gel phase, long lasting, produces large batches of soap, professional looking bars
Cons: May need to line mold, can soften over time when exposed to raw soap from drips & normal use, prone to overheating
Another popular soap mold option are wood molds. They are sturdy, cost effective and act as great insulators for cold process soap. They can also last for years and years with proper storage and care. Bramble Berry wood molds are made out of top grade Birch plywood that is both sturdy and durable, click here to learn how to care for them.
Wood molds also need to be lined with freezer paper to avoid the soap from sticking to the mold. To make this process easier, many of the Bramble Berry wood molds have silicone liners available. When lining any mold, keep in mind that freezer paper is much different from wax paper. Freezer paper is sturdier, and will not melt under high temperatures.
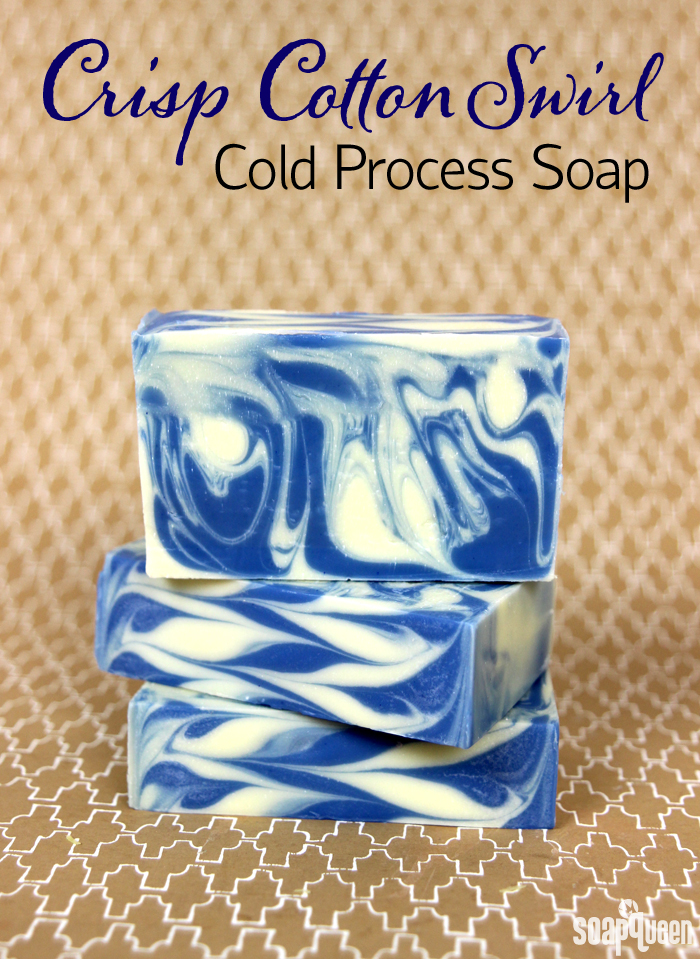
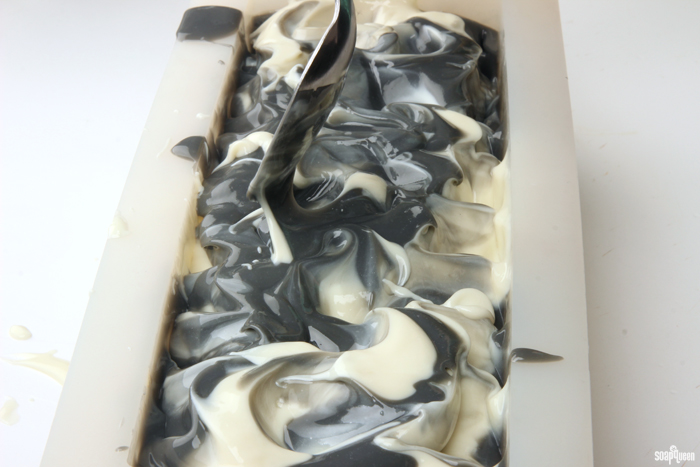
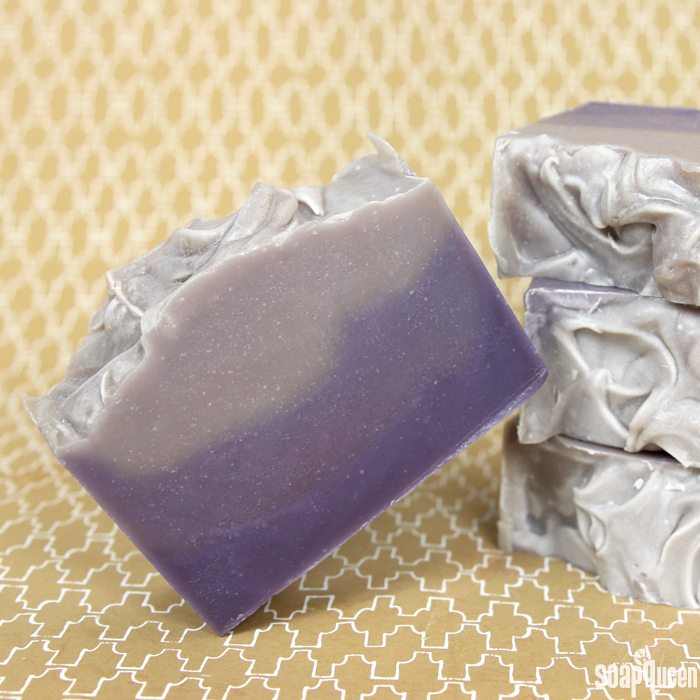
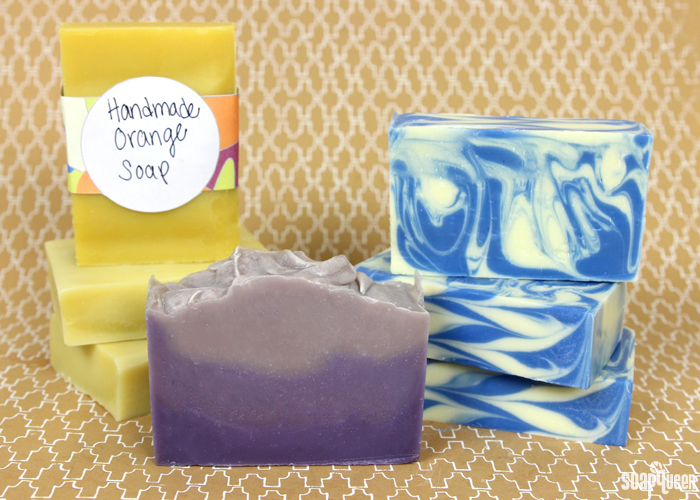
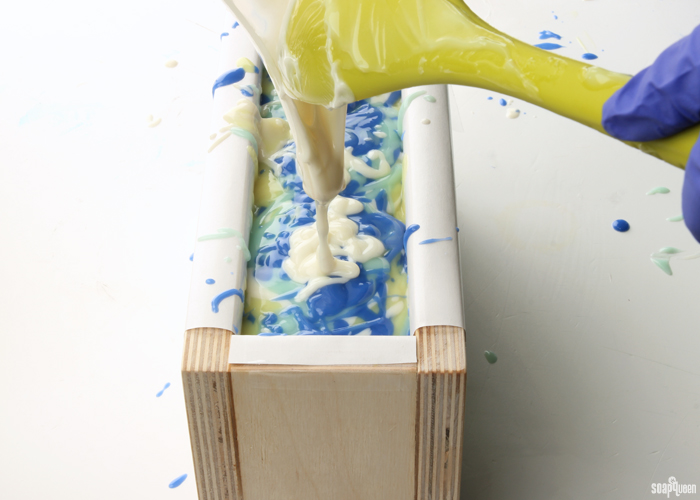
A wood mold is used in the Blue Rain Drop Swirl Cold Process to insulate the soap. Don’t forget to line your wood molds!
One of the best features of wood molds is they insulate the soap well. This makes it easy to achieve a complete gel phase throughout the soap. It’s important to keep this in mind when insulating wood molds; because they insulate the soap naturally, placing the mold on a heating pad may not be necessary. If you want to avoid gel phase completely, you may want to place the mold and soap into the fridge or cool place. Learn more about gel phase and when to insulate your soap in this post.
Plastic Molds
Pros: Wide variety of shapes and designs, cost effective, great for small batches, professional looking bars
Cons: Can be difficult to unmold, requires more time to unmold, prone to soda ash, difficult to make large production batches
Best suited for melt and pour, plastic molds can also be used for cold process soap. Plastic molds come in a wide variety of shapes and sizes. In fact, Bramble Berry has more than 400 plastic molds to choose from. If you can’t imagine it…there is probably a plastic mold for it! The majority of plastic molds are individual cavity size. The smaller size means that the molds do not insulate the soap as well as large slab or loaf molds. We don’t recommend placing plastic molds on a heating pad, as they can melt or warp if they get too hot. Instead of using gel phase to help prevent soda ash, you can spritz the soap with 99% isopropyl alcohol every 15 minutes for an hour. That helps create a barrier to protect the top of the soap. You can also decrease the superfat level to 3% or water discount at 10%. Read more tips for preventing soda ash here.
The trick is that cold process soap can be a little bit tricky to remove from plastic molds. Cold process soap can require up to a week to unmold from plastic molds. If using a plastic mold for your cold process project, we recommend using a large amount of hard oils (palm oil, coconut oil, cocoa butter, etc) to help the soap harden. Adding sodium lactate also makes a huge difference; check out the Unmolding Cold Process Soap from Plastic Molds for more tips and an experiment with hard/soft oils and sodium lactate.
Sometimes it takes a little time to find the right type of mold for you. Personally, silicone molds have become my new go to after years of using wood molds. But if I want my soap to go through gel phase, wood molds are still my favorite. When using plastic molds I make sure my recipe contains solid oils, and I always use sodium lactate. When teaching friends how to soap, I usually recommend trying out the craft with recyclables first, just to make sure they enjoy the process. Each mold has its positives and negatives, and so much just depends on personal preference! =)
What kind of molds do you prefer? I would love to hear your thoughts in the comments below.
Back to Basics: Layered Lavender Cold Process Tutorial
Today is the third tutorial in the Back to Basics Cold Process Series. The first two projects were designed to give you a “feel” for soaping, and did not feature color or any complex design elements. Now, we are ready to work with color, thick trace and gel phase! The Back to Basics Soapmaking Kit includes all the soaping ingredients you need to create all four recipes in this series, including the 10″ Silicone Loaf Mold. Now, let’s get soaping!
Basic layers are a fantastic design option for the beginner soaper. To make sure layers don’t blend together, the bottom layers of soap need to be thicker than the top layers. This Layered Lavender Cold Process Soap works with thick trace to ensure the layers stay separate. Thick trace soap has a texture similar to pudding, and holds its shape. To help give the soap its thick texture, this project uses Lavender & Cedar Fragrance Oil, which accelerates very slightly. To learn more about trace, check out the All About the Trace blog post.
In addition, this project uses LabColors to give the layers a purple ombre effect. LabColors are highly concentrated liquid dyes. In order to be used in water based projects, they first must be diluted in distilled water. Click here to learn more about LabColors, and how to dilute them. LabColors become more vibrant when the soap goes through gel phase. Gel phase refers to the part of the saponification process where the soap gets warm and gelatinous. Gelled soap looks slightly more transluscent and shiny than non-gelled soap. Click here to read more about gel phase, and see how gel phase affects LabColors.
Back to Basics: Beginner Project Roundup
Last week featured two recipes perfect for beginners: the Simple & Gentle Cold Process Soap and the Creamy Orange Cold Process Soap. Both of these projects are made in a recycled box and do not contain complex design elements. If you have never made cold process soap before, I highly recommend starting with a simple recipe like these to get a feel for soaping. Once you have a few basic cold process recipes under your belt, it’s time to challenge yourself with more complex techniques. These include swirls, layers and embeds. This upcoming week will feature two starter tutorials, specifically designed for beginners who are ready to challenge themselves.
Sunday Night Spotlight: Lotion Bases
Making lotion from scratch is a fun project. The process includes emulsifying water and oils, much like making soap. Other additives such as extracts, vitamin E and DL-panthenol can also be added to increase benefits to the skin. If you love the feel of homemade lotion but don’t want to formulate it yourself, the Bramble Berry Lotion Bases are here to help! These pre-made bases are ready to customize with scent and color.
The lotion bases come in four varieties: Aloe Lotion Base, Basic Lotion Base, Beeswax Lotion Base and the Shea Body Butter. The main ingredient for all the bases is water; what makes them different are the types of oil, extracts and other ingredients such as emulsifiers. All the bases include the preservative optiphen to prevent mold and bacterial growth. To learn more about preservatives and how to us them, check out this blog post. Check below to see the ingredients of each base!
Soapy Social Media Roundup
It’s always fun to try new soaping techniques, but it can also be valuable to revisit the basics. The past week I shared two tutorials perfect for the beginner soaper as part if the Back to Basic series. If you have never made cold process before, the first tutorial in this series, Simple & Gentle Cold Process Soap, is the perfect place to start. Be on the lookout next week for tutorials of the purple and blue soaps below. This series also includes the Back to Basics Kit which includes all the ingredients (except lye) you need to create the four projects!
[Read more…]
Facebook and Instagram Photo of the Week (July 18th ~ 24th)
There are many factors to consider when making cold process soap. This week and next week will focus on the basics of soap making. One of the most important parts is safety. When working with sodium hydroxide lye, it is important to wear safety gear like goggles, gloves and long sleeves. With the correct precautions, soaping is a safe process. Learn more in the Back to Basics: Lye Safety Guide.
Back to Basics: Creamy Orange Cold Process Tutorial
Today is the second tutorial in the Back to Basics Cold Process Series. Now that we have made a basic recipe with coconut oil, palm oil and olive oil, we are adding cocoa butter into the mix! The addition of cocoa butter adds to the firmness of the bar. It also causes the soap batter to reach a thick trace more quickly. In addition, 10X Orange Essential Oil is added to give this soap a beautiful, natural orange color. The Back to Basics Soapmaking Kit includes all the soaping ingredients you need to create all four recipes in this series, including the 10″ Silicone Mold. Now, let’s get soaping!
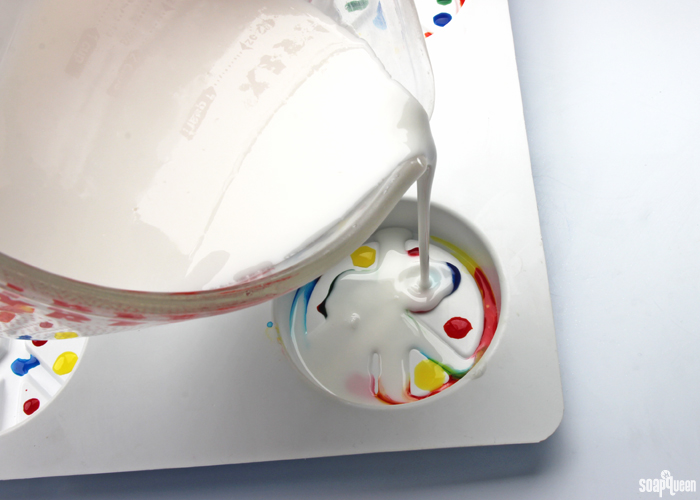
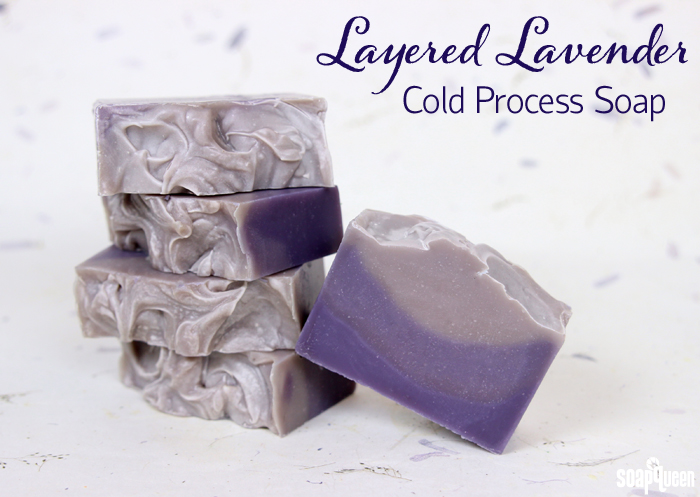
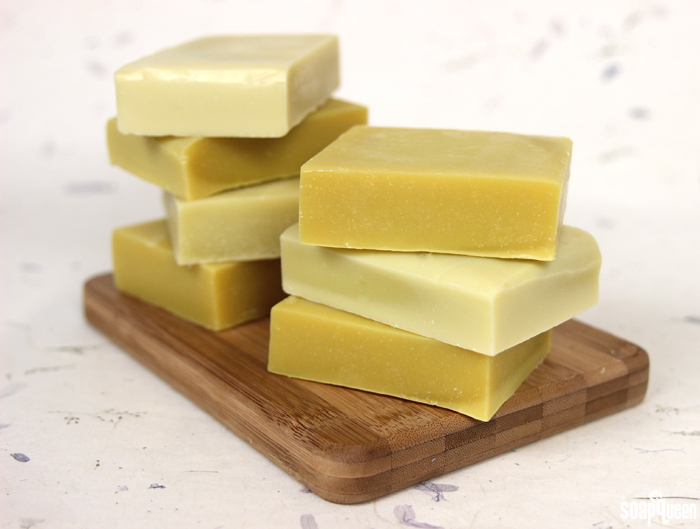
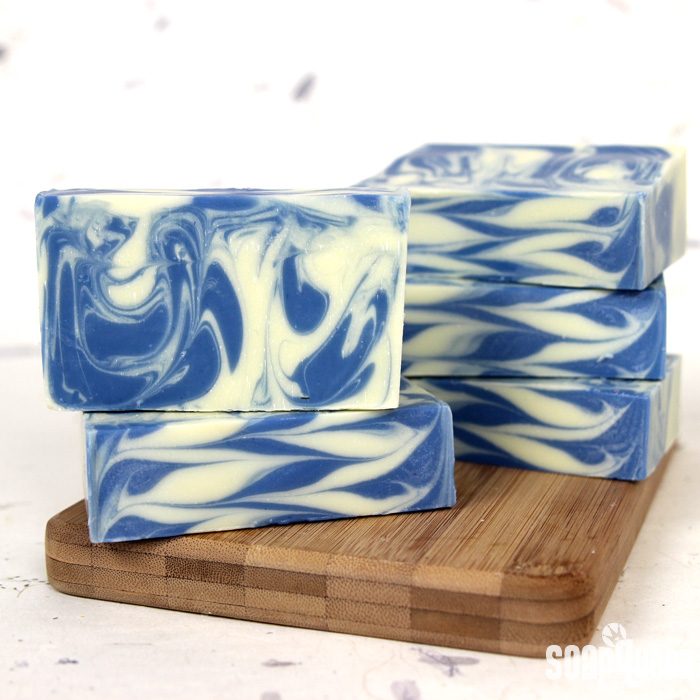
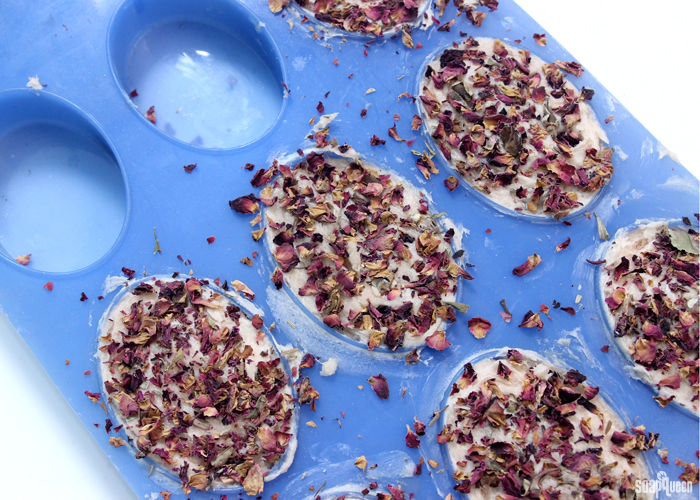
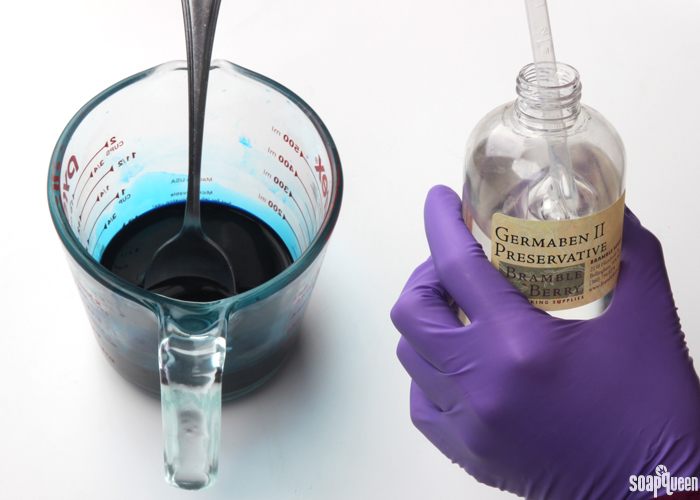
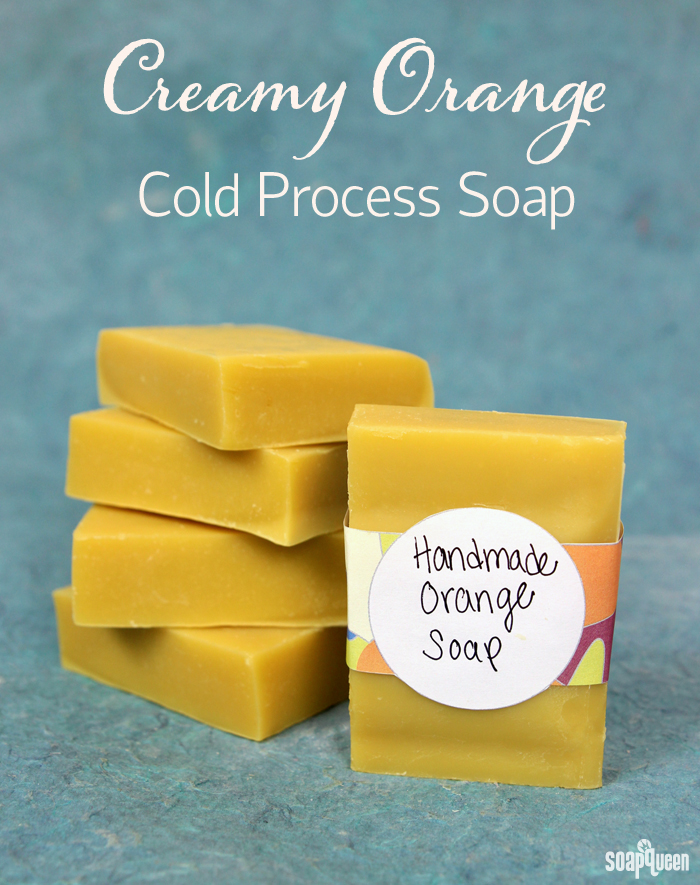
The soap bands shown above are included in the
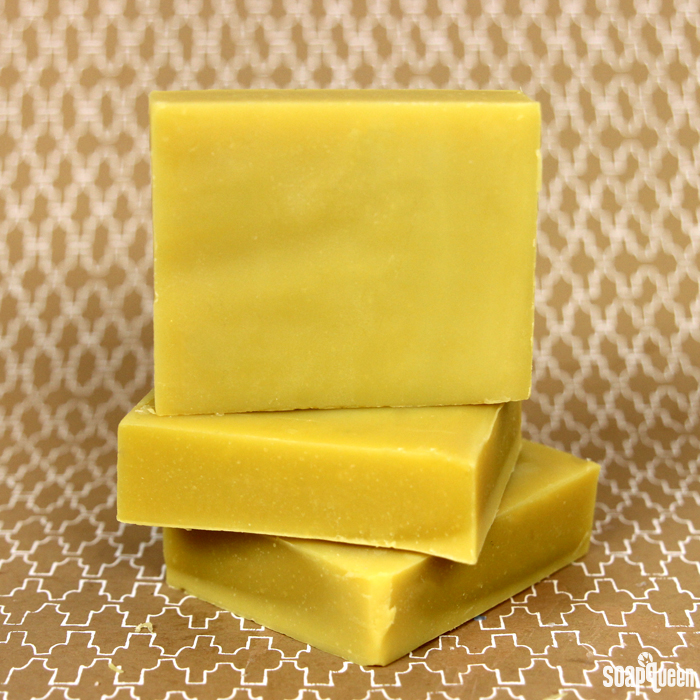
 Back to Basics Kit!
One of the most best parts of soap making is trying out different oils and butters. It’s interesting to see how various oils and butters affect trace and the final product. There are so many soaping oils, it can take a few batches to find “the perfect bar” for you. Everybody likes different soap properties (cleansing, moisturizing, exfoliating, etc), so it’s fun to experiment! This recipe is comprised of coconut oil, palm oil, olive oil and cocoa butter. To learn more about properties of common soap making oils, check out this blog post.
The coconut oil, palm oil and cocoa butter contribute to the firmness of the bar. A large percentage of olive oil is used to give the bar softness. In addition to firmness, coconut oil also gives the bar a lush lather and cleansing properties. Cocoa butter is used at 10% for firmness and for its skin loving properties. Cocoa butter is a stable fat and also contains natural antioxidants, making it a popular choice for cold process recipes. Read more about it in this Sunday Night Spotlight.
Back to Basics: How Temperature Affects Cold Process Soap
Today is the next lesson in the Back to Basics Cold Process Series. Today, we are reviewing how temperature affects cold process soaping. If you missed yesterday’s Basic and Simple Cold Process Soap, be sure to check it out! It’s the perfect recipe for the beginner soaper. Tomorrow will feature another cold process tutorial including butters and essential oil. If you’d like to receive all the ingredients to make all the projects in this series, the Back to Basics Soapmaking Kit contains everything you need!
Cold process soap making is a science. It involves mixing oils and lye solution to begin a chemical reaction known as saponification. Like any scientific process and reaction, it’s important to be precise and consistent. For soap making, these means carefully measuring and mixing ingredients and controlling for factors such as temperature.
The temperature of cold process ingredients (the oils and lye solution) can greatly affect the final product. The temperature of your soaping area also affects your results. If you were to ask advanced soapers, “What is the perfect soaping temperature?” you would receive a wide range of answers. This is because it depends greatly on the particular recipe and design. For most soapers, the preferred temperature of soaping lye and oils are 120-130 ° F. In addition, many soapers and books believe it is helpful to have the lye and oil within 10 degrees of each other.
Back to Basics: Simple & Gentle Cold Process Soap
When starting to make cold process soap, it can be tempting to take the “go big, or go home,” approach. New soapers often want to dive in head first with layers, swirls and fragrances. While I completely understand the urge to make eye-catching soap, I always recommend starting with very basic recipe. A great place to start is a recipe that includes no colorants, design, or fragrance. I also highly recommend sticking to the three most basic soaping oils: olive, coconut and palm.
This might sound a little boring to some, but there is a lot to learn when making your first batch of cold process soap. First, you need to learn how to safely mix your lye solution. Then, you need to correctly mix and measure your soap making oils. Sometimes pouring the lye into your oils while holding your stick blender can feel a little funny, and your first batch of soap familiarizes you with this. Your first batch also teaches you what trace looks and “feels” like. In addition, you may need to line your mold.
All of this combined is plenty when just starting out! Don’t overload yourself. I have watched many beginner soapers become discouraged right off the bat, because they attempt techniques that even advanced soapers struggle with. Set yourself up for success, and keep it simple. Trust me =)
Back to Basics: Lye Safety Guide
Starting today, we are revisiting the basics of cold process soap with the Back to Basic series. Over the next two weeks, we will cover basic concepts and tutorials designed for the beginner in mind. If you have never made cold process soap before, now is the perfect time! The Back to Basics Soapmaking Kit includes all the ingredients you need to make all 4 projects. If you are a seasoned soaper, it’s always good for a little refresher course. For our first lesson, we are covering the most important part of soaping (other than having fun)…safety! In particular, we are chatting about lye safety, including how to safely mix and handle your lye solution. Pencils ready? Let’s get started!
In order to make soap, oils must emulsify with lye, which begins the saponification process. During this process it’s important to make safety a top priority. Sodium hydroxide lye is an inorganic compound commonly found in drain cleaners like Draino. Sodium hydroxide lye is highly caustic and has the potential to burn the skin. Like driving a car, sodium hydroxide is safe when handled properly. But because lye has the potential to be extremely dangerous, it’s important to take every safety precaution when making cold process soap.
Sodium hydroxide lye is available in various forms, such as flakes, pellets and powder. To make cold process soap, lye is introduced to a liquid like distilled water. The liquid dissolves the lye and creates a lye solution. Mixing water and lye creates an exothermic reaction that causes a dramatic temperature increase. Adding lye to room temperature water can cause the water to reach temperatures up to 200 ° F. The mixture also creates fumes, which should not be inhaled.
Frozen Banana “Ice Cream”
Happy National Ice Cream Day! If you ever needed an excuse to indulge with a bowl of ice cream, today is the day. If you’re like me and want to celebrate without any guilt, this Frozen Banana Ice Cream is the ticket. This “ice cream” contains only one ingredient: bananas. When frozen and blended, bananas transform into a thick and creamy ice cream texture. The first time I tried it, I was honestly shocked how delicious and satisfying it was!
This “recipe” really couldn’t be easier. All you need are 2 ripe bananas and a powerful food processor or blender. If your blender/food processor is not very strong, a splash of milk might be needed to help the bananas blend. Ripe bananas work best, as they give the “ice cream” natural sweetness. Toppings such as nuts, fruit and chocolate sauce taste amazing on this no-guilt ice cream. My favorite topping combination is blueberries and almond shavings. You can also add other ingredients to change up the flavor such as peanut butter, chocolate, cinnamon, and even pumpkin!
[Read more…]
Soapy Social Media Roundup
Happy weekend everybody! As you can tell from our Snapchat feed (user name: bramble-berry), the kiddos and I enjoyed a morning throwing rocks on the beach. We feel so lucky to leave in town with access to the water. I hope you enjoyed the fun Summer of Love projects that were on the blog this week. These projects included the Groovy Peace Sign Melt and Pour, Psychedelic Spin Swirl Cold Process and the Tie-Dye Bath Bombs. All three projects featured bright colors and groovy scents including the new Flower Child Fragrance Oil. This new scent is a complex blend of floral, patchouli, vanilla and musk that does not discolor. It’s a new office favorite! For more crafty project ideas, check out my favorite pins, tweet and ‘grams below!