It’s been many years since I learned the ins and outs of percentages, ratios and parts. I get plenty of practice playing with them though since almost every day is a soap day around here (lucky me!). It is one of the more common questions that our stupendous team gets whenever soapers are trying to calculate parts (whozit? whatzit?!), resize batches or try to figure out if they have too much (or too little) coconut oil in their recipe.
Search Results for: blend essential oils
Soap Behaving Badly
I started my soaping adventures when I was young (ah, sweet 16), and have learned that not everything turns out perfectly the first time. Sometimes despite your best efforts during a soaping session, you’ll get batches that just don’t quite turn out right. It’s just an inherent (and disappointing!) part of soaping. I’m a firm believer in ‘practice makes perfect,’ and being persistent in mastering your technique will help you achieve what you want in your soap, consistently. While there are hundreds of soaping variables that can cause problems, one huge factor that can determine the success of your soaping session is the fragrance or essential oil you use.
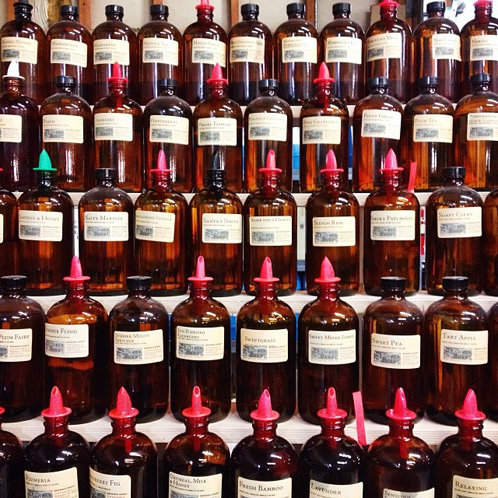
All Bramble Berry Fragrance and Essential oils go through a thorough testing process to ensure they perform well in cold process soap.
Soapy Social Media Roundup
Two weeks into the new year and we’re off to a running start. I’ve kept up with the S.M.A.R.T. goals I set for myself this year (thank you Carrot app, my VitaMix and Bellingham-based Dandelion produce delivery). I’m excited to track my progress along with everyone else who told me about their goals. There’s big plans for Bramble Berry this year, and we have lots of awesome promotions and campaigns planned, as well as adding to our continually growing product line. Be sure to check our What’s New page frequently to be first in the know about new items.
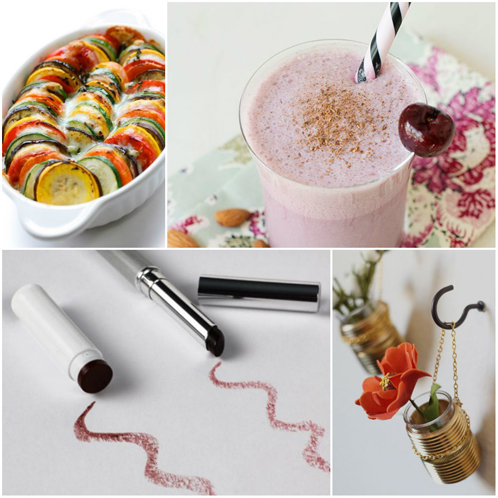
For now, take a look at my favorite social media happenings from the past two weeks for all of our social media accounts:
Pins:
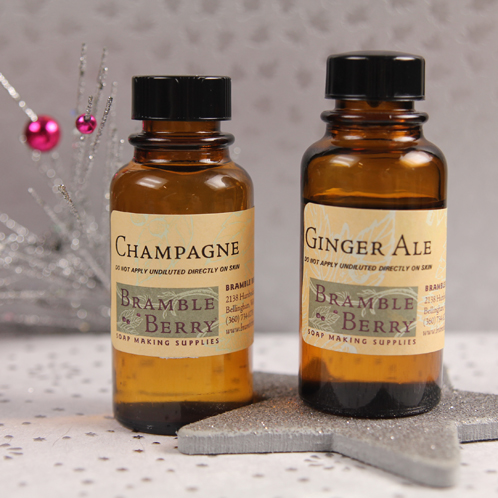
Sunday Night Spotlight: Sparkling Fragrances
New Year’s Eve may be over, but there’s no reason to put away the sparkling beverages (or fragrances) quite yet. In fact, you may want these two effervescent fragrances on hand all year round! Ginger Ale and Champagne Fragrance Oils are both bright “sparkling” fragrances that enhance almost any other fruity or sweet scent.
Soap Queen’s Best of 2013
I blog almost every day. That is a lot of posts to wade through and it’s easy to miss a few. But, these are ones you don’t want to pass over: the most popular Soap Queen posts of 2013. From beginner’s guides to tutorials to posts packed with info, the following is a list of reader favorites as well as my own personal favorites list. This year was full of surprise and new opportunities, and I have watched our little community of soapers and crafters grow leaps and bounds. Here’s to hoping that 2014 is just as good!
Reader’s Favorite Posts
1. Free Beginner’s Guide to Melt & Pour Soapmaking
Published way back in January, this beginner’s guide remained the most popular post of the entire year. It’s an all-encompassing overview of everything melt & pour related, and it’s geared toward those who are just beginning to dabble in soapmaking (or even those who just want a refresher). After you read through this very thorough guide, there’s an adorable Layered Plumeria Soap tutorial (picture above) that you can create to put all that knowledge into action.
Guest Tutorial: The Dream Catcher Swirl
This is a very simple swirl technique comes to us from our friends and Otion, and it yields dramatic end results. This is a great beginner cold process recipe, but it is important to keep the batter nice and thin during the entire process. That’s the key to getting nice rings of color and making the end swirl really pop.

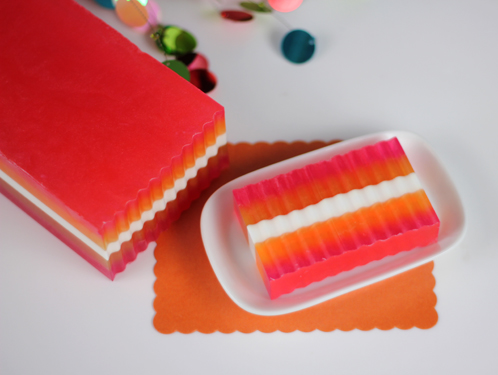
Fall Sherbet Cold Process Soap
This soap ended up being a happy accident. We were originally going for a marbled scarf look (very similar to this pattern) but ended up with something quite different though equally as beautiful. We combined several dispersed micas to achieve soft pastel colors, and fragranced this soap with a blend featuring our brand new Palmerosa Essential Oil, giving it a gentle floral scent. The pouring pattern leads to an exquisite and interesting inside pattern during the cutting process. Here’s to happy accidents!

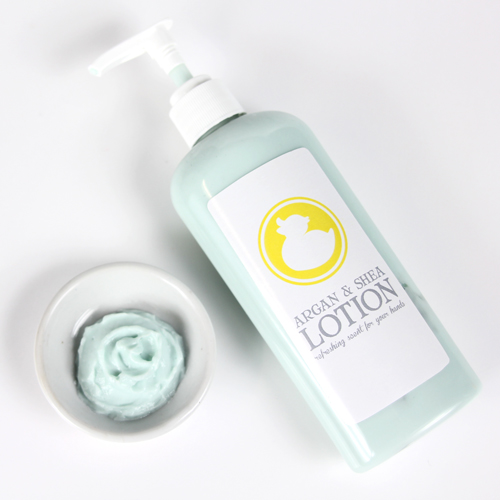
Guest Post: Perfectly Preserved + a body butter recipe
Lotions and butters are some of the most popular bath and body products, but they’re also products that can raise the most questions. Questions such as “Do I need a preservative for my product?” “Which preservative do I use?” and “Are preservatives safe?” are some of the most common ones we see, and we hope this thorough guest post by formulation guru and fellow crafter Susan Barclay-Nichols will help clear up some confusion.
Susan is an expert in cosmetic chemistry, and in this post she gets down to the nitty-gritty of which preservatives work best in which products, their usage rates and their ingredients. It’s a one-stop-shop for everything preservative related! Read on to learn about the wide world of preservatives and how you can safely use them in your products.
A-M Note: If you’re concerned about parabens and the safety of preservatives in bath and body products, we’ve found these following resources to be helpful explanations: Parabens Puzzlement, More to the Parabens Puzzlement and Debate Over Parabens – Truth and Research. Borrowing from the blogs: “The FDA supports the use of Parabens as does the European Union….and under regimented testing by the cosmetics directive of the European Union they too, found no direct correlation of Parabens and cancer.”
Keep in mind, the type of preservative you choose is up to you, and I’m glad that there are effective options for everyone out there who wants to responsibly use a full spectrum preservative. All Bramble Berry preservatives have been approved for use in body products. Now onto the guide! – A.M.
_____________________________________________________________________________________________________________________________________________________________________
You’ll notice there are actually two areas of contamination in the product. The first is the great big green spot on the left side, but did you notice the brown-y orange streak to the right hand side of that on the side of the jug? Yep, there’s a little more contamination for you!
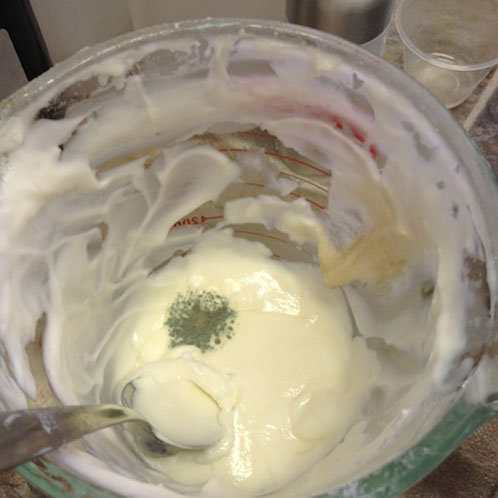
I made this lotion without preservatives to show you how quickly things can go off. I made this sixteen days ago. (It might have gone off earlier. This was the first chance I had to check it, to be honest!) I did all the things I generally do – I heated and held both phases, I made sure all my equipment and workshop was clean – but I left out the preservatives. I covered it tightly with Press & Seal in this jug after it had cooled to room temperature. It’s been cold in the workshop – below 10˚C – which is quite chilly considering a fridge should be kept at 0˚C to 4˚C, and room temperature is 18˚C to 22˚C. It is also quite damp back there as we’ve had a bunch of rain since Halloween – just about every day – which is normal for this time of year.
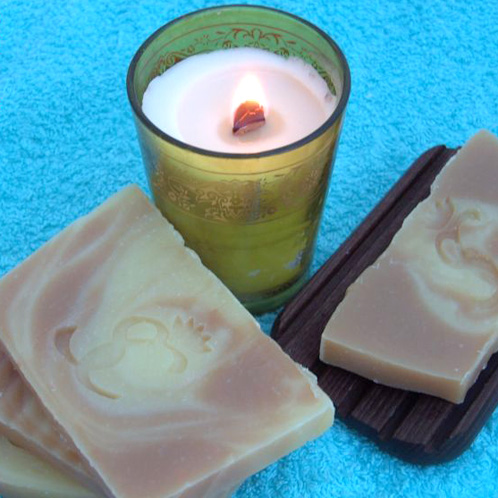
Guest Tutorial: Marbled Beer Soap
Anne-Marie note: Elham sent me a baby care package months ago with a wonderful bar of beer soap. I couldn’t get over how nice it was in the shower with luxurious, soft lather that felt silky on the skin and rinsed away cleanly. She has graciously agreed to do a tutorial on this wonderful soap. Thank you Elham!
Hi, I’m Elham from SkinChakra® and I am so excited to be here for a guest post.
I have been a cosmetic chemist for almost half of my life, and I’ve had my own line of hand-crafted soap and skin care products for the past two years (in addition to my consulting activities in the cosmetic industry). I live in Bavaria in Germany, and so I have had the opportunity to experiment with countless beer soap variations. I am surrounded by small, handcrafted breweries, and I consider myself a specialist in beer soap. Not surprisingly, beer soap is one of my best selling products!
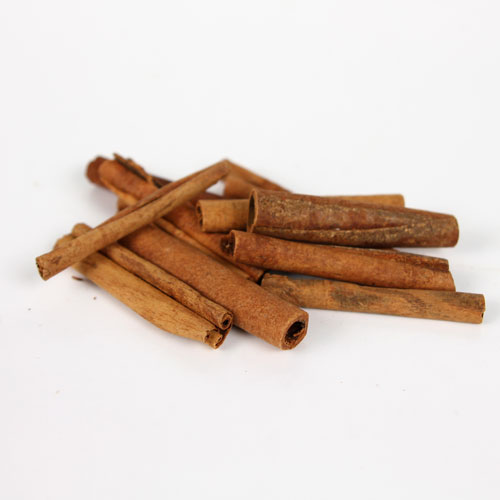
Sunday Night Spotlight: Cinnamon Sticks
I love to bake during the holidays, and one of my staple ingredients is cinnamon. Whether it’s cinnamon sugar cookies, cinnamon pinwheel rolls, or cinnamon bread pudding, there is nothing that says ‘holidays!’ to me like the warm, rich scent of this versatile spice (well, that and eggnog…).
French Curl Cold Process Tutorial
We are so excited about our new swirl tools that we went on a bit of a soaping spree with them (and by ‘spree‘, I mean I made well over 90 pounds of soap in three weeks with them just to try out new techniques). We started with the Frog Foot, continued with the Butterfly Swirl and now we’re bringing you this fabulous French Curl. Inspired by a paper marbling technique, this pattern translates beautifully in soap. This soap also has scent blend reminiscent of a gourmet meal: a savory blend of Litsea, Black Pepper and Basil essential oil is a sprightly, uplifting somewhat masculine scent.
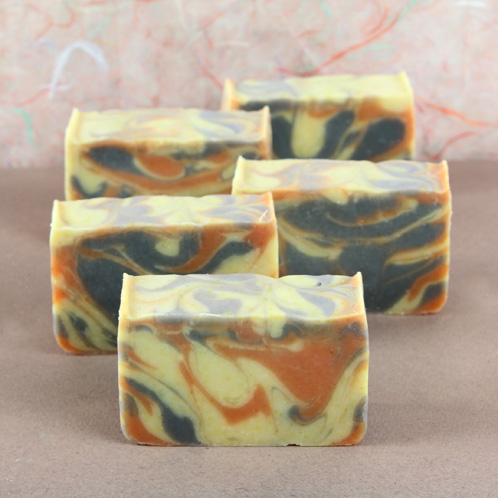
Indigo Spoon Plop Soap Cold Process Tutorial
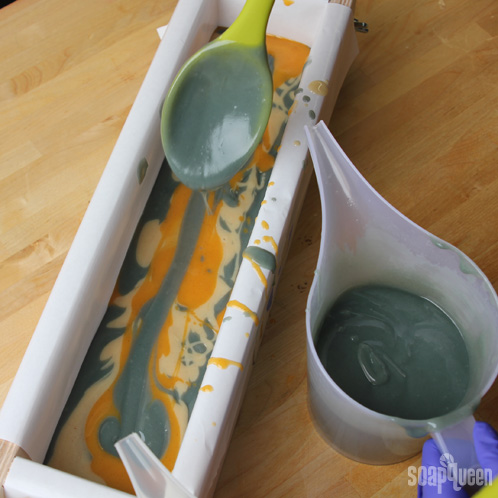
For this recipe, we went all natural: earth colorants and a soothing blend of rosemary, lavender and eucalyptus essential oils make this soap a raw beauty. We were very excited to incorporate our brand new natural Indigo Powder colorant into this soap and it turned a beautiful blue-grey in the finished product. Handmade soap with indigo provides a great contrast to the Paprika, which turned a lovely orange, and the Safflower Powder, which turned a soft yellow. The spoon plop is also an easy technique that yields intriguing results every time.

What You’ll Need:
11 oz. Coconut Oil
2.2 oz. Mango Butter
13.2 oz. Olive Oil
11 oz. Palm Oil
6.6 oz. Sweet Almond Oil
6.1 oz. Sodium Hydroxide
14.5 oz. distilled water
1.1 oz. Rosemary Essential Oil
1.1 oz. Eucalyptus Essential Oil
.6 oz. 40/42 Lavender Essential Oil

Click here to add everything you need for this project to your Bramble Berry shopping cart!
If you’ve never made Cold Process soap before, stop here! I highly recommend checking out our FREE four part SoapQueen.tv series on Cold Process Soapmaking, especially the episode on lye safety. And if you’d rather do some reading, Bramble Berry carries a wide range of books on the topic, including my newest book, Soap Crafting. You can also checkout the digital downloads for that instant gratification factor.
SAFETY FIRST: Suit up for safe handling practices! That means goggles, gloves and long sleeves. Make sure kids, pets, and other distractions and tripping hazards are out of the house or don’t have access to your soaping space. Always soap in a well-ventilated area.
COLOR PREP: Disperse 1 teaspoon all colorants into 1 tablespoon of liquid oil (we like Sweet Almond or Sunflower). Prepping your colors in the beginning will allow you to work quickly and give you more time to work with your soap. Use the mini mixer to get all those clumps worked out smoothly.
FRAGRANCE PREP: In a glass container, combine the Rosemary, Eucalyptus and 40/42 Lavender Essential Oils. Set aside.
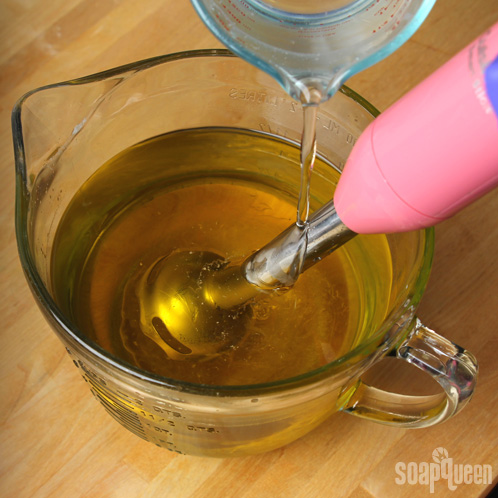
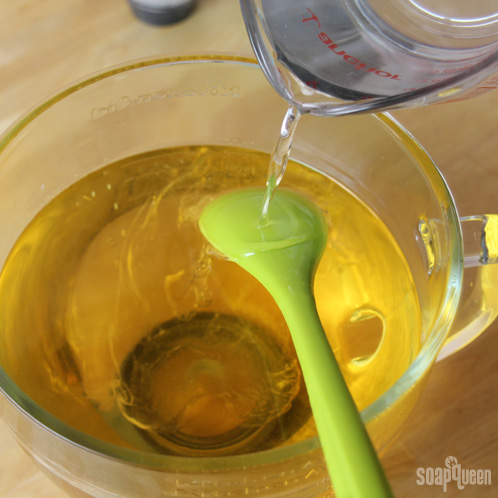
ONE: Slowly and carefully add the lye to the water, and stir until clear. Set aside to cool. If you’d like a harder bar of soap, you can add Sodium Lactate to the cooled lye water. Use 1 teaspoon of Sodium Lactate per pound of oils in the recipe.
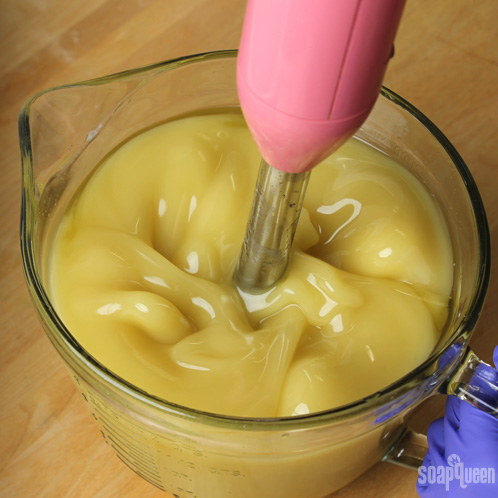
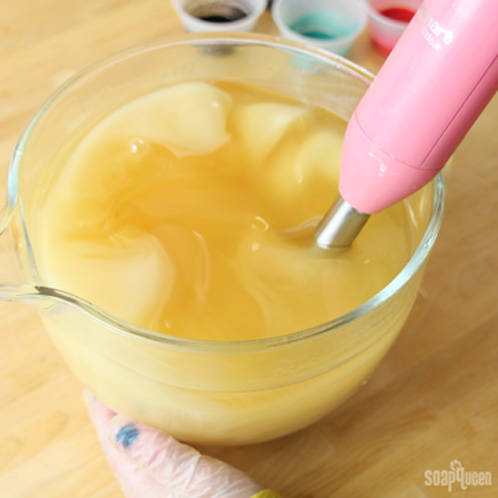
TWO: Then, melt and combine the Coconut Oil, Mango Butter, Olive Oil, Palm Oil and Sweet Almond Oil in a large glass container. Once the lye water and the oils have cooled to 130 degrees or below (and are ideally within 10 degrees of each other), add the lye water to the oils and stick blend until thin trace.
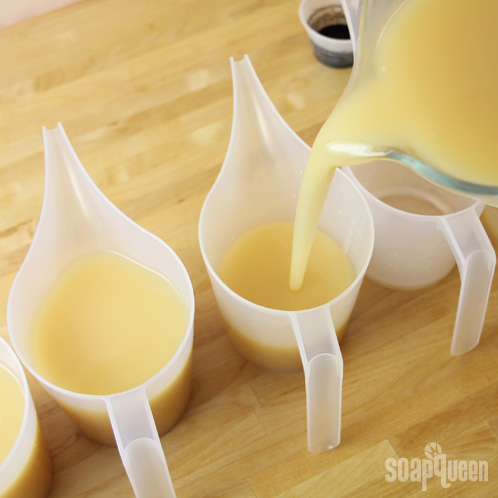
THREE: Equally split the batter into three containers.
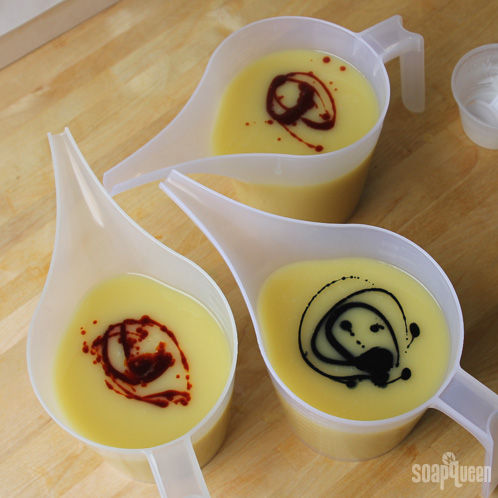
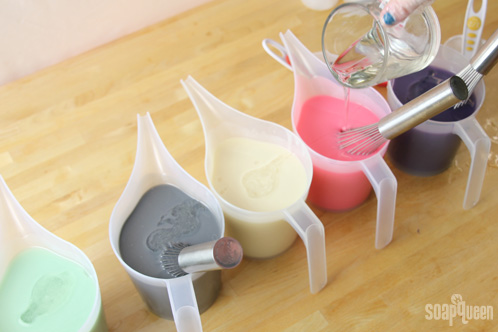
FOUR: Add one colorant per container in the following measurements:
- 3 teaspoons dispersed Indigo Powder
- 3 teaspoons dispersed Paprika
- 3 teaspoons dispersed Safflower Powder + 1 teaspoon Titanium Dioxide
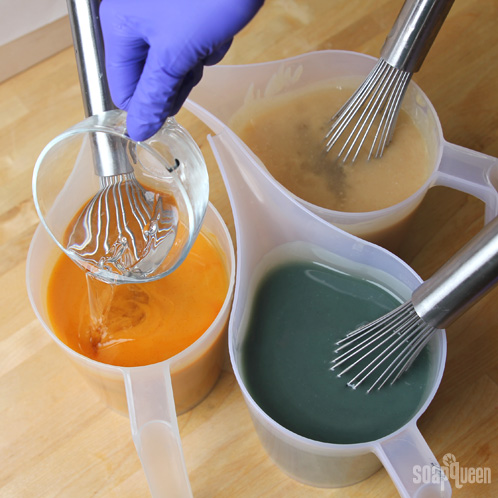
Mix in the colorants using a wire whisk or spoon.
FIVE: Split the essential oil blend equally between the three containers and stir in with a wire whisk or spoon.
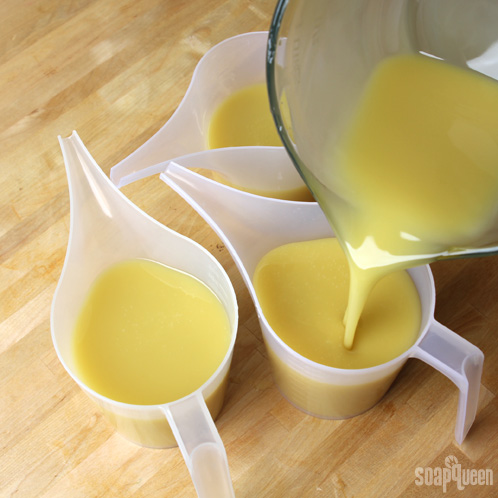
SIX: Use a large spoon (we like our Round Silicone Spoon) to plop spoonfuls of color into the mold. Repeat this process with each color, keeping the same color order, until you have about 1/5 of the soap remaining in the cups.
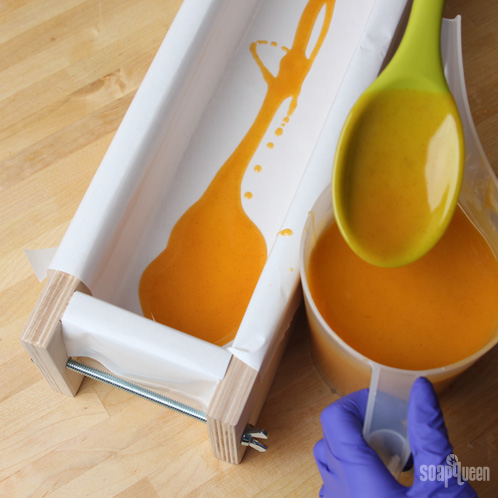
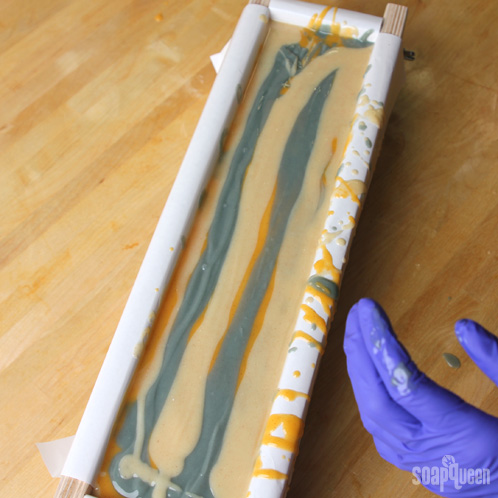
SEVEN: Using the remaining soap in the cups, pour lines of soap horizontally into the mold.
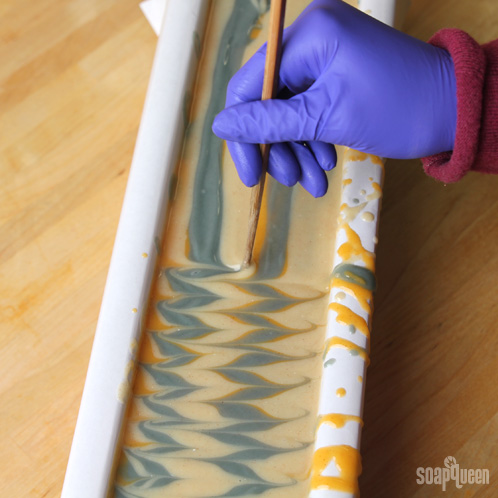
EIGHT: Insert a chopstick or dowel about 1/4″ into the soap and make a vertical zig-zag pattern down the length of the mold for that finishing touch swirl.
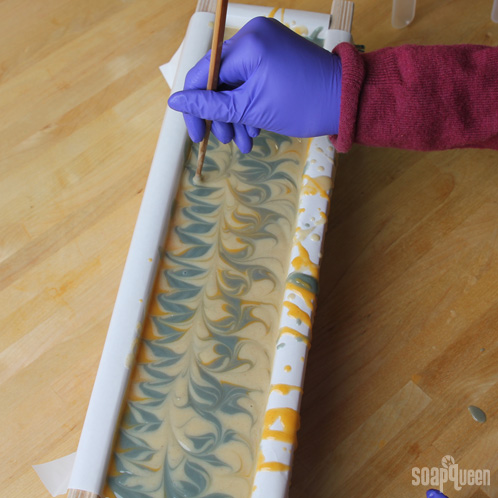
NINE: Using your chopstick or dowel again, make a series of small loops down the length of the soap. Once you’ve gone from one end of the soap to the other, make small loops back down the length of the mold. When you reach the end of the mold, create one big loop that carries you into the next row, and do a reverse loop back across the mold again. You may recognize this swirling technique from the Elemental Swirl.
Spray the entire top with 91% Isopropyl Alcohol to reduce soda ash. It is particularly important to insulate this soap for 24 hours because gel phase will help bring out a nice, vibrant color in the Indigo. Unmold after 3-4 days and allow to cure for 4-6 weeks. Enjoy!
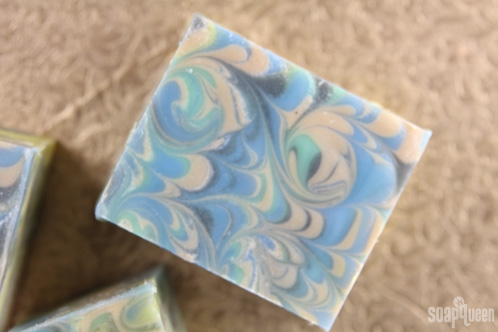
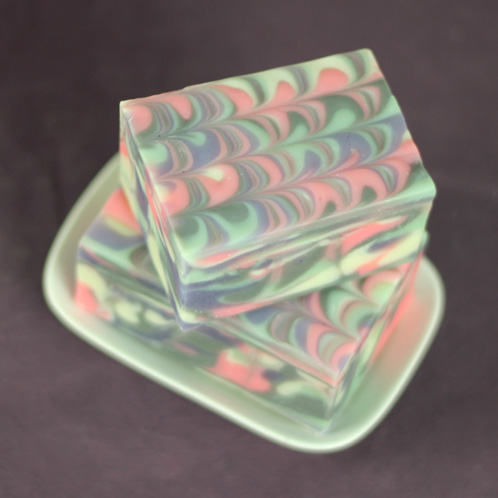
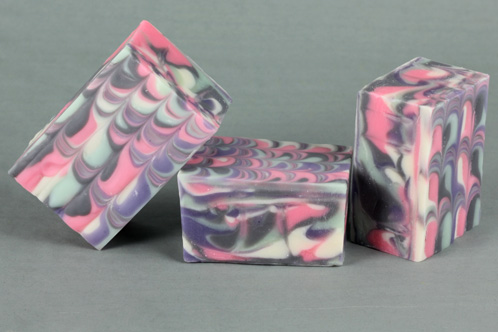
Butterfly Swirl Soap Tutorial
This beautiful Butterfly Swirl is inspired by the nonpareil paper marbling of old (not sure what a nonpareil pattern looks like? Check out the beautiful handmade paper that inspired this tutorial for a good example!). Four different tones create dynamic complex and rich patterns both on top of the soap and within the bars themselves. It is the perfect recipe for giving these new swirl tools a whirl.
What You’ll Need:
24 oz. Canola Oil
16 oz. Coconut Oil
4 oz. Hemp Seed Oil (refined)
4 oz. Mango Butter
20 oz. Palm Oil
12 oz. Rice Bran Oil
10.9 oz. Sodium Hydroxide
26.4 oz. Distilled Water
3.8 oz. Lychee Red Tea
1.2 oz. Peppermint Essential Oil, 2nd Distill
Titanium Dioxide
Aqua Pearl Mica
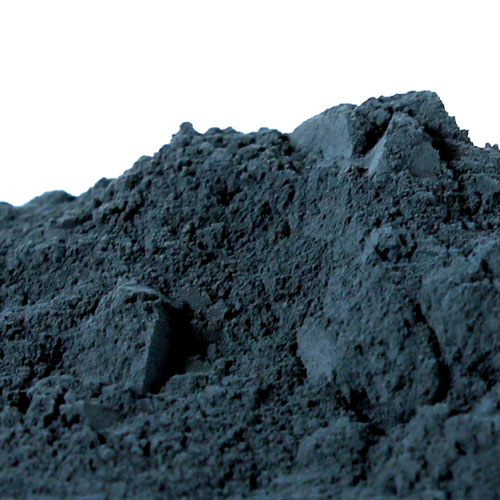
Activated Charcoal Powder
Fired Up Fuchsia Pigment
Ultramarine Violet Oxide
18 Bar Birchwood Mold
Liner for 18 Bar Mold
Comb Swirl Tool
Click here to add everything you need for this project to your Bramble Berry shopping cart!
If you’ve never made Cold Process soap before, stop here! I highly recommend checking out our FREE four part SoapQueen.tv series on Cold Process Soapmaking, especially the episode on lye safety. And if you’d rather do some reading, Bramble Berry carries a wide range of books on the topic, including my newest book, Soap Crafting. You can also checkout the digital downloads for that instant gratification factor.
SAFETY FIRST: Suit up for safe handling practices! That means goggles, gloves and long sleeves. Make sure kids, pets, and other distractions and tripping hazards are out of the house or don’t have access to your soaping space. Always soap in a well-ventilated area.
COLOR PREP: Disperse 1 teaspoon of Aqua Pearl, Activated Charcoal, Fired Up Fuchsia and Ultramarine Violet into 1 tablespoon of liquid oil (we like Sweet Almond or Sunflower oils). Disperse two teaspoons of Titanium Dioxide in 2 tablespoons of liquid oil. Prepping your colors in the beginning will allow you to work quickly and give you more time to work with your soap. Use the mini mixer to get all those clumps worked out smoothly.
FRAGRANCE BLEND: In a glass container, combine the Lychee Red Tea Fragrance Oil and the Peppermint 2nd Distilled Essential Oil. Give the mixture a good stir and then set it aside.
ONE: Slowly and carefully add the lye to the water, and stir until clear. Set aside to cool. If you’d like a harder bar of soap that lasts longer in the shower, you can add Sodium Lactate to the cooled lye water. Use 1 teaspoon of Sodium Lactate per pound of oils in the recipe.
TWO: Melt and combine the Canola, Coconut, Hempseed, Mango, Palm and Rice Bran oils in a large glass container. Once the lye water and the oils have cooled to 130 degrees or below (and are ideally within 10 degrees of each other), add the lye water to the oils and stick blend until thin trace.
THREE: Equally split the batter into 5 containers. Then use a wire whisk or spatula to stir in one colorant per container at the following rate:
• ½ teaspoon dispersed Titanium Dioxide and 1 teaspoon dispersed Aqua Pearl
• ½ teaspoon dispersed Activated Charcoal and 1 teaspoon Titanium Dioxide
• 1½ teaspoon dispersed Titanium Dioxide
• 1½ teaspoon dispersed Fired Up Fuschia and 1 teaspoon dispersed Titanium Dioxide
• 2 teaspoons dispersed Ultramarine Violet
FOUR: Once you’ve fully incorporated the colorant, split the fragrance blend between the five containers and mix with a whisk or spoon.
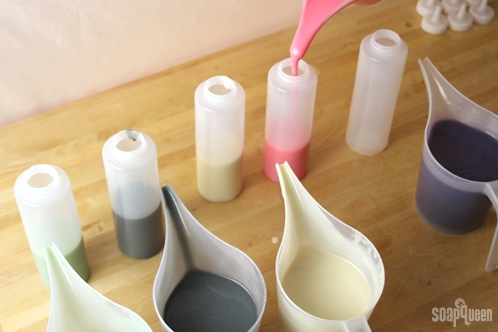
FIVE: Once the fragrance has been fully incorporated, pour each color into its own condiment bottle. Fill each bottle about halfway (6 oz.) full.
SIX: Beginning in the bottom left-hand corner of the mold, pour about half of the remaining color in your mixing containers in a diagonal zigzag motion. Repeat this pattern with each color, layering one color on top of another and keeping the same order.
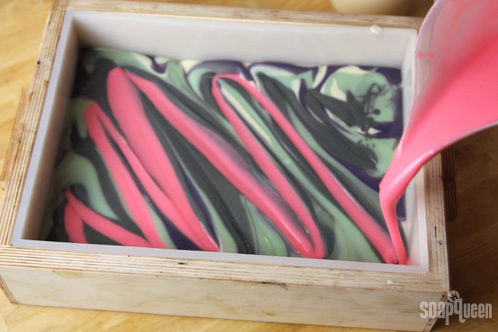
SEVEN: When you have used about half the soap in all five containers, change your pour pattern. Begin at the far left hand corner and pour the soap in the same diagonal zigzag pattern across the mold to the near right hand corner. Repeat this process until all the soap in the containers is gone.
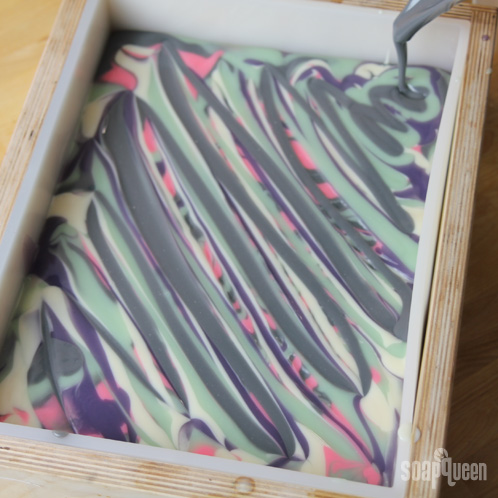
EIGHT: Insert a chopstick or dowel into the soap beginning in the near left hand corner. Drag the tool in a diagonal zigzag pattern to the far right hand corner.
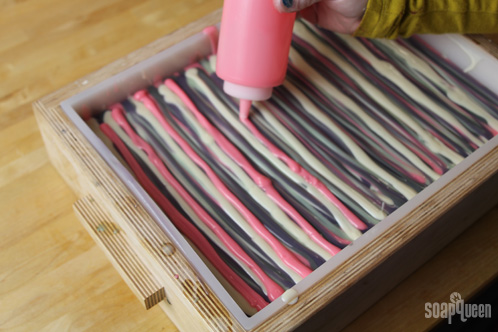
NINE: Using the condiment bottles, squirt each color vertically across the mold. Repeat this pattern layering colors on top of each other in the same order until you have about 2 oz. of soap in the bottles.
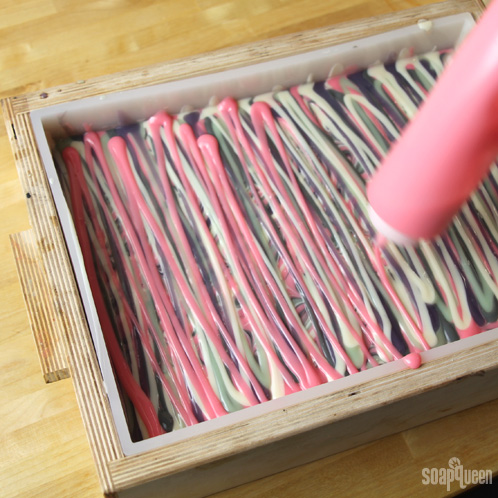
TEN: When you have about 2 oz. left in your bottles, start making your lines more purposeful. Carefully lay down lines of thick color, working your way from one end of the mold to the other. Space your color lines about an inch apart.
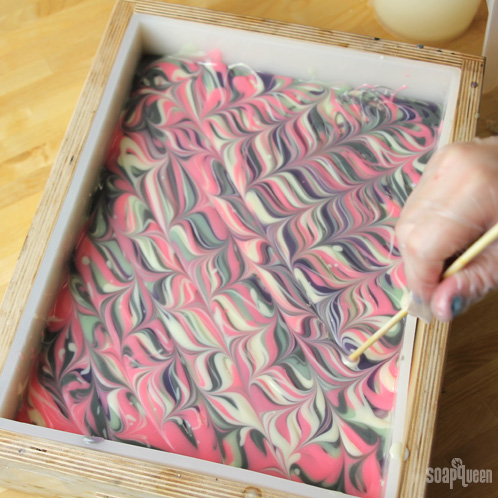
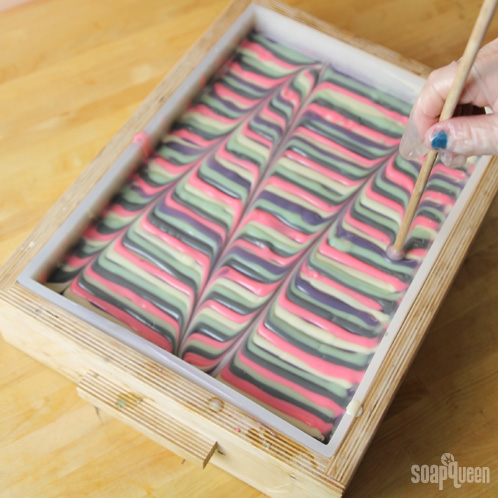
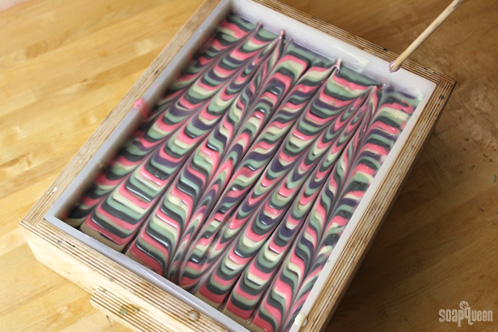
TEN: Using a chopstick or dowel again, start in the far left-hand corner and make a diagonal zig-zag across the mold to the lower left-hand corner. And then, back again.
ELEVEN: Drag the Comb Swirl Tool in a slow and smooth motion from the top of the mold to the bottom. Lift it straight up out of the soap, and the design is done!
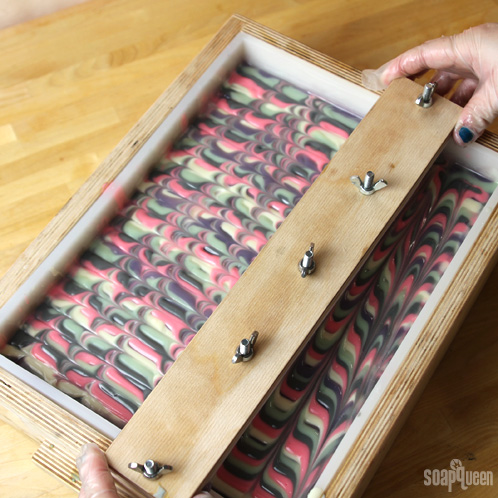
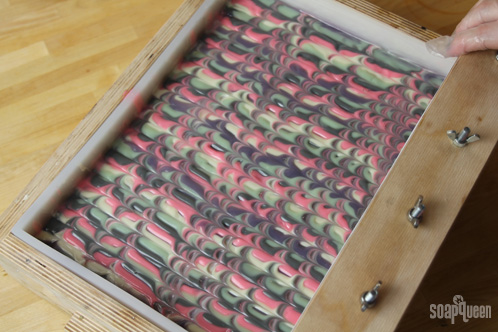
Spray the entire top with 91 or 99% Isopropyl Alcohol to reduce soda ash. Cover and insulate for 24 hours and unmold after 3-4 days, and allow to cure for 4-6 weeks.
What’s New for Fall
Santa came early this year to Bramble Berry, and he brought a whole host of new products with him! With winter quickly approaching, we want to highlight some of our new products before the busy soaping season starts. We’ve got a few exciting new tools, several fragrance and essential oils and a library’s worth of books and e-books. If you have any suggestions for products you’ d like to see Bramble Berry carry, be sure to let us know in the comments below.

In the past few months, we’ve been working hard on some new soaping tools that will change the way you swirl. Our Easy Swirl and Comb Swirl Tools (also available in our Swirl Tool Kit) are a cold process soaper’s dream. Instead of spending time painstakingly getting those peacock or frog foot swirls just perfect, these tools make the designs possible in a matter of minutes.
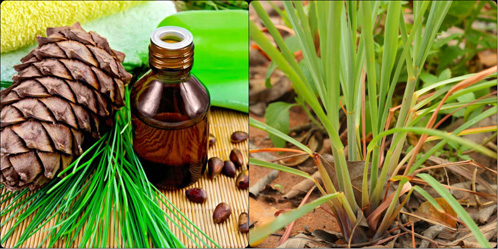
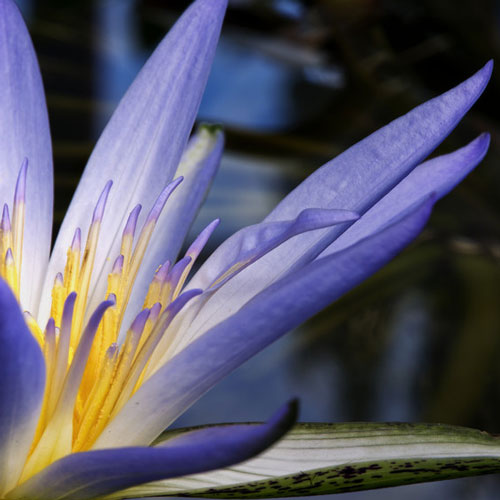
Our two newest essential oils — Cedarwood Atlas and Palmarosa, are fantastic for any all-natural recipe. Cedarwood Atlas Essential Oil is said to have aromatherapy benefits, and it’s it’s been said to be helpful for acne-prone skin. In cold process soap, this essential oil has a lovely woodsy scent. Palmarosa Essential Oil, on the other hand, has a soft floral aroma vaguely reminiscent of rose and blends well with citrus-y oils such as Bergamot or milder oils such as Chamomile. We used Palmarosa in the beautiful Fall Leaves soap we cut earlier this week.
To achieve a beautiful blue jean-blue, we’ve introduced a Natural Indigo Powder that can be dispersed in isopropyl alcohol and used in melt & pour or added to the lye water for cold process coloring. Indigo requires a super hot gel phase to go blue and we found that adding it directly to lye water gets you the most blue color. For the below video, we added it, pre-dispersed, at trace. We used Indigo Powder, Safflower Powder and Paprika Powder to color our Celine Swirl. Check out the cut below:
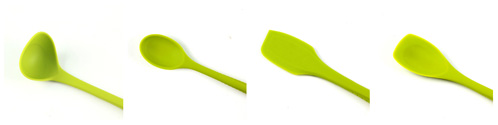
Easy Grip Silicone Ladle, Round Silicone Spoon, Silicone Spatula, & Square Silicone Spoon
These easy-grip silicone tools have been our go-to tools for our soaping sessions. They’re also easy to clean and sanitize. The rubber handles have a non-slip grip and can resist temperature up to almost 500 degrees Fahrenheit. You can purchase the tools individually or purchase the entire Silicone Tool Set.
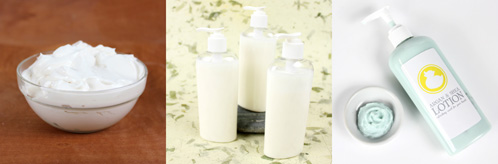
Do you want to learn more about making your own lotions, cremes and emulsified scrubs? These three new e-books — Back to Basics, Formulating Lotions & Cremes, and Lotion Making 101 — will give you all the information you need to start formulating your own recipes. And at the very last moment (minutes before this post went up), we added this 194 page e-book on Hair Care Products. With this e-book, you’ll have a comprehensive overview of hair chemistry, how shampoo and conditioner work and most importantly, how to formulate great quality hair products for everyday use. They’re available for quick download and instant formulation gratification.
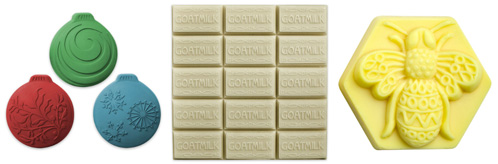
We added three new molds for your melt and pour & cold process soaping (or chocolate or plaster or wax crafting). We couldn’t help but add the Ornaments Mold, and the Guest Goat Milk Tray Mold and an art-deco inspired Filigree Bee Mold were too cute to pass up.
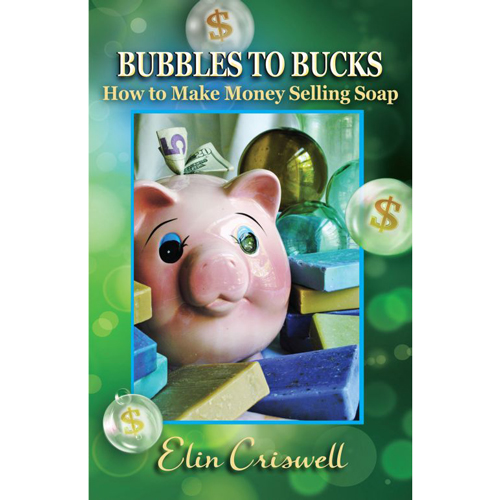
In Bubbles to Bucks, veteran soapmaker Elin Criswell explores what it takes to turn your soapmaking hobby into a business. She gives you useful advice on starting a small business so you’ll have the tools to succeed. This is a must-read for any soapmaker wanting to start or grow their business.
We also snuck a brand new fragrance oil into our line. Introducing the Amazon Lily & Rain, which smells like florally fresh line-dried linens. If you want a sneak-peek of how it works in cold process, check out our Rainbow Squirty Swirls (it performed beautifully!). Also, be sure to also check out the refill for the Guava Shave Ice Fragrance Oil, which is part of the SoapyLove Island Style Soap Colorants Kit. It’s a great way to keep this perennial summer favorite in-stock.
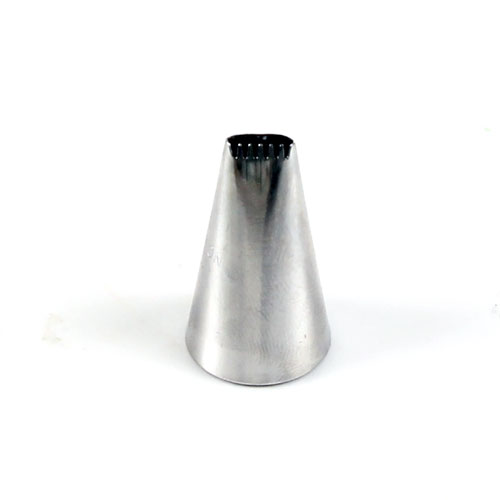
To achieve the perfect decorative finish for your bath bomb cupcakes, soap meringues, or even your fluffy soap filling, use this brand new Basket Weave Frosting Tip to take your designs to the next level.
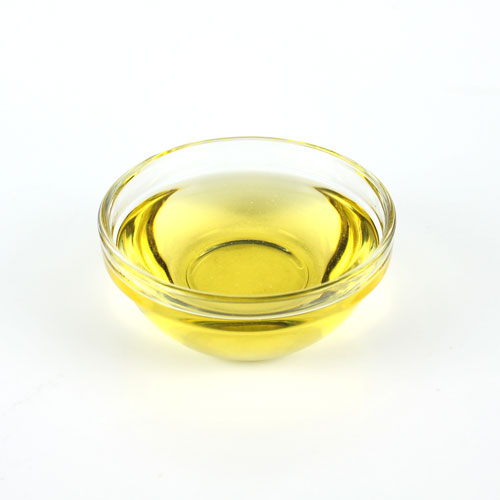
Now you can get all your major soapmaking oils in one place. We’ve introduced Canola Oil to our fixed oils line for an affordable, inexpensive oil to use in your recipes. We like using Canola Oil as a partial substitute for Olive Oil when we’re trying to get precise colors in soap because it doesn’t discolor the way Olive Oil sometimes can.
Have you used any of these new products yet? If so, we’d love for you to leave a review on our website. Not sure how to do it? Learn how to leave a review on our website here.