 Project Instructions – Part One, Part Two, Part Three
Make this in red and white for Christmas.
(originally posted in May 2008)
Tutorials on soapmaking, bath fizzies, lotions and more
Project Instructions – Part One, Part Two, Part Three

Project Instructions – Part One, Part Two, Part Three
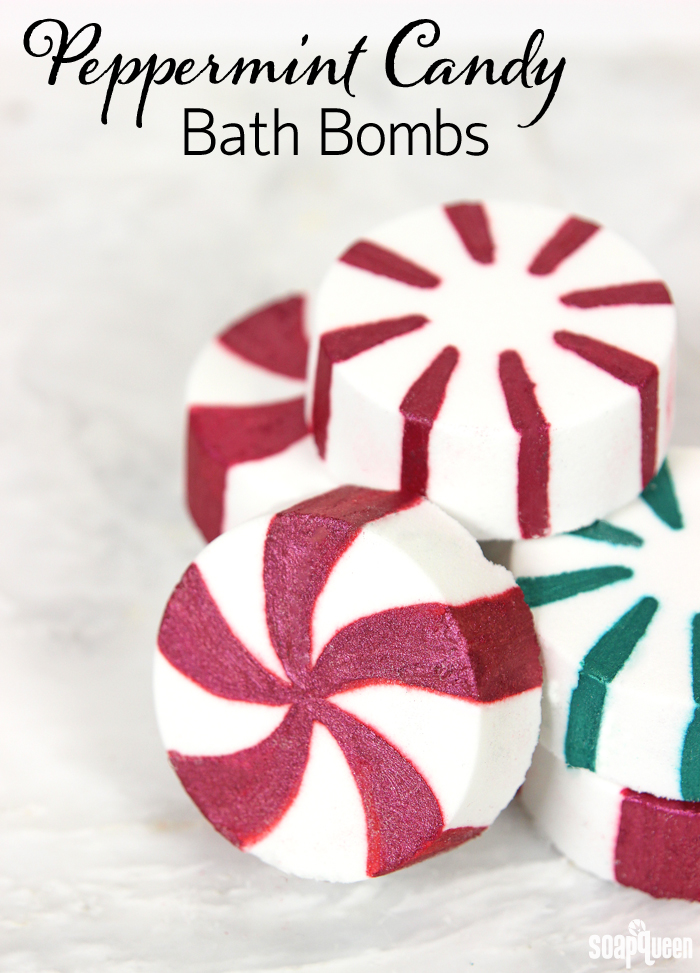 One of my favorite ways to treat myself after a long day is with a hot bath and a book. This is especially true during the cold winter months! A hot bath can keep you warm and comfy for hours. To make your bath time extra fun, bath bombs are a must. These Peppermint Candy Bath Bombs are made with argan oil which is full of vitamin E and skin-loving properties. The blend of Peppermint Essential Oil, 1st Distill and Non-Discoloring Vanilla Fragrance Oil creates a sweet and minty blend that smells just like traditional peppermint candies.
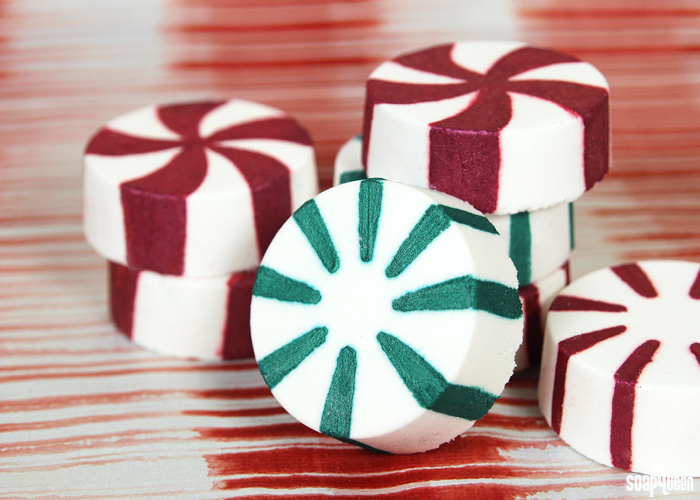
After these bath bombs harden and dry in the mold, they are decorated with a blend of mica and alcohol to give them the peppermint candy appearance. The mica does color the bath water and may leave a little color on the tub, but will wash away with a little scrubbing. I added polysorbate 80 to this recipe to help the oils disperse throughout the water instead of pool on the top, but it’s completely optional. To see the difference between bath water with polysorbate and without, read the Herb Infused Bath Oil tutorial. Check out these fizzies in action in the video at the very bottom of this post!
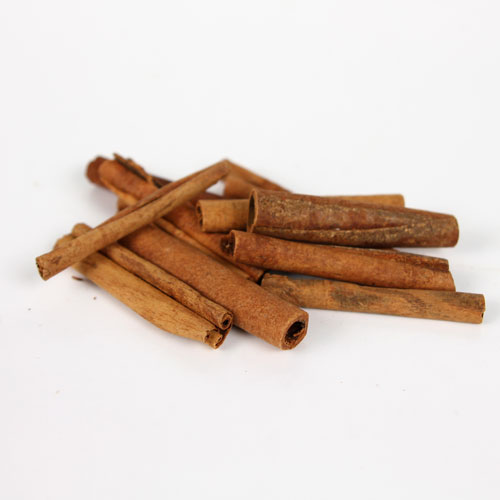
I love to bake during the holidays, and one of my staple ingredients is cinnamon. Whether it’s cinnamon sugar cookies, cinnamon pinwheel rolls, or cinnamon bread pudding, there is nothing that says ‘holidays!’ to me like the warm, rich scent of this versatile spice (well, that and eggnog…).
Any kids or tweens on your list of gift recipients? Here’s a great mashup of projects could work perfectly as some quick and easy stocking stuffers!

Top Row: Tween Soap, Cool Yule Peppermint Loaf, Gift Series: Bath Fizzies (Day One & Day Two)
Middle Row: Color Block Rainbow Soap, Candy Pinwheel (Part 1, Part 2, Part 3), Snowflake Soap
Bottom Row: How to Make Tattoo Soap, Dressed Up Bath Bombs, Soaping Cats & Dogs
In this Soap Queen Short I show the basics of soap sculpting. This quick little video was inspired by the soap sculpting challenge. I wanted to show how easy it is to manipulate and roll Melt & Pour soap when you know the trick!

It’s easy to roll up Melt & Pour soap when you add a little glycerin. For ideas on how to use sculpted soap check out this video where I embed a soap roll in soap and this video where I make soapy pinwheels and fortune cookie shaped soap.
How to Roll Melt & Pour Soap from Soap Queen on Vimeo.
To make the soap in this video you will need:
![]() Buy everything you need with the click of a button!
Buy everything you need with the click of a button!
As summer comes to an end, it’s time to get the kids ready for school (“Already?!” Awwwww Mo-oom!“) Make a good impression on the teacher with the gift of handmade soap! Or just have fun making soap with the kids. Here are some favorite back to school projects compiled from the Soap Queen Blog. Enjoy!
 See the bottle of glue in the upper left picture? You guess it. It’s really soap!
It’s a beautiful day here in Bellingham, Washington and we’re enjoying the summer sun and some fun summer soap projects like Strawberry Pie Soap, Summer Lip Balm and Soothing After Sun Oil. What are some of your favorite summer soap projects?

Red, White and Blue Massage Bars

Skeeter Beeter Tips for Summer
Get your soaping supplies at Bramble Berry and get started!
Learn how to combine 2 melt & pour techniques in this episode of Soap Queen TV. First, make a pink and white jellyroll soap which is a variation on the Pinwheel Soap Technique from the 4th of July Special Edition video. Then, embed the jellyroll into a melt and pour loaf, demonstrated in one of the earliest episodes of Soap Queen TV.
I am always so thrilled when I see soaps that were inspired by a Soap Queen tutorial (melts my heart). Here are some projects that were posted on the Bramble Berry Facebook page! Become a fan and show off your soaps. Until then, enjoy some soapy inspiration:


My brother, Erik (from ELF Industrial, Otion and The Soap King blog), designed 2 massage soap molds: The Round Massage Mold and the Oval Massage Mold. They have been a huge hit so far so I thought I would do a last minute 4th of July project with them. This project literally took me 10 minutes, it couldn’t have been easier. Give it a try!

ONE: Melt 1 ounce of white melt and pour in the microwave and use a dropper to fill in the dots. Let cool for about 5 minutes.
TWO: Melt 11 ounces of clear soap base in the microwave and add .25 ounces of your favorite summertime fragrance oil (I used Coconut Citrus Sorbet). Mix well and separate the soap into two separate containers. Color one container of melted soap with Liquid Blue and the other with Perfect Red Color Block. Mix both colors well.

THREE: Once the melted blue soap has cooled to 125 degrees, spray the first layer of white soap with rubbing alcohol and fill up two cavities with the blue soap. Spritz with the rubbing alcohol to get rid of any air bubbles and repeat with the melted red soap. Let cool for 4-6 hours.


ONE:Melt 4 ounces of white melt and pour soap base, stir in your favorite fragrance oil. Fill each star cavity. Let cool and unmold.
Variation:Add Liquid Red or Liquid Blue to 4 ounces clear soap base with a splash of glitter if you want to embed colored stars.

TWO: Melt 16 ounce of clear soap base in the microwave. Add a tiny bit of liquid blue colorant to get a clear effect (for more info on the “bluing” technique see this Soap Queen TV video). Do not add fragrance at this time.
THREE: Pour a 1/8” thick layer of the clear soap into each cavity of the Slim Square and spritz with rubbing alcohol.
FOUR: Spritz the thin clear layer of soap and soap stars with rubbing alcohol. Then pour another thin layer of clear soap into each cavity and place your stars into the melted soap. Make sure that your soap is around 125 degrees to avoid melting the soap stars.

FIVE: To the remaining melted clear soap base, add your favorite fragrance oil and either red or blue colorant (and glitter if you’re feeling sassy). Mix well.
Note: The Heavy Duty Slim Square Mold has been discontinued and substituted with out 12 Bar Square Silicone Mold
SIX:Spritz the cooled layer of soap with the stars and pour your final colored background layer. Spritz again with rubbing alcohol to get rid of any air bubbles. Let the soaps cool, pop them out of the mold and celebrate the 4th of July with your friends and family.
Ready to try making your own? Get everything you need added to your Bramble Berry shopping cart here. Don’t worry, you can always delete items or change quantities before you check out.

Don’t miss out on past summer projects a blog posts like Graduation Scrolls, Pinwheels, Parfait Soaps, Summer Lip Balm, Soothing After Sun Oil, Summer Flip Flops, Bug-Be Gone Candle, Summer Break Soap for Kids, Kumquat Blends, After Sun Lotion, After Sun Spritzer

ONE: Melt 4 ounces of clear soap base in the microwave (about 30 seconds). Once the soap is fully melted, mix in .3 ounces of liquid glycerin, 1 ml of fragrance oil and your non-bleeding (school) colors. I chose Liquid Green to represent one of our local schools, Sehome High. Mix well and pour the soap into the brownie pan mold. Spritz with rubbing alcohol to get rid of those pesky bubbles. Let cool for about 5 minutes.
TWO: In the meantime, melt 4 ounces of white soap base in the microwave (about 30 seconds). Then mix in .3 ounces of liquin glycerin and 1 ml of fragrance oil. I left this layer white but feel free to add a colorant at this time. Mix well.
THREE: Once your first layer of soap has cool and your melted soap is around 120-125 degrees, spritz the first layer with rubbing alcohol and pour the second layer of soap. Spritz again with rubbing alcohol to get rid of any bubbles. Let the layers cool for about 10 minutes.
Tip: Don’t let the soap cool for too long. As soon as it’s hard enough to unmold it’s ready to “roll”. If you wait too long the soap will be harder to work with and you could end up with unsightly cracks (which may drop your grade on the project).

FOUR: Once the soap has cooled, carefully pull the soap out of the mold and place it on a flat surface. Cut the soap in half with a soap cutter or flat edged knife. Then trim up the sides so all of the edges look the same (getting rid of those rounded corners).

FIVE: Start at the skinny end of the soap and roll it all the way up. Then (aggressively) squeeze the middle of the soap to slightly dent it. This will give the soap its “paper like” effect.
SIX: Tie a coordinating ribbon around the soap in a simple bow and you’re done. They’re ready for the party favor bowl!

I got a little carried away in this episode of Soap Queen TV. I show how to make two adorable projects, pinwheels and fortune cookies – out of soap of course! Make your Fourth of July really exciting with Pinwheel Soap Favors for all of your guests.
Soap Queen TV: 4th of July Special Edition from Soap Queen on Vimeo.
For the Pinwheel soap:
Clear Soap base
White Soap base
Liquid ultramarine blue
Pineapple Cilantro fragrance
Liquid Glycerin
tools:
Flexible brownie tray
Craft knife
Heat safe containers
Spoon or stir stick
For the Fortune Cookies:
Clear Soap base
White Soap Base
Sparkle Gold mica
Peach Shimmer mica
Butter Cream and Snickerdoodle fragrance
Vanilla Color Stabilizer
Liquid Glycerin
tools:
Flexible brownie tray
Round cookie cutter or craft knife
Paper fortunes
