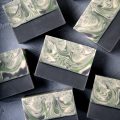
If the frost on car windshields this morning was any indication, we’re in for a long, cold winter. With temperatures dropping in the 20s this week (brrr!), we decided to embrace chilly December by making this winter weather-inspired soap.
The walnut shells in this tutorial not only make for realistic looking sand, but they’re also one of our favorite gentle exfoliants. This tutorial also uses our brand new Round Mini Silicone Column Mold to create a milky white moon above a stormy ocean (p.s. looking for more cold process embed molds? Check out the Mini Heart Silicone Mold and the Mini Square Mold too!).
Shout out to the Lathered Pony Soap Co., our Facebook Photo of the Week winner back in October, for inspiring this soap. It definitely makes winter feel a little less dreary! 
Click here to add everything you need for the embeds and the loaf to your Bramble Berry shopping cart!
If you’ve never made Cold Process soap before, stop here! I highly recommend checking out our FREE four part SoapQueen.tv series on Cold Process Soapmaking, especially the episode on lye safety. And if you’d rather do some reading, Bramble Berry carries a wide range of books on the topic, including my newest book, Soap Crafting. You can also checkout the digital downloads for that instant gratification factor. This is an advanced technique and should not be attempted without a few recipes under your belt.
SAFETY FIRST: Suit up for safe handling practices! That means goggles, gloves and long sleeves. Make sure kids, pets, and other distractions and tripping hazards are out of the house or don’t have access to your soaping space. Always soap in a well-ventilated area.
COLOR PREP: Disperse 1 teaspoon of each mica, pigment or oxide into 1 tablespoon of liquid oil (we like Sweet Almond or Sunflower oils). Be sure to dilute your LabColors — we like diluting the small LabColor bottle in 4 oz. of distilled water. If you’ve never diluted LabColors before, see this blog post to learn how!
Prepping your colors in the beginning will allow you to work quickly and give you more time to work with your soap. Use the mini mixer to get all those clumps worked out smoothly.
The Embeds
Note: Because the embeds aren’t long enough to reach the entire length of the 5 lb. Wood Log Mold, the following recipe is enough for two embeds. We used two molds to make both embeds simultaneously, but you can always make one, wait for it to harden, and then make the second. If you do have to make the recipe twice, it will take a few extra days for this project. Before using your embedding mold, make sure that both sides are fully snapped and sealed together to prevent and soap leaks.
What You’ll Need:
1.2 oz. Palm Oil
1.2 oz. Coconut Oil
1.2 oz. Olive Oil
.4 oz. Sweet Almond Oil
.5 oz. Sodium Hydroxide
1.3 oz. distilled water
1/8 teaspoon Sodium Lactate
Round Mini Silicone Column Mold
ONE: Slowly and carefully add the lye to the water, and stir until clear. Set aside to cool. We highly recommend adding Sodium Lactate to the cooled lye water so you can use the embed faster!
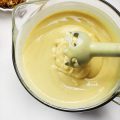
TWO: Melt and combine the Palm, Coconut, Olive and Sweet Almond Oil in a medium-sized glass container. Once the lye water and the oils have cooled to 130 degrees or below (and are ideally within 10 degrees of each other), add the lye water to the oils and blend with a stick blender until thin trace. Because this is such a small batch, be careful not to over-blend or the batter will become too thick! We switched to using a mini mixer after a few seconds to get the batter to emulsify without over mixing.


THREE: Add 3/4 teaspoons of dispersed Titanium Dioxide colorant. Mix in with a wire whisk or spoon.

FOUR: To help our Round Mini Silicone Column Mold stand up, we recommend propping it up against cups or containers. In our case, we used two coffee cups with handles and wedged the mold in between them! Slowly pour the soap batter into the mold. Allow the embeds to harden for at least 12 hours, and preferably overnight.

The Soap Loaf:
What You’ll Need:
13.7 oz. Olive Oil
16.5 oz. Coconut Oil
11 oz. Palm Oil
2.7 oz. Hazelnut Oil
11 oz. Rice Bran Oil
7.7 oz. Sodium Hydroxide
18.1 oz. distilled water
3 tablespoons Walnut Shells
1 teaspoon Vibrant Orange LabColor
1.5 teaspoon Fuchsia LabColor
3.5 oz. Pomegranate and Black Currant Fragrance Oil
5 lb. Wood Log Mold with Silicone Liner
ONE: Slowly and carefully add the lye to the water, and stir until clear. Set aside to cool. If you’d like a harder bar of soap that lasts longer in the shower, you can add Sodium Lactate to the cooled lye water. Use 1 teaspoon of Sodium Lactate per pound of oils in the recipe.
TWO: Melt and combine the Olive, Coconut, Palm, Hazelnut and Rice Bran oils in a large glass container. Once the lye water and the oils have cooled to 130 degrees or below (and are ideally within 10 degrees of each other), add the lye water to the oils and stick blend until thin trace.

THREE: Pour off about 20 oz. of soap into a separate container. Add 1 teaspoon of dispersed Cappuccino Mica and 1 teaspoon of Walnut Shells.

FOUR: Stick blend the batter until you achieve a thick trace. You want to mimic the texture of thick, wet sand! After you’ve gotten the batter to thick trace, whisk in about .5 oz. of the Pomegranate and Black Currant Fragrance Oil. This layer needs to support the next layer so it’s just fine if it’s gloppy and extra thick.

FIVE: Pour the brown batter into your lined mold. Use a spatula to empty the entirety of the container into the mold. Tamp the mold on the table surface to disperse bubbles — you may want to do this a few times as the trace will be very thick, which makes for prime bubble-forming conditions (see those bubbles in the photo below? Tap tap tap to get them to go away).

SIX: Give the batter about 5 – 10 minutes to set up, and then use a spatula to mound up texture throughout the brown soap. Remember that you’re going for a final look of beach sand, so there is no wrong way to do this.

SEVEN: From the main batch of batter, split off off three more separate cups of soap in the following measurements and add the following colors:
- About 7 oz. of batter colored with 1/2 teaspoon dispersed Titanium Dioxide.
- Another 7 oz. of batter colored with 1/8 teaspoon dispersed Black Oxide.
- About 17 oz. of batter colored with 1/2 teaspoon dispersed Ultramarine Blue.
Use a spoon or wire whisk to incorporate the color.

EIGHT: Whisk in about .3 oz. of fragrance oil per container. Eyeballing it is okay! Just be sure to save some for the remaining top layers.

NINE: Drizzle the three colors over the brown layer, alternating colors. The Easy Pour Measuring cups make for precision pouring. Don’t worry about being careful — you want to create the look of rough ocean waves so the more texture the better! We used a chopstick to swirl the colors together after we poured.


TEN: From the main batch, split off about 10 oz. of soap into two separate containers. Color one container with 1.5 teaspoon of diluted Fuchsia LabColor. Color the second with 1 teaspoon diluted Vibrant Orange LabColor. This is our sunset color combination.

ELEVEN: Stick blend the batters until they reach a thick trace. Add a little bit of Pomegranate and Black Currant Fragrance Oil to both batters, and be sure to leave a little for the last layer. Again, check out those bubbles in the photo below. This is super thick, gloppy trace.

TWELVE: Pour about 2/3 of each colored batter into the mold. Just like before, pouring in different patterns and directions and alternating colors will create interest in the final cut bars, so get creative!

THIRTEEN: Gently place the embeds into the mold on top of the pink and orange layer. One embed will fit entirely, and you’ll have to cut the second one to fit. Then, cover the embeds with the remaining soap in the containers.

FOURTEEN: Color the remaining soap (you should have about 16 – 17 oz. left) with 2 teaspoons of dispersed Titanium Dioxide. Whisk in the remaining fragrance oil. Once the colorant and fragrance oil have been fully incorporated, use a large spoon to gently plop the white soap on top.

FIFTEEN: Drag a chopstick or dowel inserted into the top 1/4″ of the soap down the length of the mold, making a series of small loops. When you reach the end of the mold, create one big loop that carries you into the next row, and do a reverse loop back across the mold again. Continue this pattern until all of the soap is swirled. This provides texture and interest to the top of the bar.


SIXTEEN: Because everything is better with glitter, finish the top of the soap with a dusting of Fine Iridescent Glitter. Spray the entire top with 91% Isopropyl Alcohol to reduce soda ash. Cover and insulate for 24 hours and unmold after 3-4 days. Allow to cure for 4-6 weeks and enjoy!


This is a beautiful soap!! i’m thinking about using Rose Clay and Tangerine Wow instead of the Lab colors. Do you think this will work? Thanks.
Hi Arlene!
So glad you like the post!
Also, you can absolutely use those colors if you like! With the Tangerine Wow, we recommend mixing 1 tsp. of the colorant into 1 Tbsp. of a light carrier oil, like sweet almond oil. Then, add the 1 tsp. of dispersed colorant to your soap. That way the color mixes in smoothly and there are no clumps of color. 🙂
You can see how to prepare the colorants in this video: http://www.soapqueen.com/bath-and-body-tutorials/tips-and-tricks/learn-prepare-colorants-cold-process-soap-making/
For the clay, we recommend adding 1 tsp. to 1 Tbsp. of distilled water for the same reason. Keep in mind clays absorb moisture, so they can cause the soap to accelerate a bit. I would recommend adding the color at the last minute. 🙂
Sunday Night Spotlight: Brazilian Clay: http://www.soapqueen.com/bramble-berry-news/sunday-night-spotlight-brazilian-clay/
The Talk It Out Tuesday: Colorants post has a lot of great tips as well: http://www.soapqueen.com/bath-and-body-tutorials/tips-and-tricks/talk-it-out-tuesday-colorants/
-Kelsey with Bramble Berry
It would be nice to have a pdf version available online for printing. This would make access easier when “soaping”(not having to have laptop near work area)
Would appreciate your feedback or suggestions
Regarda, Nancy
Hi Nanc!
Thanks so much for this feedback! It is something we are hoping to have in the future 🙂 Thanks again for letting us know that you would find this helpful!
-Amanda with Bramble Berry