
Hi! I’m Debbie Chialtas, owner and designer for Soapylove. I recently taught how to make UFO Soaps and Cameo Soaps at Otion’s Soapmaking Weekend Intensive. I’m truly obsessed with M&P soap crafting and am so excited to be a guest blogger for The Soap Queen! Every week I’ll bring you new projects and soap making tips. So without further ado, I present this first tutorial made just for you!
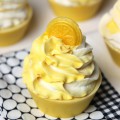
Brambleberry’s new Cupcake Mold is so adorable I just had to make a soapy rendition of a classic: Chocolate Cupcakes with Pink Frosting. These cupcakes are almost better than the real thing because they have a sprinkle of glitter, too! This project is fun because you build your cupcake, layer by layer, and when you unmold your soap you get a very sweet reward!
You’ll need:
Cupcake Mold
3 oz clear soap base
8 oz white soap base
Non-bleeding liquid red colorant
Rose Pearl Mica
Iridescent Soap Glitter
Brown Oxide
Dark, Rich Chocolate fragrance oil
Vanilla Color Stabilizer
Melt and Pour Tool Kit
3 small cups and a mug
Spray bottle with rubbing alcohol
 1. Melt 4 oz clear soap base. Pour about 1 tablespoon of soap into a small cup and add a few drops of red colorant. Put some hot water in the mug. Using the injector from the tool kit, fill each cherry with red soap. Clean your injector with the hot water. Put extra red soap aside.
 2. Pour another tablespoon of clear soap into a different small cup. Stir in a pinch of pink mica and a tiny pinch of glitter. Use injector tool to fill frosting area. This will take 2 turns to adequately fill the outer details of the frosting, as you can see in my photo. If you have overflow into the cup area, use the pointy tool to scrape it out when it’s cool. Clean injector tool in hot water. Put extra soap aside.
 3. In your last small cup, spray a few squirts of rubbing alcohol. Add a large “pinch” (or about 1/16 teaspoon) of brown oxide and stir well until dissolved. Add 1 tablespoon of melted clear soap and stir until smooth. Tilt mold so 2 of the cup portions of the mold are level. Inject brown soap into cup area carefully and let cool. Do this in 2 layers again so it’s nice and opaque. This time you can use the flat scraper tool to remove any brown soap that spilled over onto your frosting. Repeat for other 2 cavities.
4. Melt 8 oz of white soap. Stir in the extra pink and red soap to make a nice pink color (you might not need it all). Add 1/4 teaspoon each of Chocolate fragrance oil and Vanilla Stabilizer. Let cool to 120 degrees, or until it’s not too hot to touch with your finger. Spray molds with alcohol and slowly pour in pink soap (don’t pour directly onto your cupcake design). Allow to cool overnight and unmold!
When planning other color combinations, make sure to refer to Bramble Berry’s list of non-bleeding colorants. It’s a life saver! See you Thursday!

We’d love to be included in your blog! Thanks so much for the invitation. I’ll drop you an email right now.
This is fab! I’m going to post about you on Blissfully Domestic’s Creative Bliss channel (if you don’t mind) and I’d love for you to join our team of contributors! If you’re interested email me at sylvia{at}blissfullydomestic{dot}com! 🙂
My cupcake mold arrived today (HOORAY!). It is even cuter “in person” and I was surprised by the size – it’s bigger than it looks in the photos.
Time to get out all my “sweetie scents” now!
: – )
Erin
OH! Wow.. these are really cute! And I was planning on holding off my next order for a few weeks. I think you just ruined that! I have to get these molds 🙂
Thanks!!
Thanks, you guys! I hope you all try it, too!
Cakespy – I think I must have been channeling your adorable illustrations when I made this soap. With a few dots of soap paint, these could easily become Cakespy Soaps!
Oh!! I nearly shrieked from the cuteness of this soap!! Beautifully done with a gorgeous mold. Excellent tutorial too!
Great tutorial & beautiful soap!
Thank you for the tutorial, Debbie! I just bought BB’s cupcake mold so this tutorial is very timely and I look forward to trying it out.
BTW, congratulations on being a guest soap designer here on the Soap Queen blog!:)