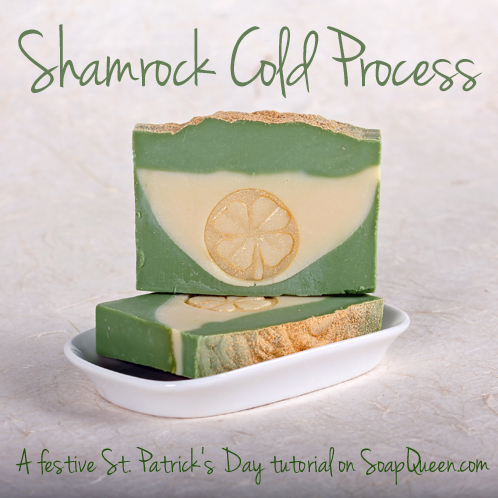
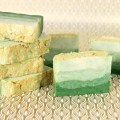
Don’t be caught without your green this St. Patty’s Day! This cold process soap recipe features clean green and yellow soap layers enhanced by a cute Four Leaf Clover Stamp. Embellish with a little gold sparkle mica and you’ve got a bar of soap fit for a leprechaun’s pot of gold.
What You’ll Need:
12.2 oz. Olive Oil
10.5 oz. Canola Oil
8.7 oz. Rice Bran Oil
1.7 oz. Castor Oil
1.7 oz. Cocoa Butter
4.4 oz. Sodium Hydroxide
11.5 oz. distilled water
2 oz. Raspberry Porter Fragrance Oil
 Click here to add everything you need for this project to your Bramble Berry shopping cart!
If you’ve never made Cold Process soap before, stop here! I highly recommend checking out our FREE four part SoapQueen.tv series on Cold Process Soapmaking, especially the episode on lye safety. And if you’d rather do some reading, Bramble Berry carries a wide range of books on the topic, including my newest book, Soap Crafting. You can also checkout the digital downloads for that instant gratification factor.
SAFETY FIRST: Suit up for safe handling practices! That means goggles, gloves and long sleeves. Make sure kids, pets, and other distractions and tripping hazards are out of the house or don’t have access to your soaping space. Always soap in a well-ventilated area.
COLOR PREP: Disperse 1 teaspoon of Chrome Green pigment and 1 teaspoon of Titanium Dioxide into 2 tablespoon of liquid oil each (we like Sweet Almond or Sunflower).
ONE: Slowly and carefully add the lye to the water, and stir until clear. Set aside to cool. If you’d like a harder bar of soap that lasts longer in the shower, you can add Sodium Lactate to the cooled lye water. Use 1 teaspoon of Sodium Lactate per pound of oils in the recipe.
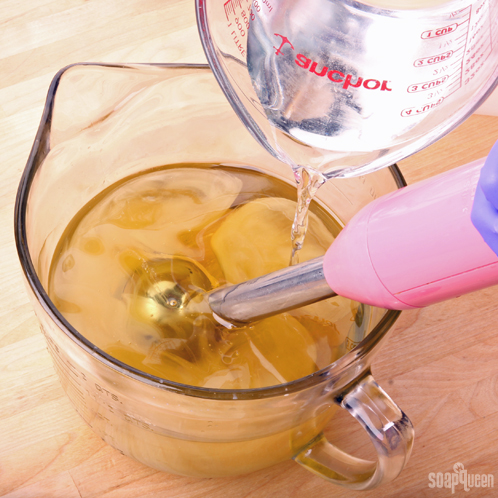
TWO: Melt and combine the Canola, Castor, Cocoa Butter, Olive and Rice Bran oils in a large glass container. Once the lye water and the oils have cooled to 130 degrees or below (and are ideally within 10 degrees of each other), add the lye water to the oils and stick blend until thin trace.
THREE: Pour off about 2 cups (16 oz.) into two separate containers. Each container should hold about 8 oz. of soap each. Add ½ teaspoon of dispersed Chrome Green Pigment to each container.

FOUR: Add about one-third of the fragrance to the batter (estimating is okay). Mix in with a wire whisk or spoon.

FIVE: Because this is a palm-free recipe, it will take longer to reach a thick trace. Achieving thick trace is important in this recipe tp keep the different colors of the layers separate. Using a stick blender, blend one container of green batter for 1 – 3 minutes until it reaches the consistency of pudding.

SIX: Slowly pour the green soap into the mold until you have a layer that is approximately 1/2″ deep across the bottom.

SEVEN: Add another one-third of the fragrance oil to the uncolored soap and stick blend to fully incorporate the fragrance. Add 3 tsp. dispersed Titanium Dioxide, sticking blending again to reach a thick trace.

EIGHT: Slowly pour the white soap into the mold. You may want to pour over a spoon or spatula to ensure that the layers don’t swirl and mix together. Concentrate your pouring down the center of the mold to create the curve in the first layer of green The concept here is to create a thicker white layer on top of the green since that is where you will apply your soap stamp once your soap has set up and is unmolded.

NINE: Add remaining one-third of the fragrance oil to the remaining container of green soap. Stick blend until the batter reaches the consistency of pudding (thick trace).

TEN: Gently pour the green soap on top of the uncolored soap. You may want to pour over a spoon or spatula so as to not break through the layer below. To give the top of the soap texture, pour up and down zig-zagging down the length of the mold. Then, pour horizontally down the length of the mold. Try pouring in loops or using a small spatula to create interesting texture.

ELEVEN: Dust the top of the soap with Sparkle Gold Mica. Then, still wearing your goggles, close your eyes and gently blow on the mica to lightly press it into the soap. Because mica is so fine, this part can get messy. Be sure to have paper towels and isopropyl alcohol on hand to clean up any mica that sticks to the mold or your work surface. Unmold after 3-4 days, and allow to cure for 4-6 weeks.

TO STAMP: After waiting 3 – 4 days to unmold the soap, cut the loaf into bars that are about an inch wide. Keep in mind that because this is a palm-free recipe, the bars may still be too soft to stamp immediately after cutting. If they’re gummy or sticky, let them sit overnight to firm up.
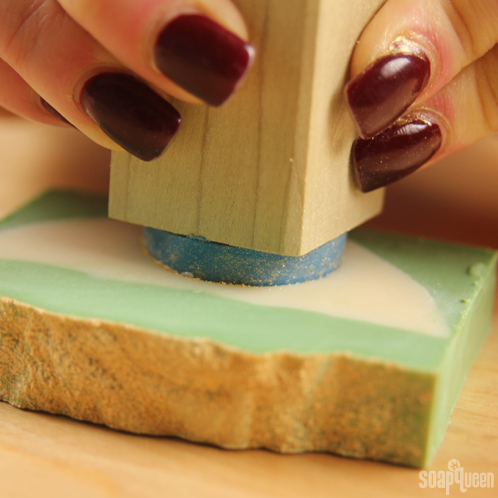
ONE: Wet your fingers with 99% isopropyl alcohol and rub them on the raised part of the stamp. This will help the mica stick to the stamp.
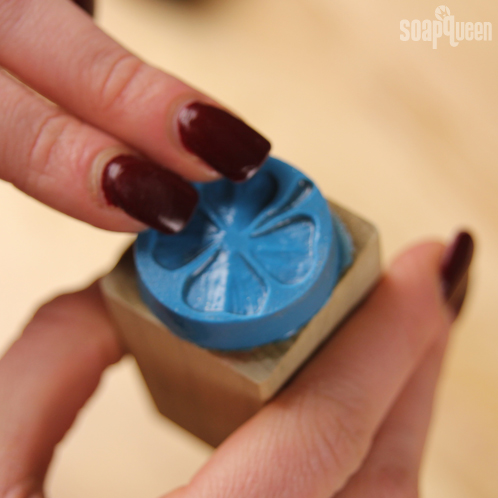
TWO: Gently press the stamp into the gold mica and tap off any excess. Gently blowing on the stamp will also help to get rid of excess mica (you may want to wear goggles to protect your eyes).
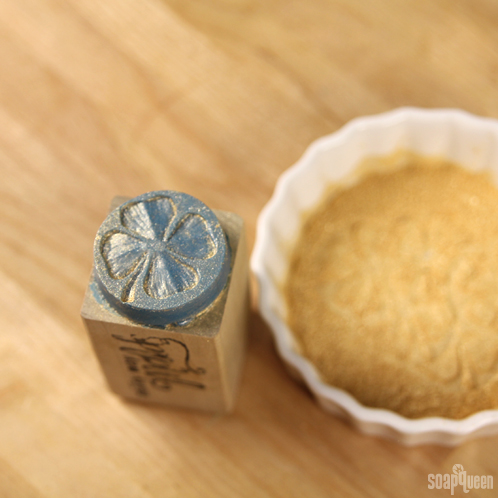
THREE: Press the stamp into the center of the soap. If the soap is hard, you may want to use a mallet with a rubber head to tap the stamp into the soap.
Wait 4 – 6 weeks for the soap to fully cure and your St. Patty’s Day soap is ready to use or give away.


I plan to try this soap. My question is on the soap stamp………can I use any rubber stamp like from stampin up when I used to design cards and scrapbooking………..I have like 500 of them. Thanks for the help
Andrea Sayer
Hi Andrea!
We haven’t worked with those stamps so I’m not 100% sure! I would recommend stamping a small end piece just to be sure.
We also have great consistent results with our soap stamps. You may like them. 🙂
Stamps: https://www.brambleberry.com/Soap-Stamps-C113.aspx
-Kelsey with Bramble Berry
Could you possibly add some sodium lactate to this, to help harden the bars? If yes, when do you suggest adding it? If SL is not recommended, could you discount the water any? As you might suspect, my CP soaps have been really soft lately & we are headed into a very humid season here, so I am looking for recipes that allow the addition of sodium lactat to help harden up my loafs due to some sticking issues when unmolding. I am also wondering about using my oven @ it’s lowest setting for an hour after pouring into molds, are there any hard, steadfast rules as to when to/ not to use the CPOP method? Thanks for any advice on this.
Hi Carolyn!
You can certainly add Sodium Lactate to this recipe, we love using it in our soap! You can add it to just about any soap recipe 🙂 You can add Sodium Lactate to the cooled lye water. Use 1 teaspoon of Sodium Lactate per pound of oils in the recipe.
There aren’t really any hard rules about using the CPOP method. CPOP is great when you want your soap to go through gel phase, so it all depends if that’s what you’re going for 🙂 Here is a tutorial that you may find helpful!
CPOP Swirls: http://www.soapqueen.com/bath-and-body-tutorials/cold-process-soap/hot-process-series-cpop-swirls/
-Amanda with Bramble Berry
I did not stamp this soap, but I made it exactly as the instructions said and it is a wonderful bar and the raspberry porter FO Was a great choice.
Hi ML!
I’m so happy to hear you enjoyed making this soap! If you get any photos, we would love to see them on our Facebook page 🙂
-Amanda with Bramble Berry
Thanks for sharing another nice tip…
The soaps look great!
Thank you. It cured out really lovely and the scent is getting nicely subtle.
I love this. It is very pretty.
Thank you – I thought the colors turned out nicely. =)
I love this! It’s really fun to learn new techniques, but it is often the simple things that add real beauty and pizazz to a craft!
Stamping is so fun to do – and the mica dusting really adds to the glamor factor.