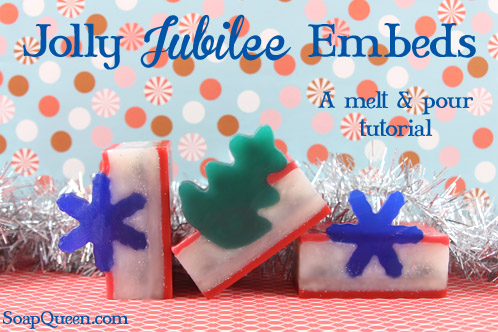
If you plan on giving soapy presents for the holidays, we highly recommend ordering all your supplies now to ensure you get everything on time! To help you brainstorm fun holiday crafts, we gave our Valentine’s Day Embedded Hearts tutorial a jolly little twist. The technique is similar, but for this project we’re giving you a free PDF template so you can create your own tree and snowflake embeds from scratch. Not only that, this project uses two fantastic fragrances — Woodland Elves and Sleigh Ride – for a quintessential holiday scent.
What You’ll Need:
43 oz. Clear Melt and Pour Base
.3 Woodland Elves Fragrance Oil
½ tablespoon Iridescent Glitter
Super Pearly White Color Block
Hydrated Chrome Green Color Block
Click here to add everything you need for this project to your Bramble Berry shopping cart!
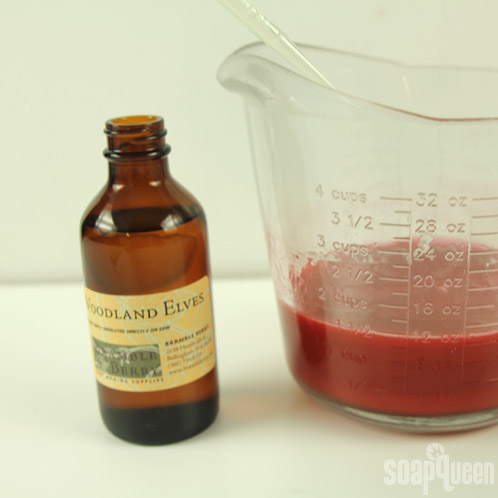
ONE: Cut and melt 12 oz. of Clear Melt and Pour base on 30 seconds microwave bursts. Shave off chunks of the Perfect Red Color Block (it’s a WYSIWYG, so add more chunks for a darker red) and fragrance with .2 oz of Woodland Elves Fragrance Oil. Use a spoon to fully incorporate the fragrance and color into the soap base.
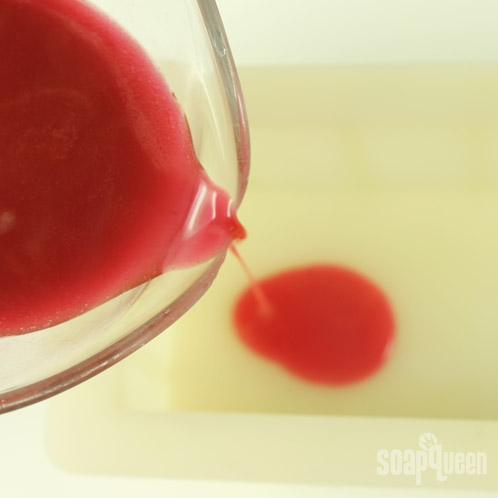
TWO: When you’ve finished mixing, pour about 4 oz. of soap into the Silicone Loaf Mold (the layer should be about ¼ an inch thick). Spray with 99% Isopropyl Alcohol to disperse bubbles. Set the mold with the soap aside to dry.
THREE: Cut and melt 23 oz. of Clear Melt and Pour Base on 30 seconds microwave bursts. Fragrance with .4 oz. of Sleigh Ride Fragrance Oil. Color the soap by shaving off chunks of the Super Pearly White Mica Color Block (again, it’s a WYSIWYG! The goal here is to just add a slight shimmer to the soap).
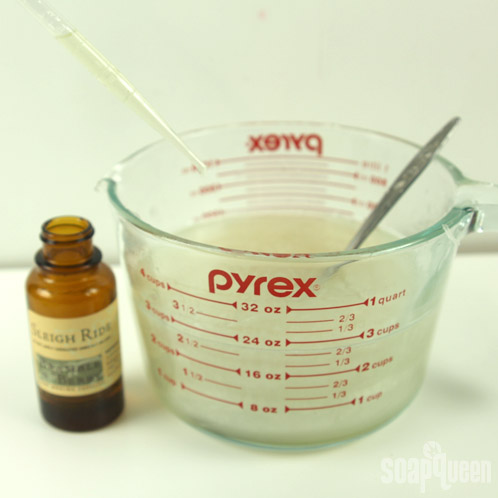
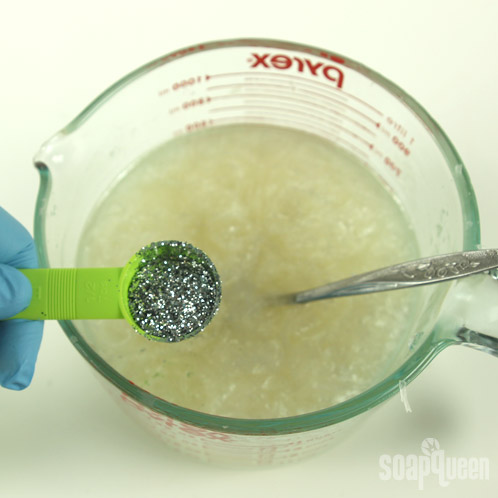
FOUR: Give the mixture a good stir to fully incorporate the fragrance oil and the color block into the soap base, and then add ½ tablespoon of glitter.
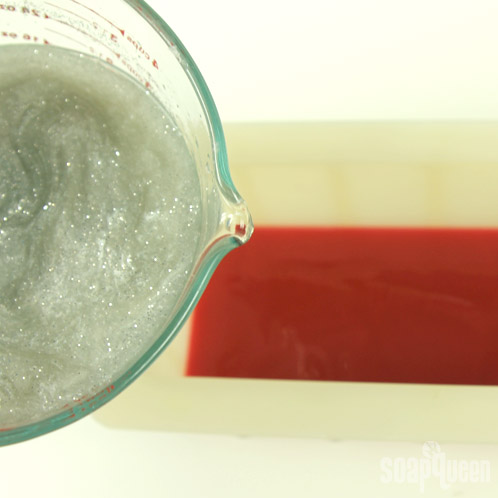
FIVE: Once the red soap layer has hardened and the silver soap has cooled to 130 degrees or below, pour a layer of silver soap into the Silicone Loaf Mold. Pour about 4 oz., or enough to occupy ¼ inch, into the mold. Spray with 99% Isopropyl Alcohol and set the loaf mold aside.
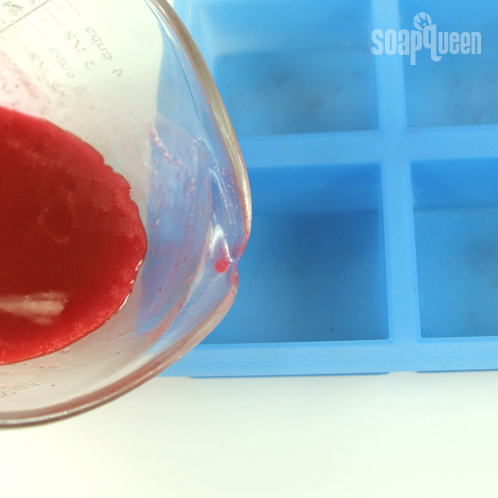
SIX: By now the red soap may have hardened, so re-melt it on 30 second microwave bursts. Once the soap has liquefied, fill two of the cavities in the 12 Bar Square Silicone Mold with 2 oz. of soap each. Spray with 99% Isopropyl Alcohol. These slabs will form the supports that will hold up your embeds.
SEVEN: To make the embeds, cut and melt 8 oz. of Clear Melt and Pour base in the microwave on 30 second bursts. Fragrance with .1 oz of Woodland Elves Fragrance Oil. Once the soap has been melted, split it in half into another container, so you have about 4 oz. in each container. Color one container with the Hydrated Chrome Green Color Block and the second container with the Ultraviolet Blue Color Block.
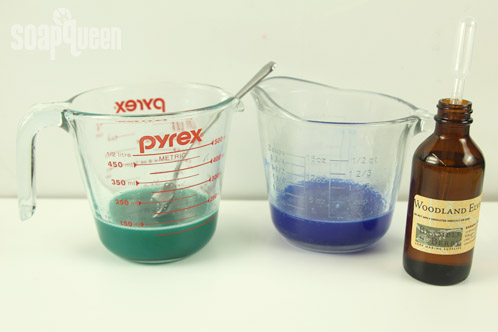
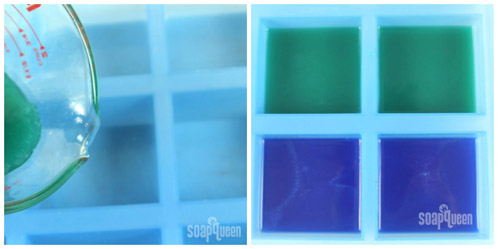
EIGHT: Once you fully incorporated the colors and fragrance into both containers of soap base, fill two of the 12 Bar Square Silicone Mold with each color. Fill each cavity with about 2 oz. of soap. You should end up with two, 2 oz. green squares and two, 2 oz. blue squares.
NINE: By now the red soap should be hardened. Unmold the soap and cut it into strips that are 1 inch wide by 2 inches long.
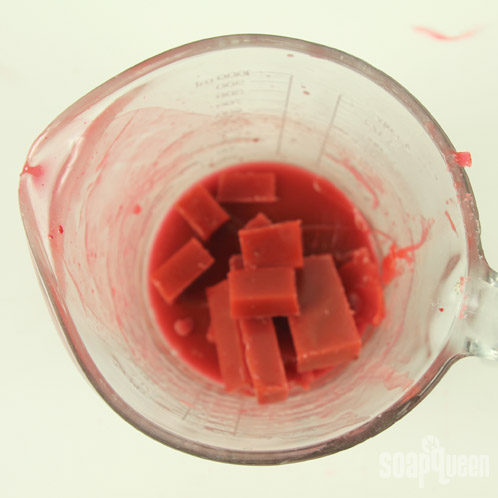
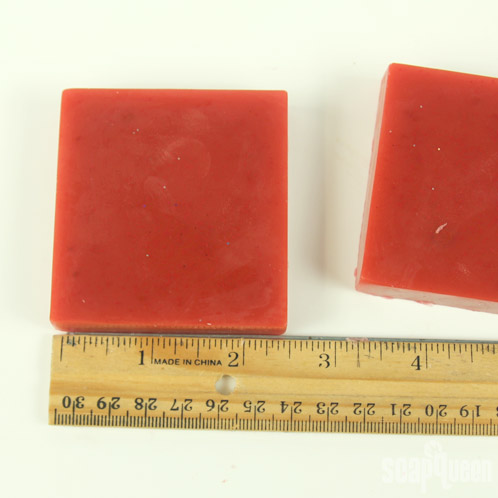 You’ll have some leftover scraps of red soap, but be sure to save them for later! Place them back in the container of red soap and remelt them later to pour the final layer on the loaf.
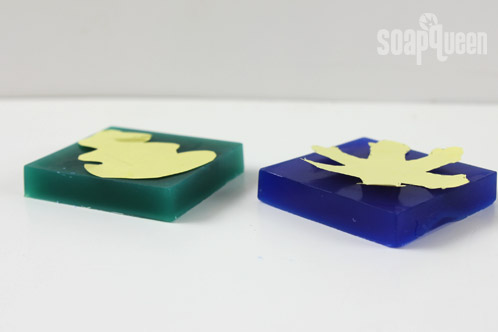
TEN: Unmold the green and blue soap and cut out the Christmas Tree and Snowflake shapes from the template. Place the templates over the soap, and use a clean up tool to trace their outlines into the soap. Then, using an exacto knife, cut out the outline of the shapes.
ELEVEN: After the shapes have been cut out, place the supports you made in step 9 between each shape. This will help prop them up.
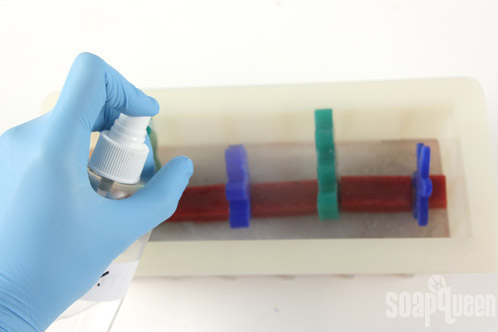
TWELVE: By now you may need to remelt your silver soap. Place it in the microwave for 30 second bursts to fully melt it. Once it has cooled to around 130 degrees, pour the entire container of silver soap into the mold.
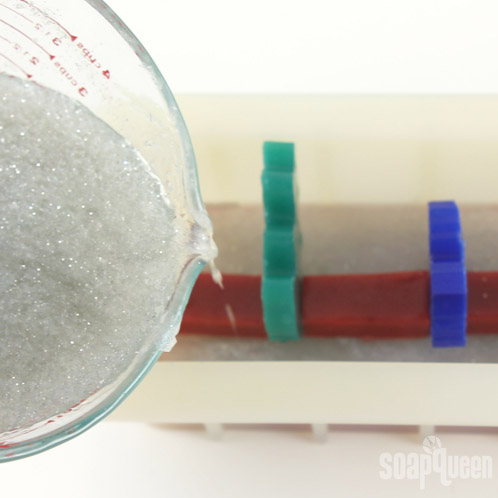
TWELVE: Once the silver soap has formed a thick skin, reheat the red soap on 30 second microwave bursts. Once it has cooled to around 130 degrees, pour it over the silver soap.
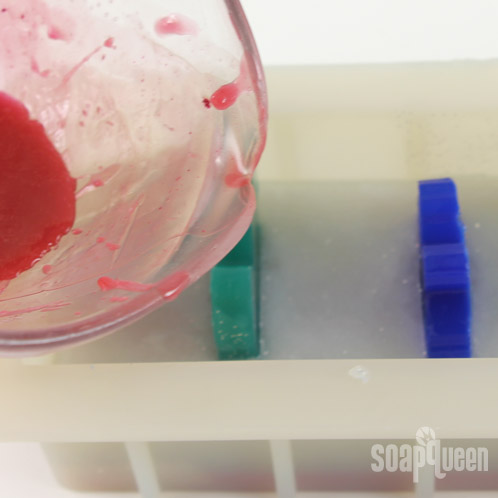
Let your soap sit for 24 – 28 hours before cutting. Once it’s been removed from the mold, use a soap cutter to cut right up against the embed so it is front and center in the final soap. You may need to use a clean up tool to help scrape off extra soap.

- 43 oz. Clear Melt and Pour Base
- .3 Woodland Elves Fragrance Oil
- .4 Sleigh Ride Fragrance Oil
- ½ tablespoon Iridescent Glitter
- Perfect Red Color Block
- Super Pearly White Color Block
- Hydrated Chrome Green Color Block
- Ultraviolet Blue Color Block
- Tree and Snowflake pattern
- 10" Silicone Loaf Mold
- 12 Bar Square Silicone Mold
- Cut and melt 12 oz. of Clear Melt and Pour base on 30 seconds microwave bursts. Shave off chunks of the Perfect Red Color Block (it’s a WYSIWYG, so add more chunks for a darker red) and fragrance with .2 oz of Woodland Elves Fragrance Oil. Use a spoon to fully incorporate the fragrance and color into the soap base.
- When you’ve finished mixing, pour about 4 oz. of soap into the Silicone Loaf Mold (the layer should be about ¼ an inch thick). Spray with 99% Isopropyl Alcohol to disperse bubbles. Set the mold with the soap aside to dry.
- Cut and melt 23 oz. of Clear Melt and Pour Base on 30 seconds microwave bursts. Fragrance with .4 oz. of Sleigh Ride Fragrance Oil. Color the soap by shaving off chunks of the Super Pearly White Mica Color Block (again, it’s a WYSIWYG! The goal here is to just add a slight shimmer to the soap).
- Give the mixture a good stir to fully incorporate the fragrance oil and the color block into the soap base, and then add ½ tablespoon of Silver Glitter.
- Once the red soap layer has hardened and the silver soap has cooled to 130 degrees or below, pour a layer of silver soap into the Silicone Loaf Mold. Pour about 4 oz., or enough to occupy ¼ inch, into the mold. Spray with 99% Isopropyl Alcohol and set the loaf mold aside.
- By now the red soap may have hardened, so re-melt it on 30 second microwave bursts. Once the soap has liquefied, fill two of the cavities in the 12 Bar Square Silicone Mold with 2 oz. of soap each. Spray with 99% Isopropyl Alcohol. These slabs will form the supports that will hold up your embeds.
- To make the embeds, cut and melt 8 oz. of Clear Melt and Pour base in the microwave on 30 second bursts. Fragrance with .1 oz of Woodland Elves Fragrance Oil. Once the soap has been melted, split it in half into another container, so you have about 4 oz. in each container. Color one container with the Hydrated Chrome Green Color Block and the second container with the Ultraviolet Blue Color Block.
- Once you fully incorporated the colors and fragrance into both containers of soap base, fill two of the 12 Bar Square Silicone Mold with each color. Fill each cavity with about 2 oz. of soap. You should end up with two, 2 oz. green squares and two, 2 oz. blue squares.
- By now the red soap should be hardened. Unmold the soap and cut it into strips that are 1 inch wide by 2 inches long. You’ll have some leftover scraps of red soap, but be sure to save them for later! Place them back in the container of red soap and remelt them later to pour the final layer on the loaf.
- Unmold the green and blue soap and cut out the Christmas Tree and Snowflake shapes from the template. Place the templates over the soap, and use a clean up tool to trace their outlines into the soap. Then, using an exacto knife, cut out the outline of the shapes.
- After the shapes have been cut out, place the supports you made in step 9 between each shape. This will help prop them up.
- By now you may need to remelt your silver soap. Place it in the microwave for 30 second bursts to fully melt it. Once it has cooled to around 130 degrees, pour the entire container of silver soap into the mold.
- Once the silver soap has formed a thick skin, reheat the red soap on 30 second microwave bursts. Once it has cooled to around 130 degrees, pour it over the silver soap.
- Let your soap sit for 24 – 28 hours before cutting. Once it’s been removed from the mold, use a soap cutter to cut right up against the embed so it is front and center in the final soap. You may need to use a clean up tool to help scrape off extra soap.



Hello. I really loved the pics of these soaps so I decided to make them. They did not turn out very good. The biggest problem was getting the soap off the embeds. How do you do that? Also, I think it was way too much glitter. Was there a mistake in the recipe? It was a great idea and one which I wanted to use. Can you offer any suggestions? It would be very much appreciated.
Hi Shirley!
I’m sorry you didn’t have good luck with this recipe! The amount of glitter is a personal preference, we went with a little more :). Could you tell us a little more about what you had trouble with? We would really like this soap to turn out for you!
-Amanda with Bramble Berry
Yes, I see that the amount of glitter could be a personal preference. My real problem was cutting it so that the embed did not have the last pour of clear soap on it. Maybe I should have asked what tool you used to cut the soap? I couldn’t get a close enough cut to get to the embed without leaving some clear soap on it.
Hi Shirley!
Oh, I see what you’re saying now! :). To achieve this look we cut with an x-acto knife, and used a clean-up tool to scrape off the white over the embed. I hope this helps! 🙂
Clean Up Tool: https://www.brambleberry.com/Clean-Up-Tool-P4758.aspx
-Amanda with Bramble
Thank you, Amanda.
I have a question: When you make these tutorial posts on wordpress how do you get multiple images into a single post? When I try to do it it ignores all my other photos and only shows one! Thanks!
Hi Leanna!
We actually use an outside hosting source for our photos, so they aren’t all uploaded into WordPress itself. I would suggest looking into Photobucket or Flickr for your blog! =)
-Becky with Bramble Berry
What a great idea, I love it!
Hi Monica!
Thank you so much for checking out this tutorial! If you get a chance to try it out, be sure to give us your feedback. =)
Happy Soaping!
-Becky with Bramble Berry