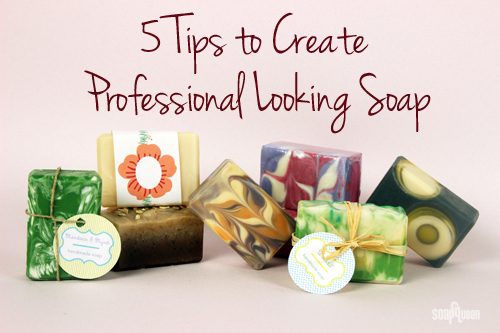
 When making soap to sell or give as a gift, it needs to look polished and professional . Unfortunately, not every batch comes straight out of the mold this way! Whether the soap has a bit of soda ash or uneven edges, there are several tricks to making each and every bar picture perfect. Here are my top five finishing touches to create soap that looks professional and finished.
1. Steam Your Soap
Soda ash occurs on soap due to the natural process of unsaponified lye reacting with carbon dioxide in the air. The result is a thin white layer on the top of the soap. While perfectly safe to use, soda ash can be considered an aesthetic issue. To learn more about soda ash and how to prevent it, click here.
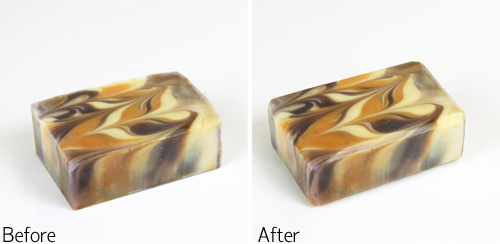
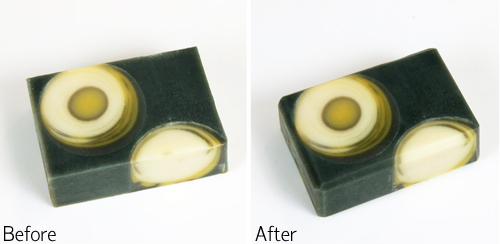
Steaming soap is one of the more effective ways to remove soda ash, especially when the soda ash is deep within the bar. As you can see from the soaps below, steaming makes a huge difference!
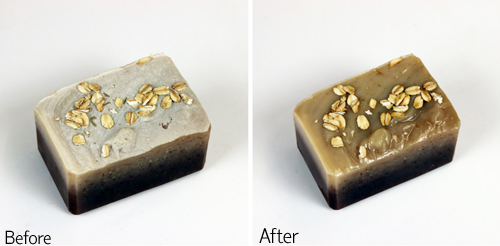
In the Instagram video below, you can see that steaming your soap is incredibly easy. You can steam soap before or after it has been cut. Simply hold the steamer directly over the top of the soap, and move the steamer around for several seconds. You can see the soda ash disappear before your eyes! The soap may become soft, so it’s best to place the soap on a hard surface while steaming and allow to dry before moving.
The Black, White and Gold All Over Soap gets a “steam treatment” to get rid of a thin layer of soda ash.
2. Wash Your Soap
Yes, you heard that right…you can wash your soap! This is a great alternative to steaming if you do not have a steamer available. Wrap a nylon around your finger, and run your finger under cold water. Gently scrub away the soda ash using the nylon and water. You can also run a paper towel under cold water, and use the paper towel to gently “wash” away the soda ash.
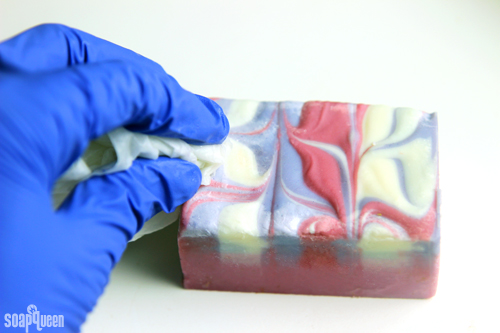 Choosing between steaming and washing will depend on the style of soap. For example, it would be difficult to wash a bar with a texture top, such as the Juicy Orange and Sweet Rose Soap. Steaming would work much better!
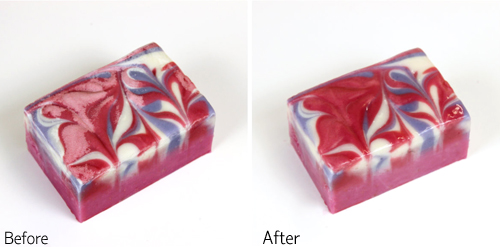
3. Bevelling Your Soap
Using a beveller creates smooth edges on the soap, helping it to look crisp and clean. Simply slide the bar of soap across the blade in the center of the beveller. Doing so shaves off the corner, producing a small flat edge. Click play on the video below to see the Soap Beveller/Shaver in action!
It is best to use the beveller after the soap has been cut and has cured for about a week. If the soap is too soft, the edges will not be clean. If the soap is extremely hard, running the soap across the blade smoothly becomes more difficult. Some soapers like to save the shavings to incorporate into other soapy projects. They would work great for the technique used in the Cherry Blossom Glitter Cold Process tutorial!
While the beveller does not drastically change the soap like steaming or washing, the before and after examples below show how a subtle change can make a huge difference!
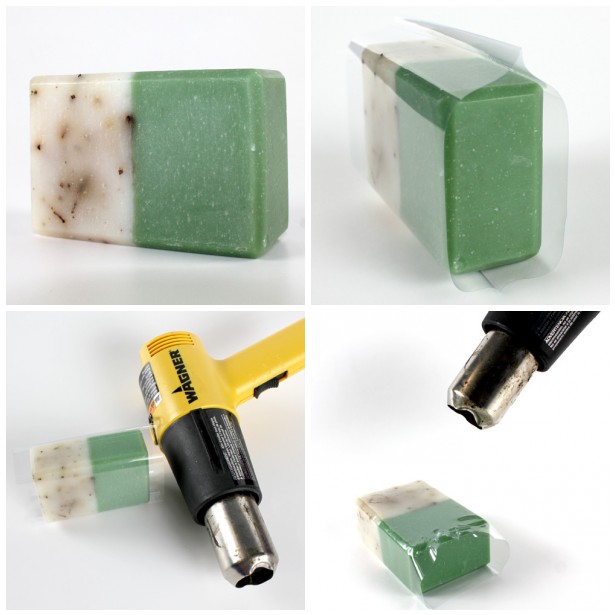
4. Shrink Wrap Your Soap
Packaging your soap is an easy way to create a professional look. There are countless ways to package your soap, and deciding on what method may depend on your own style/branding, the bar of soap, and how protective you’d like the packaging to be.
One option is to shrink wrap your soap using Shrink Wrap Soap Bands. Simply slide the soap into the band, apply heat from a heat gun, and the bands shrink down to fit your soap. They work great for soap created in Birchwood Molds (9 Bar, 18 Bar and 36 Bar), 10″ Silicone Loaf Mold and wooden loaf molds. Not only do they create a polished look, they protect your soap!
 For bars of all shapes, it’s possible to use plastic wrap from the grocery store to shrink wrap soap. This packaging Soap Queen TV Episode shows you how! Other easy and professional looking packaging options include using soap boxes, organza bags, jute bags or wrapping paper! For even more packaging inspiration, check out the Make it Monday: Packaging album on Facebook.
5. Label Your Soap
Adding a sleek and polished label not only tells recipients about the soap, a label instantly makes a bar look professional and gift-worthy. Labels can come in the form of cigar bands or hanging tags. Bramble Berry has numerous downloadable templates to make adding labels to a wide array of products extremely simple. If you’re looking for information on how to label ingredients for cold process soap, this post has you covered.
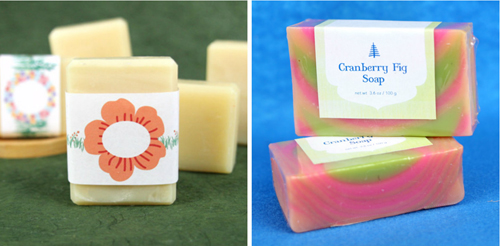 (Above, left to right) The Summer Cigar Bands completely transform the simple soap created using the Beginner’s Cold Process Kit. The colorful Funnel Pour Soap looks polished with both shrink wrap and soap labels.
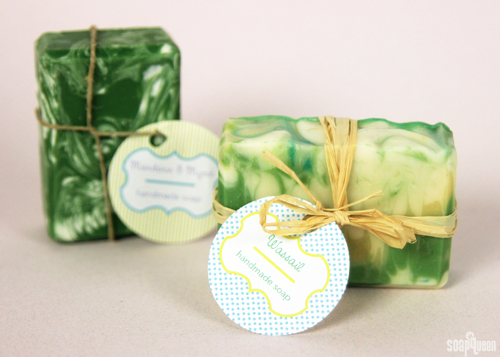 Labeling your soap is a lot of fun, because there are so many creative labeling possibilities. One classic option is to use a ribbon, piece of yarn, or twine to tie a hanging label onto your soap. The result is clean, polished and super cute.
What is your favorite way to create a polished and professional bar of soap? I’d love to hear your tips and tricks!
