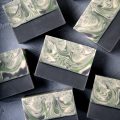
This free flowing, lava like design inspired the name for this project. Magma Soap is an intricate project with so many possibilities. I’ve combined melt and pour soap with cold process soap to create a uniquely fascinating bar.

Cold Process Advice: If you have never made cold process soap before, I strongly suggest getting a couple of basic recipes under your belt before diving in, as this is an advanced technique that requires you to be organized and move quickly. Check out Soap Queen TV on Cold Process if you want to get started with CP. It’s a 4 part series that will take you through the basics (and be sure to watch the episode on Lye Safety). Bramble Berry also has some helpful reading tools for you bookworms out there. Are you ready to take on this advanced recipe? Then let’s jump in!
Ingredients
3.1 oz. Castor Oil
17.9 oz. Coconut Oil
21.2 oz. Olive Oil
10.6 oz. Palm Oil
16 oz Clear Melt and Pour
7.7 oz. Lye
17.4 oz. Distilled Water
.5 oz. Moroccan Mint Fragrance Oil, 1 oz. Spearmint Essential Oil, 3 oz. Energy Fragrance Oil (blend oils together)
Buy everything for this project in the click of a button! ![]()
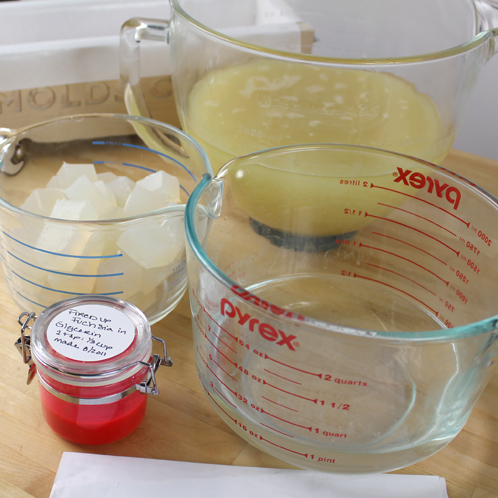
Mold Prep: Line your 5 pound Wood Log Mold with freezer paper (shiny side up).
Suit Up: Put on your gloves, goggles and long sleeve shirt!
ONE: Carefully combine your water and lye and mix well. Always remember to add the lye to the water and not the other way around. Stir until mixture becomes clear and make sure you are in a well ventilated area. Set the lye water aside to cool.
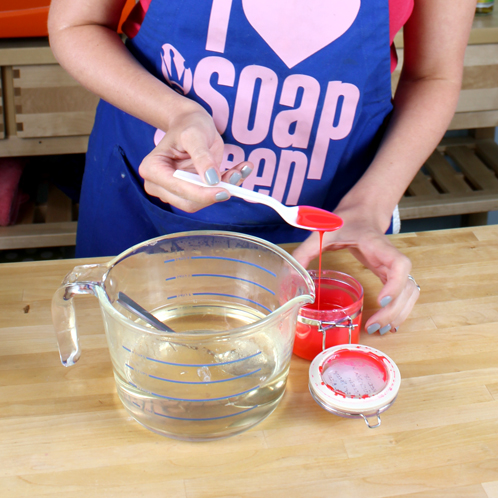
TWO: Melt 16 ounces of clear melt and pour soap in the microwave on 30 second bursts until fully melted. Then mix in your Bubble Gum colorant and fragrance oil. We dispersed Bubble Gum colorant in glycerin first (1 Teaspoon of colorant to 1/3 cup of glycerin). Add 2 Teaspoons of the colorant mixture and 1/2 oz of your fragrance oil blend. Give it a good mix and let it cool down to 135-140 degrees.
TIP: You may want to cover the melt and pour soap with plastic wrap so it stays warm and doesn’t form a skin on top. This totally depends on the temperature of the soap when it comes out of the microwave- you can make a game time decision.
THREE: Melt and combine the Palm Oil, Coconut Oil, Olive Oil and Castor Oil. Give the oils a quick pulse with the stick blender to mix.
FOUR: Slowly add the lye water to your oil mixture. Blend with a stick blender until you reach a light trace.
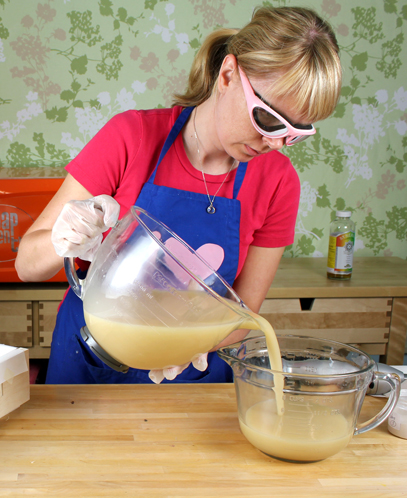
FIVE: Separate the batch into two equal parts. If you know me you’ll know that I eyeballed the measurement. Feel free to measure exactly if inclined.
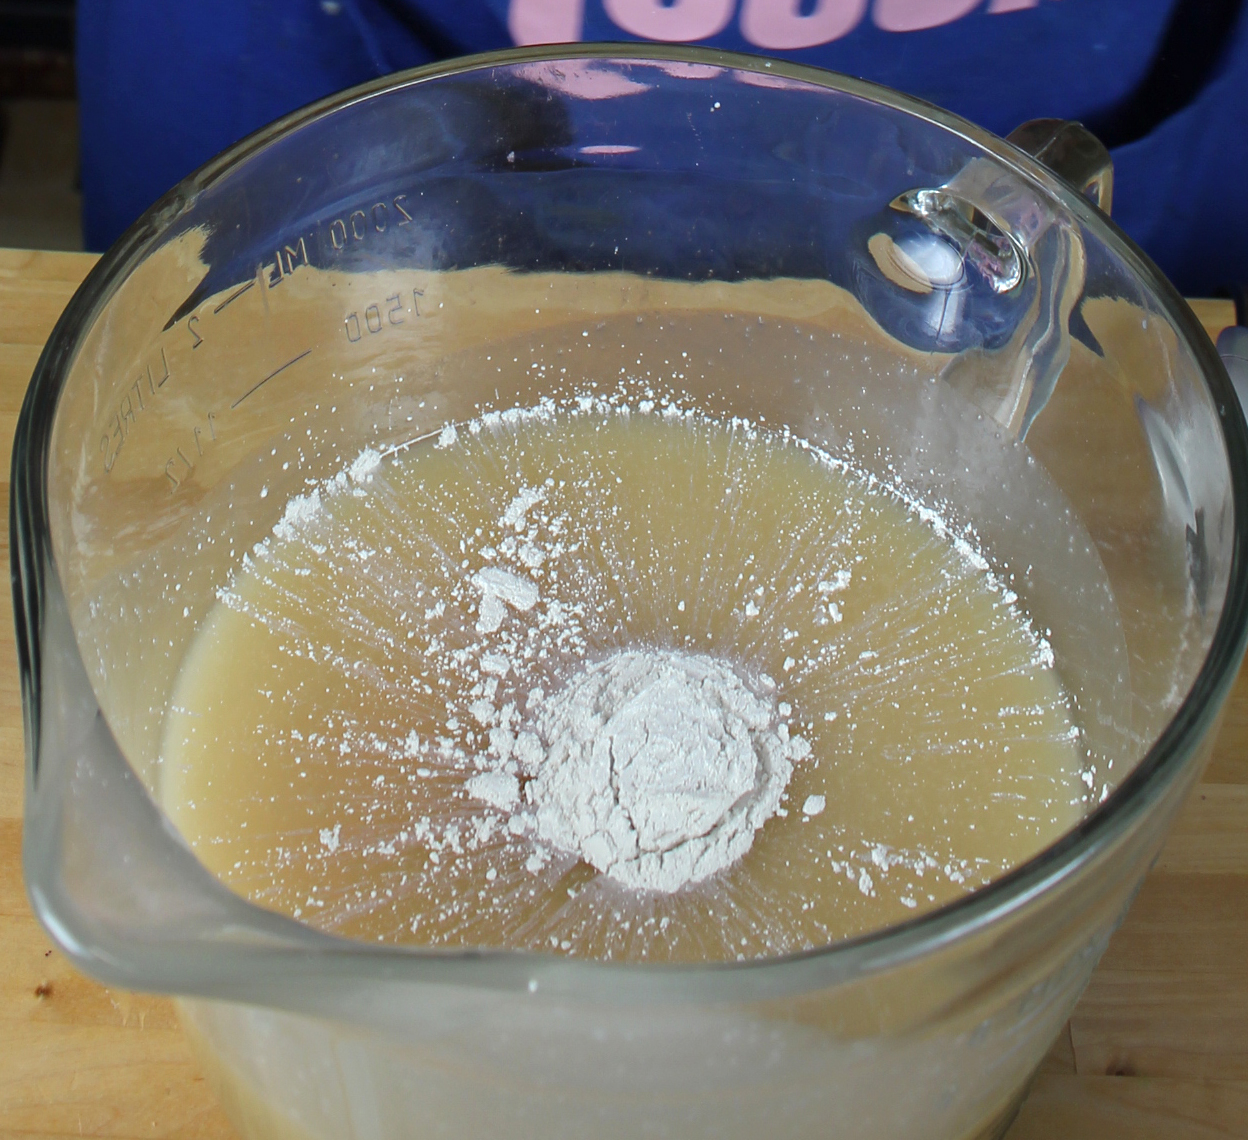
SIX: Add 1/2 Tablespoon of the Super Pearly White Mica to the first half of the soap batter. Mix with your stick blender until full incorporated.
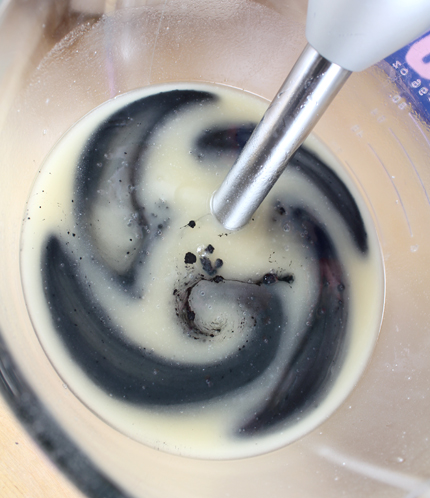
SEVEN: Add a heaping 1/4 Teaspoon of Activated Charcoal to the other half of the soap batter. Mix with a stick blender until the charcoal is fully incorporated. Because I mixed the light colorant first you won’t need to wash your stick blender. This is such a handy trick that I use all the time. Get me out of doing dishes and I’m in!

EIGHT: And now for something completely different (excuse my Monty Python quote). It’s time to swirl our melt and pour soap in with the cold process using a basic linear swirl technique. Pour your black soap in to the mold in a zig zag motion (up the mold, down the mold and up again). Followed by the pink melt and pour (you can barely see it in the first picture, a lot of it went to the bottom). Next up is the white soap in the same zig zag pattern. Repeat this pattern until you have about about an inch left in the top of the mold. Work as fast as you can!
Note: You’ll have a little bit of CP soap left over so have an extra mold ready. I made a little extra to give myself some leeway for the project. It never hurts to have extra but you never want to run out.
NINE: Use a spatula to swirl the soap back and forth in the mold. The texture is very bizarre because the melt and pour soap is cooling faster than the cold process soap. So it is important to work as quickly as you can so you can still swirl the batch.
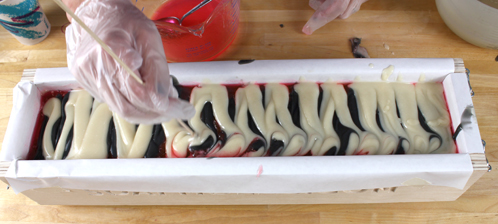
TEN: Once you’ve swirled the entire soap loaf it’s time to make the top look beautiful. Pour the black soap in the opposite direction that you did earlier (so you’re going to go back and forth 13 or 14 times the width of the mold. Repeat with the white soap on top of the black soap. Run your skewer through the top of the soap the long way to create a swirled look on the top.
TIP: Put the soap in the fridge right away so it doesn’t go through gel phase. You don’t want the hot soap batter to melt the melt and pour and ruin our beautiful swirls.
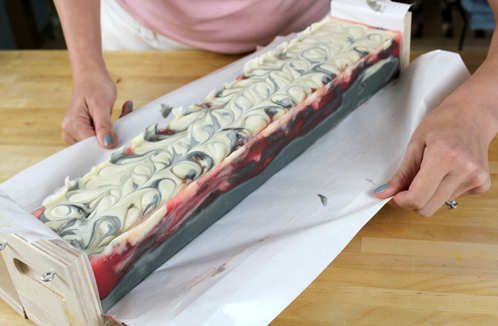
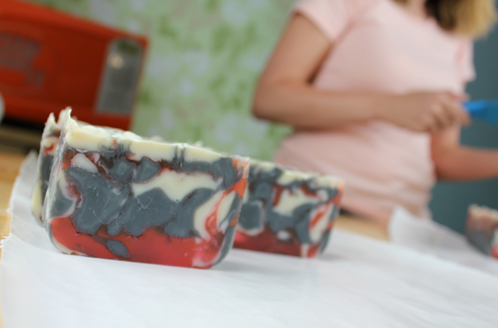
ELEVEN: Unmold after 24 hours, cut the soap and get it on the curing rack to get some oxygen flowing.

Thank you for another great recipe!
I was wondering if I could use clear MP soap that has cosmetic glitter in it?
Also, I recently made a clear w/ glitter MP soap that had embeds from a Cocoa Butter CP soap batch.
They have cured for a few weeks, and so far they look great.
Thanks!
Jody 🙂
Good morning, Jody!
You can absolutely use your clear soap that has cosmetic glitter in it, that sounds like so much fun and we can’t wait to hear (and see) more about it. If you get any pictures, be sure to share them with us on Bramble Berry’s Facebook page. 🙂
Happy Soaping!
-Becky with Bramble Berry
https://www.facebook.com/BrambleBerry
I had to laugh, I’m reading instructions and “suit up” put on your long sleeves yet I don’t see any long sleeves. At any rate, really cool soap design.
Sometimes, the soap lab gets so hot (over 100 degrees in the summer) that I trade off with potential lye burns on my arms for not passing out from heat stroke. =) It’s a trade-off that I’m willing to make in the hottest part of summer =) But, it’s definitely not a best practice so always go with what you feel most safe and comfortable with. For many soapers, that is long sleeves and sweating, even in the midst of summer.
Very interesting! I was just wondering today if I could combine MP and cold process…so I googled it and found this. I’m wondering about the ‘fridge’ though – doesn’t it interfere with sapponification of the cold process soap?
Thanks for this great site!
Jan
Hi Jan!
What a great question! Putting your soap in the fridge isn’t actually going to interfere with the saponification process, it only helps to stop gel phase (which is what you want in this recipe). Gel phase simply refers to a part of the saponification process where the soap gets extremely warm and gelatinous (up to 180 degrees).Soap that has not gel-phased is still soap.
In this particular recipe, you want to avoid your soap getting super hot, because it can melt the M&P soap and ruining the beautiful swirls that you have created. We use this cooling technique in many of our milk soap recipes to help prevent the milk from scorching and burning and having a failed batch of soap. I hope this helps! Let me know if you have any other questions. =)
-Becky with Bramble Berry
I just did mine with pink clay and blue mp’ came out great but the mp is sweating heavily, is it due to the humidity in my country. I have left it dry in front of the fan.
Hi Anita!
We are so happy to hear that you tried this recipe out. If you have any pictures, we’d love to see how they turned out. You can share them with us on Bramble Berry’s Facebook page:
https://www.facebook.com/BrambleBerry
If your soap is still heavily sweating, I’d suggest leaving it in front of that fan as well as in a cool and dark room. If you try this recipe again, you can always use our Low-Sweat M&P Bases that come in clear and white:
LCP White Melt And Pour Soap:https://www.brambleberry.com/LCP-White-Melt-And-Pour-Soap-P3190.aspx
LCP Clear Melt And Pour Soap:https://www.brambleberry.com/LCP-Clear-Melt-And-Pour-Soap-P4383.aspx
-Becky with Bramble Berry
P.S. If you have any silica packets, you can put the soap in a box with those and that should help with the sweating a bit.
Thank you, I don’t think they have low sweat MP in Malaysia, but the silica packets is a GREAT idea.
Good morning, Anita!
Bramble Berry actually ships internationally if you ever want to purchase our Low-Sweat Bases. If you have any questions about shipping costs or ordering, you can contact customer service at [email protected]. 🙂 Happy Soaping!
-Becky with Bramble Berry
I noticed that the electric bubble gum color is not the actual color you used. Was this a mistake or should we use “fired up fuchsia”? This technique looks very cool and can’t wait to give it a try!
Hi Kelly!
We did use Fired Up Fuchsia, but you can also use Electric Bubble Gum and it would turn out fabulously!
Fired Up Fuchsia: https://www.brambleberry.com/Fired-Up-Fuchsia-Colorant-P4967.aspx
Electric Bubble Gum: https://www.brambleberry.com/Electric-Bubble-Gum-Colorant-P4966.aspx
-Becky with Bramble Berry
P.S. You have great eagle eyes! We just updated the link in the post =)
Courtney with Bramble Berry
Haha! Funny, my hubby says the same thing! Lol I can’t wait to try this! I love your tutorials.
Thanks Becky! 🙂
Is there anyone who can answer this question.? 🙂
Thank you.
We always appreciate your questions, Natalia! We answer blog questions during office hours, which are Monday-Friday, 9-4 P.M! 🙂
-Becky with Bramble Berry
As I have never made a MP soap, I don’t really understand the role of Electric Bubble Gum Colorant. Is this really important to be able to make this MP&Cp soap?I was thinking of replacing it by another colorant which I use for my CP soaps. Is this possible? Thank you!
Hi Natalia!
The Electric Bubble Gum is actually what helps to make that fun bright red color in this soap. But, it isn’t necessary and you can use any choice of colors for your own CP + MP = Magma Soap! 🙂
-Becky with Bramble Berry
Thank you for sharing your wonderful work. I would like to know where can I buy those beautiful batter bowls.
I’ll be happy to hear any suggestions/links [email protected]
Thank you.
I LOVE those bowls so much. You can actually find them on Bramble Berry’s website and we LOVE to use it. It fits so many nice recipes in it =)
5 Quart Glass Mixing Bowl with Lid: https://www.brambleberry.com/5-Quart-Glass-Mixing-Bowl-with-Lid-P5606.aspx
I haven’t run it through a calc, but it doesn’t appear you take a water discount here. Wouldn’t you want to, in order to prevent shrinkage in the CP? CP combined with MP is something that really gets my creative wheels turning, except I’ve never actually tried because I assumed the bars would break apart due to CP shrinkage. If this works I have a ton of ideas!
I didn’t water discount (or if I did, it was a tiny bit like 3-5%) but in the tests a few months ago (before the tutorial), the bars aged really well AND this particular batch has continued aging well. So far, so good! =)
Hi. Is the M&P just to have a different look for the pink layer? Just wondering why you would mix M&P with CP vs. doing it all CP. Based on the name, I was expecting it to be green with pumice 🙂
Thanks!
Robbin
Just for a nifty different look. I think the clear soap is a fun change!
Amazing swirls Anne-Marie! I will have to get some of that Bubble Gum colorant with my next order. Thank you so much for sharing.
This looks great. I’ve attempted this before but only using a very small amount of M&P so looking forward to trying it again. This recipe seems high on fragrance based on .9 to 1 oz per pound of oils and 1 TBSP per pound of M&P. I never thought of combining energy with mint either and it sounds divine.
very cool looking!
How much time do i have to put the soap in the fridge so the melt & pour doen’t keep on melting with the cold process
2-3 hours will definitely do it =)
Wonderful project. Must try this sometime.
Nice. I have wanted to do this for a long time but I live in a humid area and could not leave the soap unwrapped. Maybe I can make it for myself.
If you set a fan to blow in the soap as it cures, you can do this project. It will pull the extra moisture out of the MP soap and away from it, so you shouldn’t get any condensation.
Hi Molly!
Using a fan for this soap recipe is definitely a way to keep it from sweating. We also suggest making it in the driest and coolest room in the house. If you do end up making it, we’d love to see how it turns out. You can share pictures with us on Bramble Berry’s Facebook page.
https://www.facebook.com/BrambleBerry
Happy Soaping!
-Becky with Bramble Berry
Would a LCP MP work better if we deal with high humidity?
That’s a wonderful project. I love the beautiful swirls. waouh !
Hi AM.
Wonderful project!!! I´ve already start making my first four CP soaps (one of them failed 🙁 ). Unfortunately here in Mexico I cannot find castor and palm oils. Which other oils can I use instead? I have soybean, corn, coconut, olive, jojoba, peanut and canola only.
Thanks in advence AM.
Hugs from Monterrey, México.
Claudia E
This technique will work with ANY CP recipe so just do your normal recipe and you’ll be good to go. I’m excited to see what you create =)
Thanks AM!!!! I will try immediately 🙂
Claudia
I use a detergent free M&P that really attracts moisture if left out. Would it be possible to cure the CP soap while wrapped so the M&P doesn’t sweat terribly? This is what has kept me from combining the two since it’s very important to me to use a more natural M&P base.
The clear melt and pour that we used in this project is detergent free and it seems to be working out just peachy! =)