Here’s What You’ll Need
White and Clear Melt and Pour Soap Bases
Brownie Pan Tray Mold
Shamrock Mold
Colorants (mica)
Fragrance Oil
Rubbing Alcohol
Microwave Safe Bowl (pyrex)
Knife, Paper and Pen
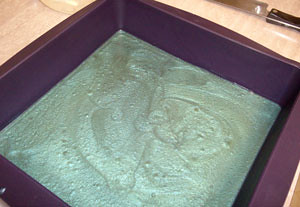
Step 2: Once the layer has cooled, remove this layer and cut into strips of random thicknesses. We found that cutting with a large butcher knife works the best. Cut them diagonally or straight across. Set the strips aside, we’ll use them later.
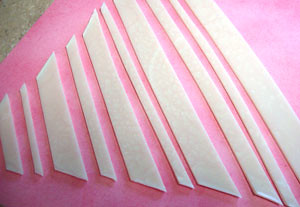
Step 3: Repeat steps 1 and 2 for all four colors you want in the plaid design. We used Gold Sparkle Mica, Opalescent Green Mica, Shamrock Green Mica and Blue-Green Mica.
Step 5: Grab your brownie pan mold and trace the outside edges of the mold onto a piece of paper. This will allow you to make a blueprint of your plaid design on “dry land” before embedding them into the soap.Step 6: It’s time to start layering! The first layer will be the background layer. Pour just enough soap to completely cover the bottom of the mold (we chose a white background). Let cool completely.
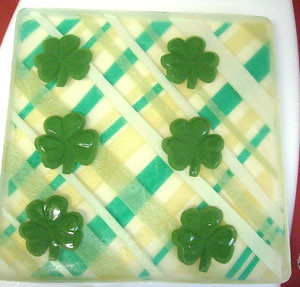
Hint: Most soaps are built from top to bottom (upside down). When you flip them out of the mold then they are right side up. These soaps are just the opposite, the layers go from bottom to top. So the last layer you pour will be the top layer of your soap.Step 7: While the bottom layer cools, we can set up the plaid design before the embedding step. Set up your strips of soap on the piece of paper with the traced mold on it.Hint: The plaid design usually consists of two colors each. The colors are semi-random. The top layer should have some gaps so you can see though it to the bottom colors. (You will be left with quite a bit of scraps. Don’t worry, we have another soapy project coming up that will put these scraps to good use).
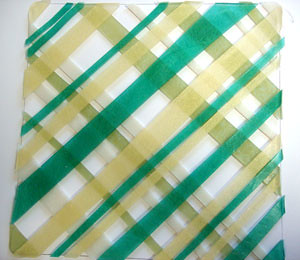
Step 8: Once you have a plaid layout that you like, and the background layer has cooled, you can finally start to piece your plaid design together layer by layer.
Step 9: Spray the background layer of soap with rubbing alcohol to ensure your layers stick together, then pour a thin layer of clear soap base. Generously spray your cut out pieces with alcohol and place them directly into the clear soap. Finish this layer off with another spritz of alcohol to eliminate any bubbles.
Hint: This layer should consist of two alternating colors. Make sure you have enough clear melt and pour to completely cover the plaid layers. And temperature matters! Keep the overpour temperature below 130 degrees as to not melt the layers.
Step 10: Once the layer has completely cooled, repeat step 9 with your other plaid pieces.
Hint: Again, consisting of two colors. But this time, laying them in the opposite direction of the first plaid layer.
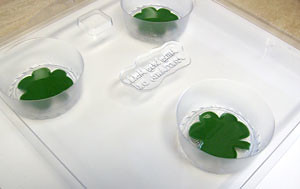
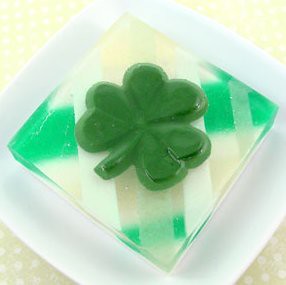
Step 11: It’s time to add the shamrocks to the final layer. Pour a thin layer of Clear Melt and Pour, generously spritz your shamrocks with rubbing alcohol and place them in the clear soap. Give it a final spritz to eliminate bubbles. Let harden and cut into bars.
Hint: Remember to put the shamrocks in right side up!
Have a question about this blog post? Come join us at Bramble Berry’s Facebook page and we can help you out with any of your soapy questions!

How cute! I love anything plaid!! I would think you could adapt this for other holidays- Christmas, or spring colors with a butterfly on top!
WONDERFUL soap! How cute! Will definately give this a try… next year!! It does though give me ideas for other holidays! humm…
Beautiful!
Oh those look amazing! That reminds me…I need to work on my St. Patrick’s Day Cupcake Soap.
I have just two things to say: I absolutely love it, and I’m not going to be making that any time soon. LOL!
LOL! 😀
Those are so cute!
Thank you for the positive comments and Jamie, thank you for the Kreative Blogger Award. I’ll go check out your site now.
fab post!!! thank you so much for sharing with everyone! i love your blog so much! actually, i love it so much i’m passing along the “Kreativ Blogger Award” to you 🙂 you can see more info at my blog about it. i just received it and i KNEW i had to give it you because reading your blog is part of my daily “internet routine” he he.
I LOVE it! The plaid is fantastic – thanks for a great tutorial!
oooooo – what a great idea! looks lovely
Awesome!!! Lovely as always!!!!!!
Thank you!!
oh goodie! now we can play!
thank you so much! you heard
our eagerness to do this NOW!!!
i did not know that mica would give that brilliant green.
now i am going to have to order some more…..dern!
but since i forgot several things in last order, this just give me
good “green” excuse!
i love love LOVE micas!
yay!
Love these! Don’t think I have the patience for them but love it that you do! You guys inspire me!
Ohhh….they look fabulous AM! I love the plaid for St. Patty’s Day!