What You’ll Need (4 Bars of Soap):
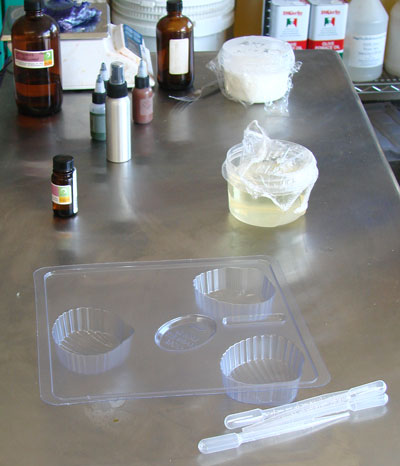
Pre-heat 4 quart pan of water on simmer (for rinsing your tools)
1 dropperful of Gardenia Fragrance Oil
1 dropperful of Sensuous Sandalwood
6 dropperful of Sea Moss Fragrance Oil
6 oz Shea Butter Melt and Pour Base
32 oz Shaving Melt and Pour Base
4 microwavable containers one large 20 oz and three smaller 8 oz
Straight Metal Fork with Tines
Plastic wrap
Heat your water to a low simmer. Cut your 6 oz of Shea Butter Melt and Pour Base Base into ice cube size pieces, place in one of the small containers, cover with plastic wrap and set aside. Cut 6 oz of Shaving Melt and Pour Base, place in small container, cover with plastic wrap and set aside. Cut another 6 oz of Shaving Melt and Pour Base place in small container, cover with plastic wrap and set aside. Cut about 16—20 oz of Shaving Melt and Pour Base into small pieces, place into the large container and cover with plastic wrap.
At this point you have:
1 small container of Shea Butter Melt and Pour Base Base
2 small containers of Shaving Melt and Pour Base
1 large container of Shaving Melt and Pour Base
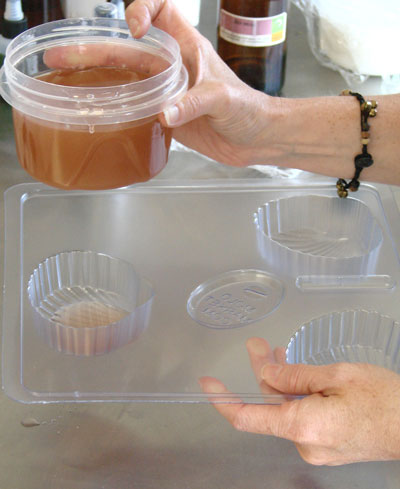
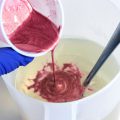
For 30 seconds microwave one of the small containers of Shaving Melt and Pour Base (heat 10 additional seconds at a time if needed) and add a little of brown oxide (not sure how to use oxides in Melt and Pour Soap? Click here to be taken to a tutorial on using Oxides in MP soap) and one dropper of Sea Moss fragrance. The result should be a translucent amber liquid soap that does not burn your pinkie finger. In the photo above, we’re using pre-mixed brown oxide in liquid glycerin. You can make up your own color blend using the instructions referenced above (here).
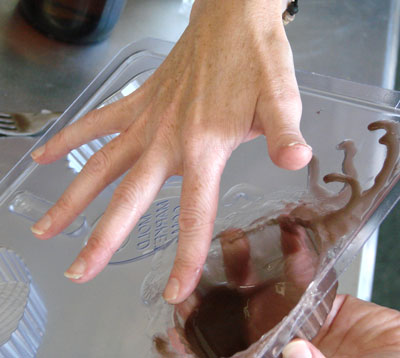
Pour about a Tablespoon and a half of the light translucent soap into one of the cavities and turn the entire mold until you’ve covered the sides and bottom of the mold. The layer doesn’t need to be even or even look like anything special and don’t worry about spilling soap over the sides as you can always wait a minute or two and use the scraper tool to replace any spilled soap into the container it originated from. Do the same for each of the cavities. We call this the “Swirl ‘n’ Twirl” method. Keep rotating the mold around in a circular fashion until the bulk of the soap has hardened up fully on all sides. It’s okay if it’s a little thicker in places.
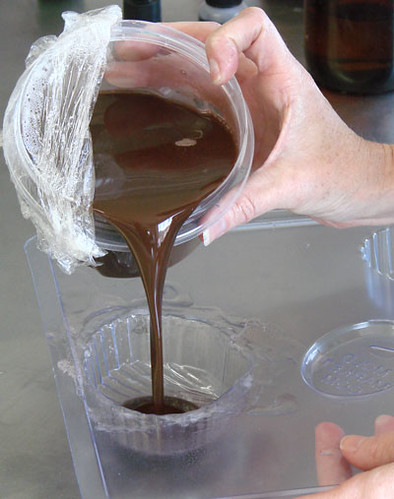
Now, for 30 seconds take the 2nd small container of clear soap cover it and melt in the microwave for 30 seconds or so and add 5 parts of brown oxide, one part black oxide and one part of green oxide (heat 10 additional seconds at a time if needed, stirring each time); when melted add one dropper of Sandalwood fragrance. The teacher for this method, PJ, likes to scent each layer separately. This is an optional thing. If you’d like one fragrance for all the layers, it won’t affect the integrity of the soap at all.
One at a time, spray with rubbing alcohol the first translucent layer in one of your shell molds and immediately add about a tablespoon and a half of the dark brown soap into the mold on top of the translucent soap, turning the mold until the sides and bottom are mostly covered (imperfections at this layer add to the look of the soap). Keep rotating the mold around in a circular fashion until the bulk of the soap has hardened up fully on all sides. It’s okay if it’s a little thicker in places. Use the scraper tool to replace any spilled soap into the container it originated from.
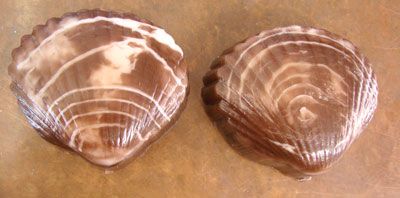
Check back for the rest of this week as we finish the Clam Shell Project, creating realistic shells out of just soap and a little skill.



LOL
I know that the seamoss is outstanding on it’s own.
I’m just kicking myself because, in spite of the dozens of FO’s I have (not exaggerating… between samples and such)I don’t have as basic a blender as sandalwood.
I found some patchouli, even if it isn’t BB. 🙁 Will give it a try.
You really don’t NEED a third fragrance (or 2nd one for that matter) BB’s Sea Moss alone is OUTSTANDING. I just like each color to have its own fragrance. But like Anne-Marie suggested Patchouli would be awesome in there.
Or, Spiced Mahogany would be good too. Or, Sugared Walnut … =)
My hubby grudgingly is learning basic soapmaking. He can do a lot of the basics now.
You’ll get him into this hobby yet =)
Hrm… Now, Arabian Spice, I’ve got. No Patchuli (yet) and the hubby is highly allergic to Cedarwood (I even had to give my great grandmother’s hope chest to my sister because of it.) Can’t use it in anything he might even come near and he’s looking forward to the clamshells almost as much as the UFO’s. (I’ll turn him into a soaper yet!)
Patchouli would be a fine substitute or Cedarwood or even a little bit of Arabian Spice?
LOL
No birthday party other than mine, actually. Package didn’t come in today though (hubby is pouting that the birthday pressie is a smidgen late) 🙁 Should be in tomorrow. Oh well, UFOs and shell making this weekend! 🙂
I know the kit comes with the seamoss, I’ve got that and the gardenia. Any recommendations for replacing the sandalwood? Of course that would be the one I’m missing from the FO collection.
PS – SingingWolf, how old are the kids for the birthday party? The UFO’s might be a little bit easier?
Rita,
I would love to see your soap if you end up taking pictures. =)
I agree – a hefty bar of soap is really nice to have.
I got these molds, no kit, and did up 15 CP soaps for my sister who loves clams. I was shooting for the look of yours, didn’t happen. Mine turned out really neat looking, though, even if they are CP, LOL. I love that the soaps are almost 5 ounces.
rita
It looks to me like those marbled chocolates. Yummie.
*grin* My kit should be here on Thursday…will probably be waiting on the porch by the time I’m back from a planned outting.
I see the perfect birthday project… (It was a toss up between this and the UFOs for Thursday night, but I think this one is going to be the hands down winner.)
I’m so excited! I have the kit and have been waiting for this lesson. 🙂