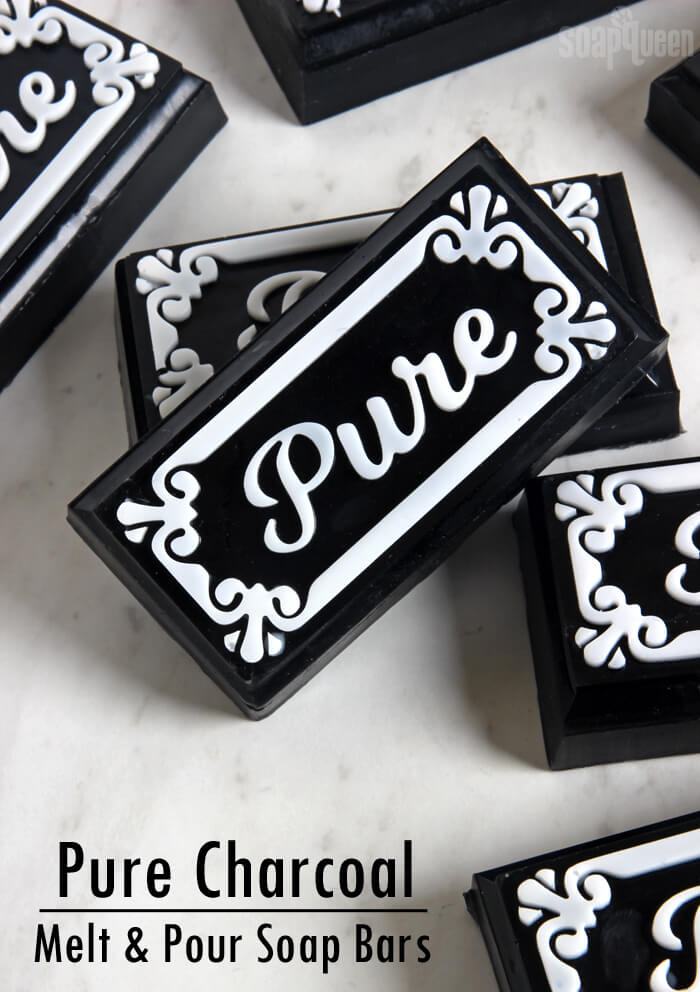
A few weeks ago I shared a recipe for Charcoal & Tea Tree Facial Bars made with cold process soap. I got quite a few requests to create something similar with melt and pour, so these Pure Charcoal Melt & Pour Bars were created! They are made in the brand new Pure Soap Silicone Tray Mold, which was specially designed by the Bramble Berry team. The details in each cavity are deep enough to make filling in each space as easy as possible. This new mold is suitable for cold process and melt and pour as well as lotion bars.
This soap is created with Aloe Vera Melt and Pour Base which contains 5% aloe vera gel. It has a slight green tint, but the activated charcoal covers that right up. Tea tree essential oil gives the bars a refreshing and earthy scent. The soap contains two full teaspoons of charcoal so they’re great for oily skin. The charcoal does create a gray lather but it’s very faint. If you prefer, you can reduce the amount of charcoal to prevent any color in the lather. Learn more about charcoal here.
Want to see this recipe in action? Scroll down to the bottom of this post to watch Anne-Marie make these bars!
What You’ll Need:
Pure Soap Silicone Tray Mold
32 oz. Aloe Vera Melt and Pour
3 oz. White Melt and Pour Soap Base
2 tsp. Activated Charcoal
0.8 oz. Tea Tree Essential Oil
99% Isopropyl Alcohol in Spray Bottle
Clean Up Tool
Injector Tool
Click here to add everything you need for this project to your Bramble Berry shopping cart!
ONE: Chop 3 ounces of White Melt and Pour Soap Base into small chunks. Place them in a small heat safe container and melt in the microwave using 5-10 second bursts. Melt and pour is easy to burn when melting such a small amount, so use short bursts and do not let the soap boil.
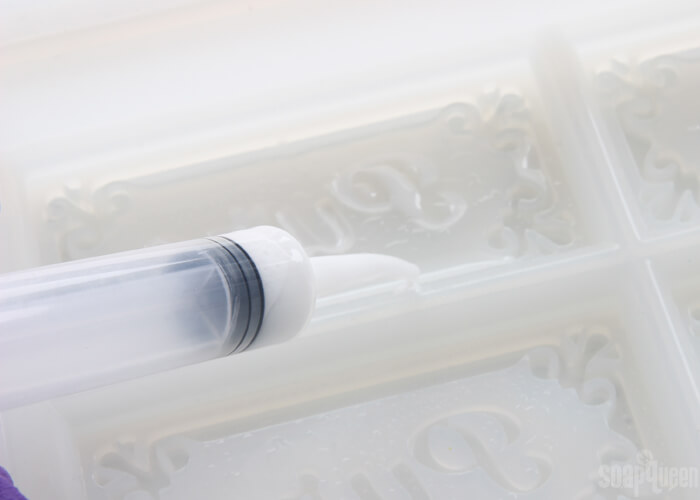
TWO: Cut a very small amount off the tip of the Injector Tool. You still want the hole of the Injector Tool to be small, but making it slightly larger helps prevent it from clogging. Fill a small cup with very hot water. Have the hot water nearby while you fill in the details of the mold with white soap. Use it to clear the Injector Tool if the soap begins to cool and harden in the tool.
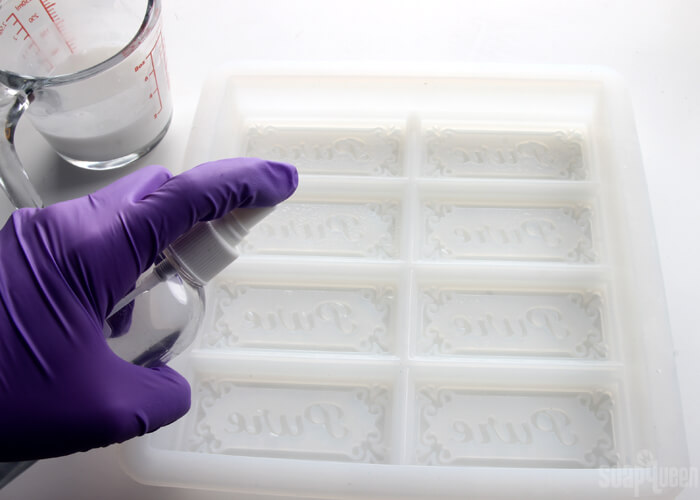
THREE: Spritz the mold with 99% isopropyl alcohol. Spritzing the mold allows the soap to spread easily into the details. Fill up the Injector Tool with the white soap and carefully fill in the details of the mold. Have the spray bottle filled with alcohol nearby to get rid of any bubbles. Work carefully but quickly to prevent the soap from hardening in the Injector Tool.
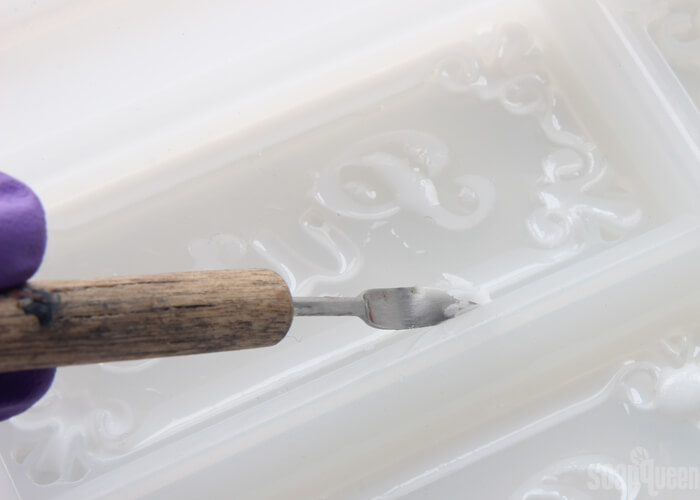
FOUR: Continue filling in the details of each cavity. If you make a mistake, allow the soap to fully cool and harden and use the Clean Up Tool to get rid of imperfections.
FIVE: While the white soap fully hardens, chop 32 ounces of Aloe Vera Melt and Pour Soap Base into small chunks. Place them in a large heat safe container and melt in the microwave using 30-60 second bursts. Between each burst, stir the soap to help it melt evenly. It can take a few minutes to fully melt depending on the strength of your microwave.
SIX: Mix 2 teaspoons of activated charcoal with 2 tablespoons of 99% isopropyl alcohol. Stir together to help get rid of large clumps. Add all of the dispersed charcoal into the melted soap and stir to fully combine.
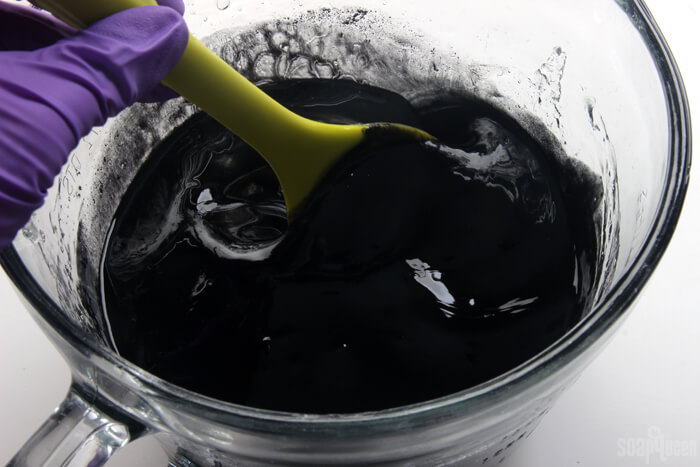
SEVEN: Add the tea tree essential oil to the soap and stir to fully combine. Take the temperature of the soap. If the soap is poured into the mold when it’s hotter than 130 ° F, it may melt the white details in the mold. Allow the soap to cool to about 125 ° F.
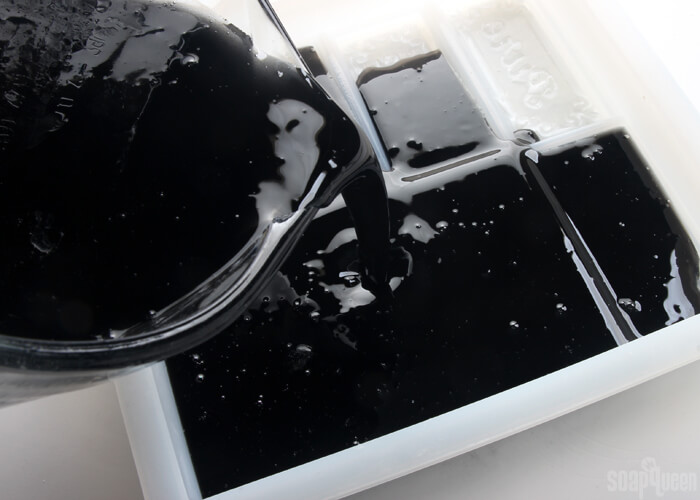
EIGHT: Spritz the mold with 99% isopropyl alcohol to help the charcoal soap adhere to the white soap details. Pour the black soap into the mold, then spritz the top with 99% isopropyl alcohol to get rid of any bubbles. Allow the soap to fully cool and harden for several hours or up to overnight.
NINE: Remove from the mold and cut into bars using a sharp non-serrated knife. To avoid glycerin dew, wrap the bars in plastic wrap or another airtight packaging option. Enjoy!
Want to see this project in action? Check out the Facebook Live video below! See more Facebook videos here.
- Pure Soap Silicone Tray Mold
- 32 oz. Aloe Vera Melt and Pour
- 3 oz. White Melt and Pour Soap Base
- 2 tsp. Activated Charcoal
- 0.8 oz. Tea Tree Essential Oil
- 99% Isopropyl Alcohol in Spray Bottle
- Clean Up Tool
- Injector Tool
- Chop 3 ounces of White Melt and Pour Soap Base into small chunks, place them in a small heat safe container and melt in the microwave using 5-10 second bursts. Melt and pour is easy to burn when melting such a small amount, so use short bursts and do not let the soap boil.
- Cut a very small amount off the tip of the Injector Tool. You still want the hole of the Injector Tool to be small, but making it slightly larger helps avoid the tool from becoming clogged. Fill a small cup with very hot water. Have the hot water nearby while you fill in the details of the mold with white soap. Use it to clear the Injector Tool if the soap begins to cool and harden in the tool.
- Spritz the mold with 99% isopropyl alcohol. Spritzing the mold allows the soap to spread easily into the details. Fill up the Injector Tool with the white soap and carefully fill in the details of the mold. Have the spray bottle filled with alcohol nearby to get rid of any bubbles. Work carefully but quickly to prevent the soap from hardening in the Injector Tool.
- Continue filling in the details of each cavity. If you make a mistake, allow the soap to fully cool and harden and use the Clean Up Tool to get rid of imperfections.
- While the white soap fully hardens, chop 32 ounces of Aloe Vera Melt and Pour Soap Base into small chunks. Place them in a large heat safe container and melt in the microwave using 30-60 second bursts. Between each burst, stir the soap to help it melt evenly. It can take a few minutes to fully melt depending on the strength of your microwave.
- Mix 2 teaspoons of activated charcoal with 2 tablespoons of 99% isopropyl alcohol. Stir together to help get rid of large clumps. Add all of the dispersed charcoal into the melted soap and stir to fully combine.
- Add the tea tree essential oil to the soap and stir to fully combine. Take the temperature of the soap. If the soap is poured into the mold when it's hotter than 130 ° F, it may melt the white details in the mold. Allow the soap to cool to about 125 ° F.
- Spritz the mold with 99% isopropyl alcohol to help the charcoal soap adhere to the white soap details. Pour the black soap into the mold, then spritz the top with 99% isopropyl alcohol to get rid of any bubbles. Allow the soap to fully cool and harden for several hours, up to overnight.
- Remove from the mold, and cut into bars using a sharp non-serrated knife. To avoid glycerin dew, wrap the bars in plastic wrap or another air tight packaging option. Enjoy!
hi just wondering instead of an aloe vera base can i use white melt and pour with tea tree essential oil and still get same results?
Sure though the color will be a bit more muted and grey since you are working with white to start instead of clear.
Could i add Tamanu Oil or any other similar oils? i see your out of stock for a while, so do you have any other recommendations of additional oils i can add as this will be used for the face.
Maybe cucumber oil?
You can add liquid oils to melt and pour but only at 1 teaspoon per pound so it doesn’t really affect the actual bar by much. If you want something similar to Tamanu Oil I would probably go towards Pumpkin Seed or Pomace Olive Oil.
In the tutorial video, I heard Ann Marie say that Melt and Pour Charcoal soaps might feel grainier because the charcoal doesn’t completely emulsify into the soap. Can we add a bit of polysorb 80 for better, smoother incorporation?
Poly80 is generally used to help oils/colorants better incorporate with water, so you’ll see it used in bath bombs quite often. We haven’t tried using it with soap, so you may want to do a small test batch first and see if you like the results.
So I made this yesterday , I loved it . But my white base was left stuck in the mold 😩 I thought I sprayed enough rubbing alcohol before pouring the charcoal. Where did I go wrong ?
Hi Kimberly, it might just be that it didn’t dry enough before you attempted to pull it out. Depending on the humidity in your area and in your house it can take up to a full day for those to remove from the silicone cleanly.
Hi there! I’m a beginner and ordered a sample pack of melt and pour bases. One of them is charcoal. Can that be used in this recipe and if so, do I still need the activated charcoal? Thank you, I am learning so much from your website!
Did my question post correctly?
Hi Meghan, the sample that you get from our website at http://www.brambleberry.com is the activated charcoal that we used in this recipe!
Hello Soap Queen!
In place of the aloe soap base, can aloe water be added to a clear or other soap base?
If so, how much aloe water per pound of soap?
Thanks!
We would not recommend that. We don’t normally suggest adding extras like that to melt and pour soap bases because it can affect their consistency, reduce the lather, introduce bacteria, etc.
Aloe Vera Melt and Pour: https://www.brambleberry.com/SFIC-Aloe-Vera-Melt-And-Pour-Soap-Base-P3185.aspx
Does the alcohol put in this evaporate out? It may be a little harsh for the skin.
Yes, the 99% Isopropyl Alcohol will evaporate out.
Hi, I followed these steps and my soap turned out great. I have been using it happily until recently. Now that i have used much of the soap I see that the center of the soap is way to soft and falls apart if I hold it a little tightly or squeeze a bit. Is this because the charcoal particles settled in the middle? Or I used too much powder?
How long did you stick blend the soap? Also, how long did you let it cure and where is it stored in the shower? I’m thinking there may be a bit of separation, or it could use a longer cure time.
I don’t think I blended it for very long. Just long enough that the soap turned black from the charcoal and after i popped it from the moulds I left them overnight in a container and then used it the other day. It was good and hard enough on the outside surface.
I’m sorry, I thought this was the cold process charcoal soap tutorial. That’s why I asked about stick blending.
I’m wondering if the soap is getting soft in the wet shower – that’s normal. It helps to keep it on a draining soap dish in a dry area. That will help keep it more firm. Get more tips in this post: https://www.soapqueen.com/bath-and-body-tutorials/tips-and-tricks/make-soap-last-longer-shower/
Oh you meant the hand blender! No I meant like with a bamboo skewer. The soap was fine, a little sweaty when it was the original size. Now I have used a ton of it and it’s soft in the center. Will take a look, thanks!
Using the listed amount of activated charcoal (2tsp) for 32oz of soap base, how are you able to get the soap as black as photographed?
The amount of charcoal listed, mixed with alcohol made the base a pale grey. I had to use 3 tablespoons of activated charcoal to get that much soap evenly remotely dark. And it still wasn’t as black as in the photos for this recipe.
Any suggestions?
We found the 2 teaspoons gave us the color above, so I’m not sure why 3 tablespoons is still gray. Are you using charcoal from Bramble Berry? Did you use clear melt and pour?
I did this and the black sangro coal soap that may have gone
I’m not sure what you mean, sorry about that. What can I help you with?
Does the charcoal need to be mixed with the alcohol. Can I leave the alcohol out and just mix charcoal in the soap?
Yes, you can add the charcoal right into the melted soap. Just keep stirring until it’s fully incorporated with no clumps.
Hi! If I am planing on just making like six bars do I still need 32 oz of soap base? And how much charcoal do I use?
You can reduce this recipe if you like. Do you know how much your mold holds? So if your 6 cavity mold holds 16 ounces of soap, that’s how much you’ll need. I can give you a charcoal estimate off that weight too.
Thanks! Yes that would be very helpful!
Do you know how much your mold holds?
Can I use 50% or 75% alcohol or do I have to use the 99%?
We recommend the 99% isopropyl alcohol for best results. The lower percentages may cause your layers to separate.
99% Isopropyl Alcohol: https://www.brambleberry.com/99-Isopropyl-Alcohol-16-oz-P5682.aspx
Learn more about working with melt and pour layers here: https://www.soapqueen.com/bath-and-body-tutorials/5-tips-layering-melt-pour/
So can I use this recipe with goat’s milk/glycerin or shea butter base?
Yes, either of those bases will work well in this recipe. If you use them in place of the Aloe Vera Melt and Pour, the color will be more gray as the charcoal is mixing with white soap instead of clear. It will still feel nice on the skin though.
Hi I made this and they look amazing, however very strong. Just want to clarify the about of tea tree oil used .8 ounces ? And also can this soap recipe be made without the tea tree? Thanks!
Yes, the .8 oz. of tea tree is the correct amount for this recipe. We found that amount with our Fragrance Calculator: https://www.brambleberry.com/Pages/Fragrance-Calculator.aspx
You can make this soap with less tea tree, no tea tree, or a different skin-safe scent all together. The Fragrance Calculator will let you know how much to add.
Essential oils: https://www.brambleberry.com/Essential-Oils-C157.aspx
Fragrance oils: https://www.brambleberry.com/Fragrance-Oils-C161.aspx
I tried this last night and the word pure didn’t stick to the bar can I melt the white and stick the bars back inside to try to get them to stick? Or should I just take the white completely off and use it that way? HELP!
I would recommend remelting the black and white soap separately and trying again. To get that lettering to stick, we recommend spritzing with 99% isopropyl alcohol right before the second layer is poured. If the alcohol is spritzed too early, it can evaporate. You want your layer covered with alcohol, but not completely soaked. Learn more about working with layers in this video: https://www.youtube.com/watch?v=5oyh1Bf3Gxo
Read more about 99% isopropyl alcohol here: http://www.soapqueen.com/bramble-berry-news/sunday-night-spotlight-99-isopropyl-alcohol/
Then, when the soap is fully cool and hard, flip the mold over and press on the lettering rather than the bars. That will help it release before the bars, which helps them stick together.
-Kelsey with Bramble Berry
I did this twice just how you described and it didn’t stick. I think I just need more experience working with layers. Thank you though.
How long are you letting that soap cool, and what are you using to cut it? Let me know and I can offer a few more tips to help your layers stick. 🙂
-Kelsey with Bramble Berry
Can these be used right after they have hardened?
Yep, once they’re hardened they’re ready to use or wrap for later use. Learn how to store your soap here: http://www.soapqueen.com/bath-and-body-tutorials/tips-and-tricks/how-to-store-handmade-bath-products/
-Kelsey with Bramble Berry
Can a different essential oil be used in place of the tea tree? If so, which do you recommend?
Absolutely, you can use any skin-safe essential oil you like in this recipe. Lavender 40/42 or lemongrass would smell great in these bars. You can use our Fragrance Calculator to find out how much to add: https://www.brambleberry.com/Pages/Fragrance-Calculator.aspx
Lavender 40/42 essential oil: https://www.brambleberry.com/Lavender-4042-Essential-Oil-P3664.aspx
Lemongrass essential oil: https://www.brambleberry.com/Lemongrass-Essential-Oil-P3822.aspx
-Kelsey with Bramble Berry
Do you have to use the 99% isopropyl alcohol? I don’t plan on using the pure soap mold, just a loaf mold.
Are you planning on doing any layering? If so, the alcohol is definitely necessary. It’s what holds the layers together. Without layers, the alcohol is optional, but does help pop any bubbles on the surface. If you don’t have it on hand, make sure to pour the soap very carefully to try and prevent as many bubbles as possible. 🙂
Learn more about using alcohol here: https://www.soapqueen.com/bramble-berry-news/sunday-night-spotlight-99-isopropyl-alcohol/
-Kelsey with Bramble Berry
Hello, are we able to use this as a facial soap as well ? the melt and pour?
If you have oily skin, this recipe works really well for the face! The charcoal helps absorb oil. If your skin is dry, it may be a bit too much for the face. You may like the dry skin recipe in this post instead: https://www.soapqueen.com/bath-and-body-tutorials/melt-and-pour-soap/cleansing-soap-dry-oily-skin/
-Kelsey with Bramble Berry
My skin gets pretty dry, but I really want to try this! Can I add tamanu oil (or any other oil that you recommend) to this recipe?And do you by chance know the approximate weight of three teaspoons of charcoal (I plan on cutting it down to only make four 6oz bars)?
We don’t recommend adding extra oil to the melt and pour bases. Because they already turned into soap, the extra oil can make them soft and inhibit lather. If you do add extra oil, we recommend no more than 1 teaspoon per pound of soap. That will give you the benefits without affecting the texture too much.
We also have lots of bases to choose from! You can select the one that best works for your skin type. Learn about our bases here: https://www.soapqueen.com/bath-and-body-tutorials/tips-and-tricks/sunday-night-spotlight-melt-and-pour-bases/
As for the charcoal, I’m not sure of the exact weight. I can tell you charcoal is pretty light! I would recommend starting with just 1/4 tsp. for your batch. If you want more, you can add from there. 🙂
-Kelsey with Bramble Berry
Thank you so much! I can’t wait to try this!
Wow! You must have the patience of Jobe: much more than I have. However, that does look great.
I was thinking the same thing!!!
Ha, it does take some patience to fill in the details! The Injector and Clean Up Tool definitely come in handy. 🙂
-Kelsey with Bramble Berry