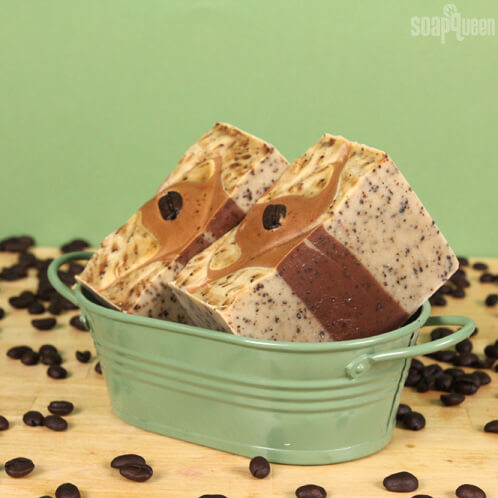
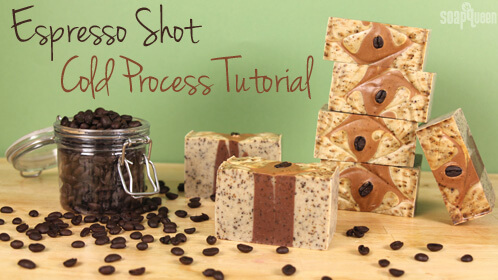
It’s no secret that the Pacific Northwest is the coffee capital of the world. There’s a coffee shop on every corner (sometimes two!), and a never-ending thirst for the latest and greatest new drink. The passion for coffee spills over into passion for soapmaking, so when we brought in the brand new Espresso Fragrance Oil, we went to work designing the most coffee-tastic soap we could.
The Espresso Fragrance Oil is a true espresso scent. Whereas Turkish Mocha has hints of sweetness and cream and Chocolate Espresso Cybilla is brimming with chocolate-y goodness, Espresso is for the coffee purist. Along with a recipe that includes Coffee Butter, Cocoa Butter, Hazelnut Oil and real coffee grounds, this is the ultimate soap for coffee lovers everywhere.
What You’ll Need:
5.5 oz. Cocoa Butter
13.7 oz. Coconut Oil
2.7 oz. Coffee Butter
2.7 oz. Hazelnut Oil
16.5 oz. Olive Oil
13.7 oz. Palm Oil
7.7 oz. Sodium Hydroxide
18.1 oz. distilled water
3.5 oz. Espresso Fragrance Oil
5 lb. Wood Log Mold with Slide Bottom and Silicone Liner
3 tbsp. coffee grounds

Click here to add everything you need for this project (except the coffee grounds) to your Bramble Berry shopping cart!
If you’ve never made Cold Process soap before, stop here! I highly recommend checking out our FREE four part SoapQueen.tv series on Cold Process Soapmaking, especially the episode on lye safety. And if you’d rather do some reading, Bramble Berry carries a wide range of books on the topic, including my newest book, Soap Crafting. You can also checkout the digital downloads for that instant gratification factor.
SAFETY FIRST: Suit up for safe handling practices! That means goggles, gloves and long sleeves. Make sure kids, pets, and other distractions and tripping hazards are out of the house or don’t have access to your soaping space. Always soap in a well-ventilated area.
COLOR PREP: To ensure that the Titanium Dioxide blends smoothly into the soap batter, we recommend micronizing it before dispersing it in oil. To micronize colorant, simply use a coffee grinder to blend the colorant to break up any clumps of color and prevent streaks of white from showing in the final soap. We like to use a coffee grinder that has a removable, stainless steel mixing area for easy cleaning. Then, disperse 1 teaspoon of the colorant into 1 tablespoon of Sunflower or Sweet Almond Oil (or any other liquid oil). Then, disperse 1 teaspoon Brown oxide into 1 tablespoon of light liquid oil. Use a mini mixer to get the clumps of color worked out smoothly.
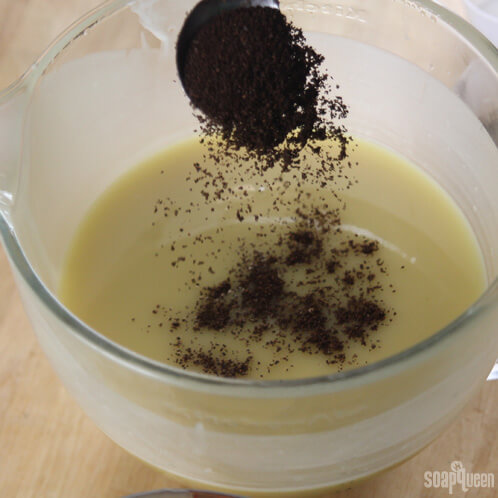
COFFEE GROUNDS: You can use either dry or used coffee grounds for this project. If you do use dry grounds like we did, be aware that they may “bleed” and form a small halo of color around them. If you don’t want the halo effect, make yourself a pot of joe and use the leftover grounds!
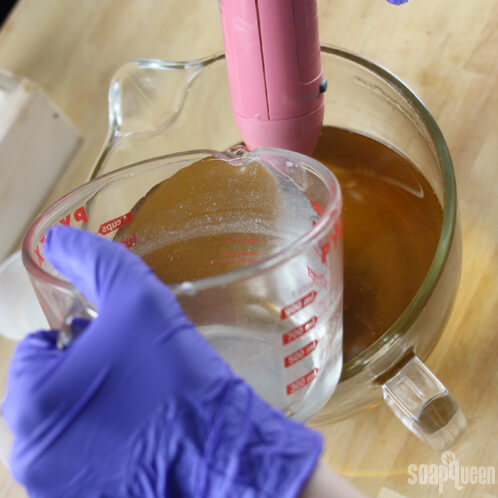
ONE: Slowly and carefully add the lye to the water and gently stir until the lye has fully dissolved and the liquid is clear. Set aside to cool.
TWO: Combine the Cocoa Butter, Coconut Oil, Coffee Butter, Hazelnut Oil, Olive Oil and Palm oils (remember to fully melt then mix your entire container of Palm Oil before portioning). Once the lye water and the oils have cooled to 130 degrees or below (and are ideally within 10 degrees of each other), add the lye water to the oils and stick blend until thin trace. If you’d like a harder bar of soap that releases faster from the mold, you can add Sodium Lactate to the cooled lye water. Use 1 teaspoon of Sodium Lactate per pound of oils in the recipe. For this recipe, you’d add about 3 tsp. Sodium Lactate.
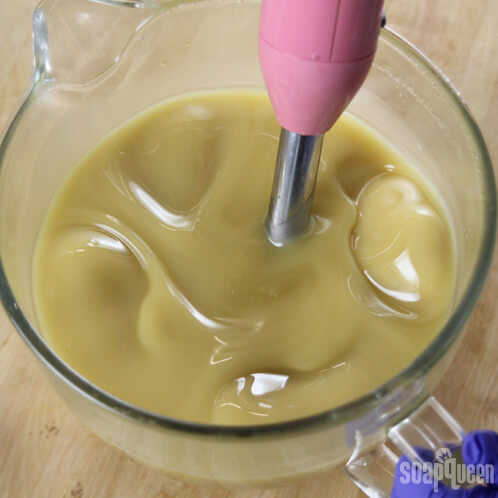 THREE: Once the batter has reached a light trace, pour 3 cups of the soap batter into a separate container.

FOUR: Add 1 tbs. of coffee grounds into the small container, and 2 tbs. of coffee grounds into the larger container. Use a whisk to gently combine.
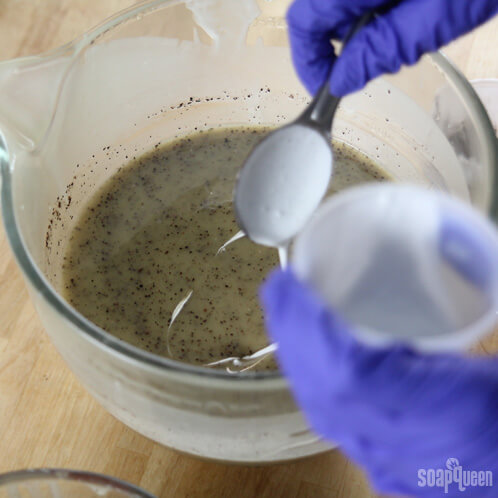
FIVE: Add 3 tps. of the dispersed Titanium Dioxide into the large container. Use a whisk to mix in.
SIX: Add 3 tps. dispersed Brown Oxide to the small container, and use a whisk to thoroughly combine.
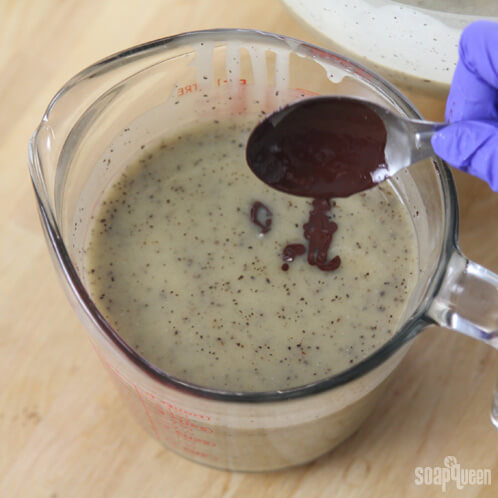
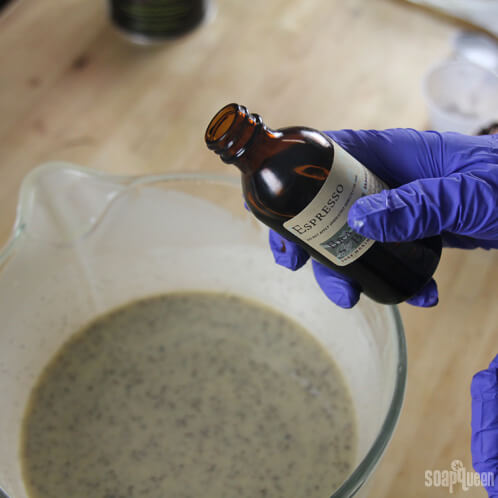
SEVEN: Add half of the Espresso Fragrance Oil to the small container, and half to the large container. You can eyeball it, but if you want to be exact then add 1.7 oz. of fragrance to each container. Use a whisk to mix in.
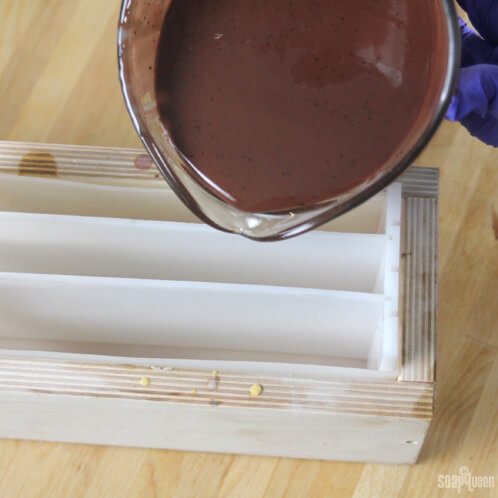
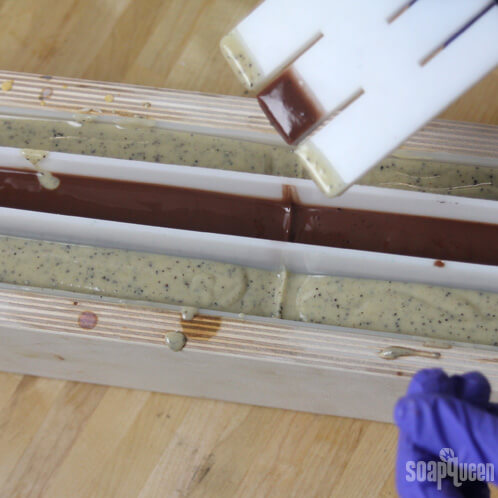
EIGHT: Gently pour the brown soap into the center of the Multi-Pour Sectioning Tool. To help the soap batter evenly spread throughout the middle section, you can alternate pouring from each end.
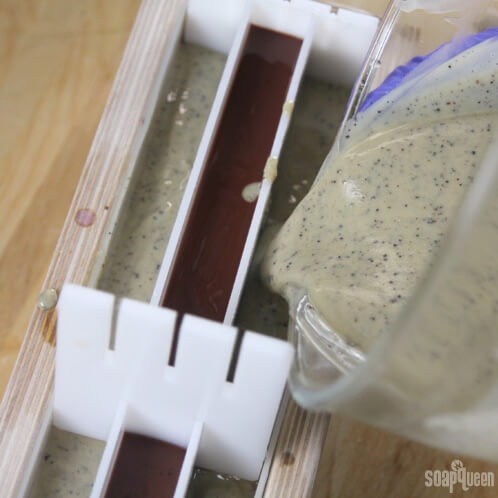
NINE: Once the center section is full, pour the white batter into the outside sections.
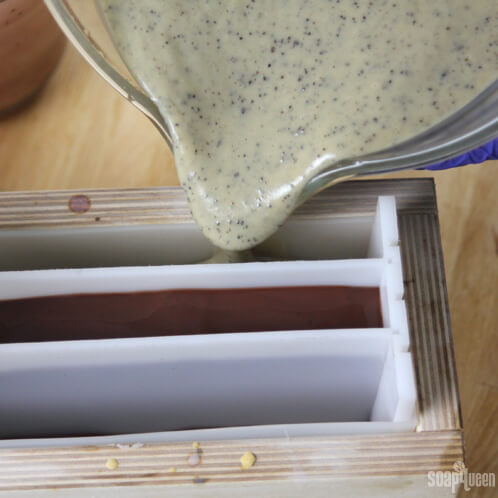
TEN: Pour slowly, and alternate pouring into different ends to evenly disperse the batter in the Multi-Pour Sectioning Tool.
ELEVEN: Once all sections are full, slowly remove the center piece straight up out of the soap. Set aside.
 TWELVE: Slowly pull the long center dividers straight up, and set aside.
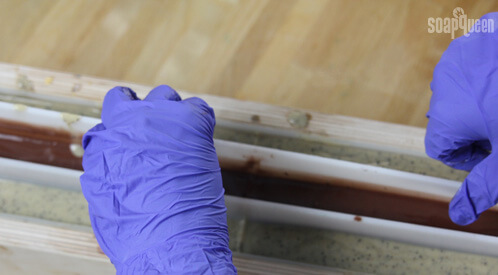 THIRTEEN: Pull the small end liners straight out, and set aside.
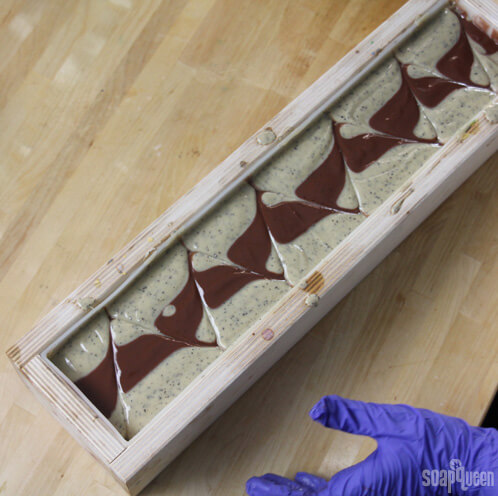
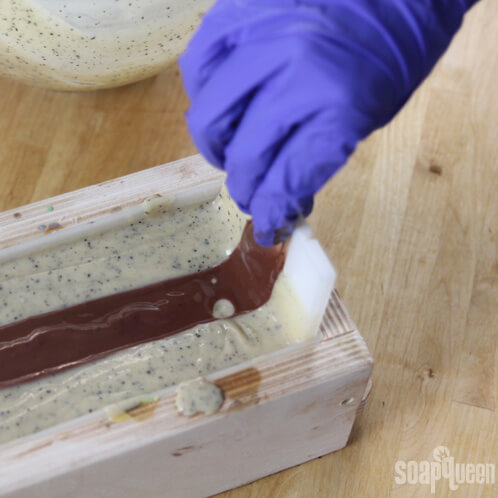 FOURTEEN: Once all the pieces have been removed, tap the soap mold firmly on the table to smooth out the sections and release any air bubbles. Beginning in the corner of the mold, insert a wooden chopstick or dowel to the bottom of the mold and make a zig-zag pattern at a 45 degree angle down the length of the mold.
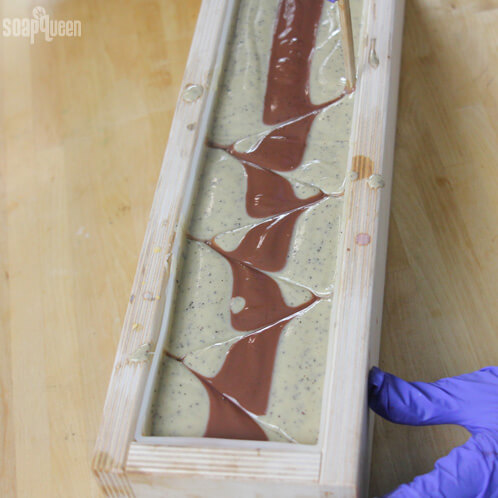
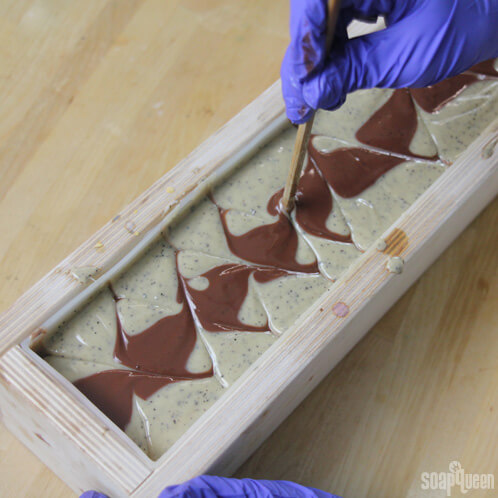
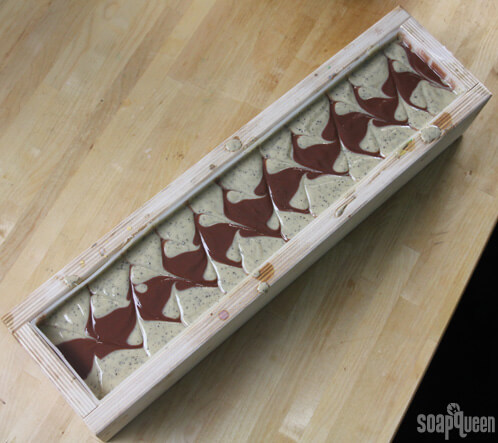
 FIFTEEN: Once you have created the zig-zag down the length of the mold once, it’s time to go back and do it again! Starting on the opposite corner on the same end of the mold you began with the first time, use your chopstick or dowel to cross through the existing lines, creating an argyle-like pattern.
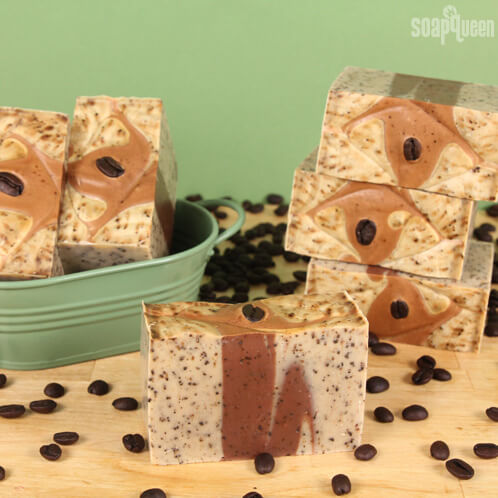
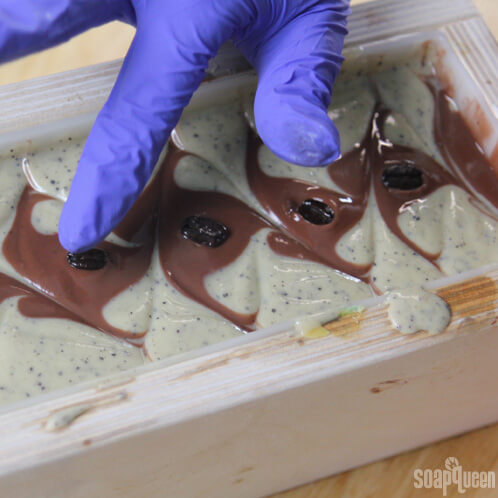
 SIXTEEN: Gently place whole coffee beans in the center of each swirl. Spray with 99% isopropyl alcohol to prevent soda ash.
 SEVENTEEN: Allow the soap to sit in the mold for 3-4 days before unmolding. Cut soap between the coffee beans, so they are in the center of each bar. Allow the soap to cure for 4-6 weeks and enjoy!