Cold process soap made with 100% olive oil is known as “Castile” soap. It is thought to originate in the Castile region of Spain – thus the name, Castile soap! Olive oil is a staple soaping oil that can be found in many cold process recipes. Olive oil contributes moisturizing properties to soap. It also gives the bars a gentle and creamy (read: small, lotion-like) lather, making it a great choice for dry or sensitive skin.
When you create soap with only olive oil (Castile soap), the batter takes quite a while to come to trace. Castile soap also takes longer to harden in the mold than most cold process recipes that contain hard oils like palm or coconut. In fact, Castile soap can require up to two weeks in the mold before it can be removed! But, there are a few tricks to help Castile soap harden more quickly. This recipe has a 20% water discount, which helps the soap harden much faster. To learn more about how and when to water discount recipes, click here.
Another trick for hardening Castile soap more quickly is sodium lactate. Sodium lactate is the sodium salt of lactic acid. It’s commonly used as a food preservative, and is also used in lotion recipes for its humectant properties. When added to lye water, sodium lactate helps cold process soap harden faster. I use it in almost all my cold process batches, especially when using a silicone mold. The usage rate is 1 teaspoon sodium lactate per pound of oils in the recipe. It’s an optional step but I highly recommend it, especially for this recipe! Learn more about sodium lactate here.
The final trick to helping this soap harden in the mold faster is gel phase. ‘Gelling’ and ‘gel phasing’ in cold process soap refers to a part of the saponification (soapmaking) process where the soap gets warm and gelatinous – up to 180 degrees. Heat speeds up the saponification process. Hot process soap, for example, can be cut usually within one day, and can be used right away. Soaping on the warmer side (about 130 ° F) and insulating the soap for 24 hours helps promote gel phase. If your room is cold, you may want to place the soap on a heating pad to keep it warm. Learn more about gel phase here. With a 20% water discount, sodium lactate and gelling, I was able to unmold and cut this soap in 2 days.
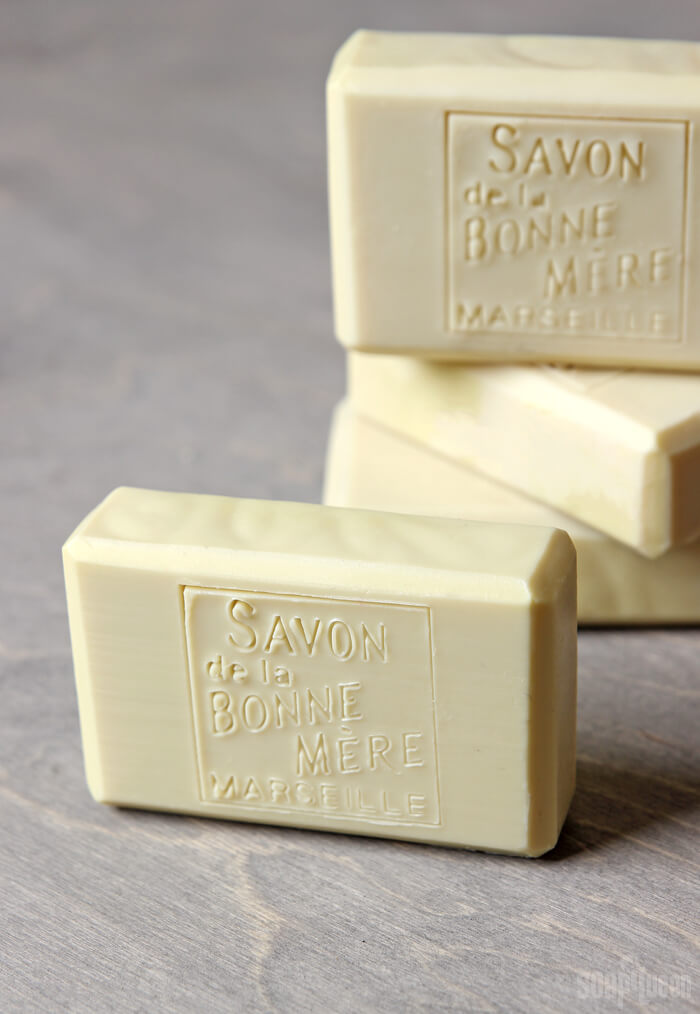
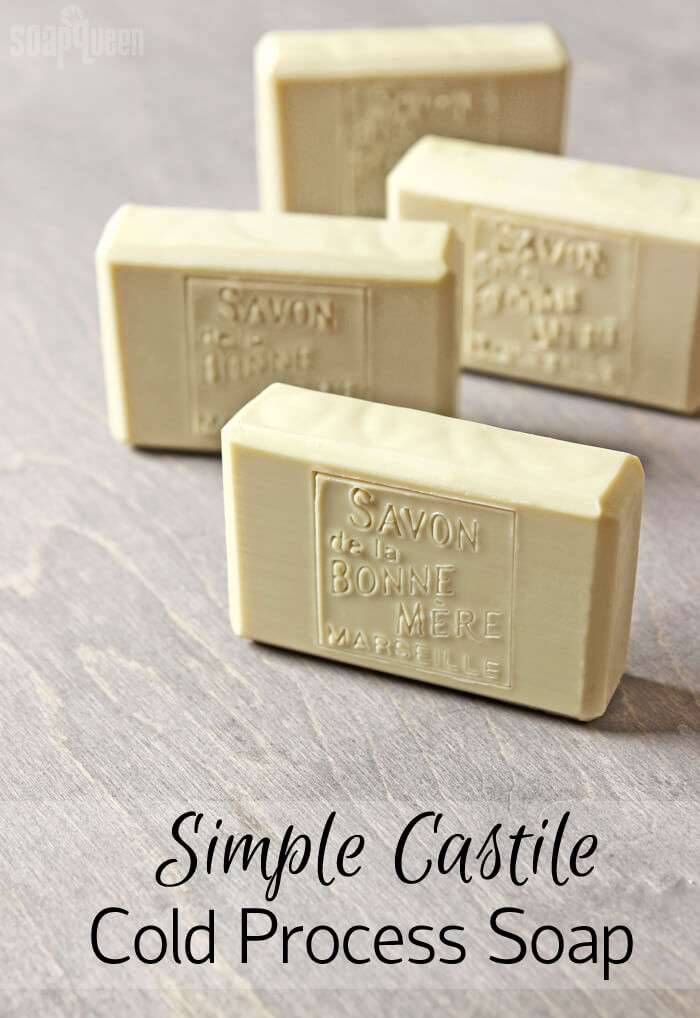
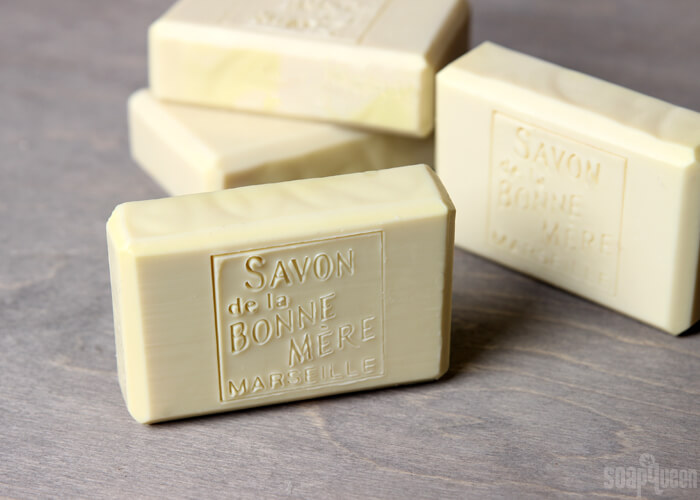
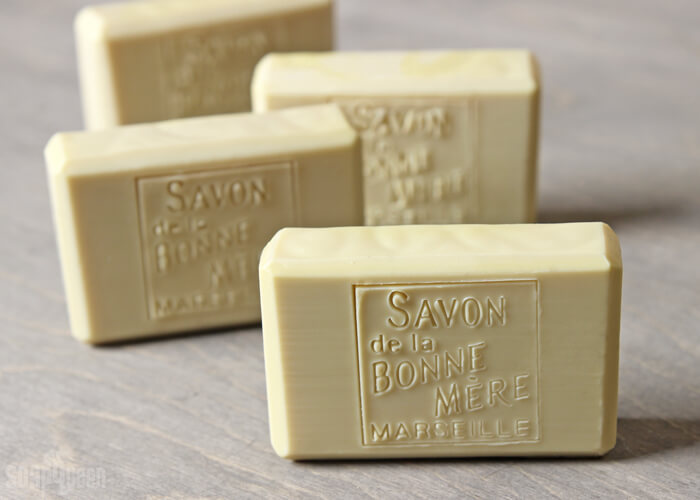
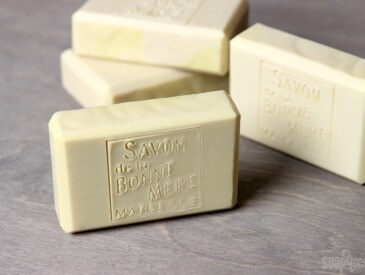
This soap is simple with no colorants or design elements. To give the soap a little interest, I stamped each bar with the Savon Soap Stamp. Savon de Marseille (aka: Marseille soap) is traditional soap made from vegetable oil and olive oil in Marseille, France. I thought it was very fitting for this recipe! For tips on stamping soap, check out this video. I scented this batch with Tomato Leaf Fragrance Oil, which is a wonderfully herby, green and fresh fragrance.
What You’ll Need:
10″ Silicone Loaf Mold
35 oz. Pure Olive Oil
4.5 oz. Sodium Hydroxide Lye
9.2 oz Distilled Water (20% water discount)
2 oz. Tomato Leaf Fragrance Oil
Savon Soap Stamp
Optional (but highly recommended!): Sodium Lactate

Click here to add everything you need for this project to your Bramble Berry shopping cart!
[sq_products]
If you’ve never made Cold Process soap before, stop here! I highly recommend checking out our FREE four part SoapQueen.tv series on Cold Process Soapmaking, especially the episode on lye safety. And if you’d rather do some reading, Bramble Berry carries a wide range of books on the topic, including my newest book, Pure Soapmaking. You can also checkout the digital downloads for that instant gratification factor.
SAFETY FIRST: Suit up for safe handling practices! That means goggles, gloves and long sleeves. Make sure kids, pets, and other distractions and tripping hazards are out of the house or don’t have access to your soaping space. Always soap in a well-ventilated area.
FRAGRANCE PREP: Measure 2 ounces of Tomato Leaf Fragrance Oil into a glass, fragrance oil safe container. Set aside.
ONE: Slowly and carefully add the lye to the water and gently stir until the lye has fully dissolved and the liquid is clear. Set aside to cool. For this recipe, I highly recommend using sodium lactate. Sodium lactate will hep you remove the soap from the mold much faster. Use 1 teaspoon of sodium lactate per pound of oils in the recipe. For this recipe, you’d add about 2 teaspoons sodium lactate. Add the sodium lactate to the cooled lye water.
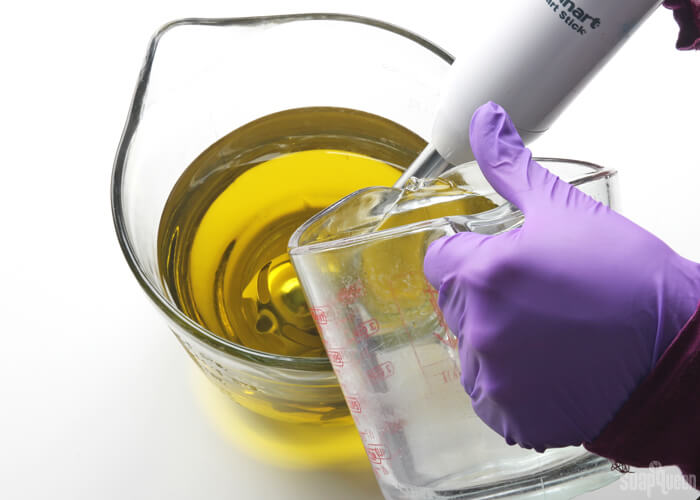
TWO: Pour the olive oil into your mixing bowl, and heat to 120-130 degrees. Once the lye water and the oils have both cooled to about 130 degrees (and are ideally within 10 degrees of each other), add the lye water to the oils and stick blend until you reach a light trace. This may take a little longer than usual, since this recipe is 100% olive oil!
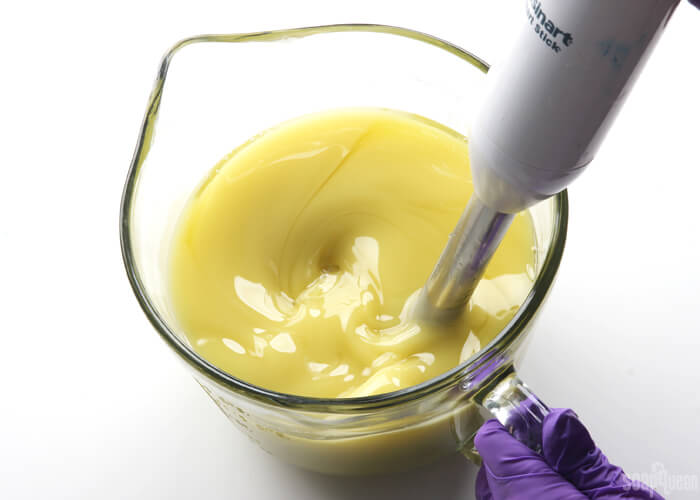
THREE: Add the Tomato Leaf Fragrance Oil and use the stick blender to mix in. Continue pulsing the stick blender and using it to stir until there is no longer streaks of fragrance oil. Don’t worry about over stick blending, this recipe gives you plenty of time to work with it!
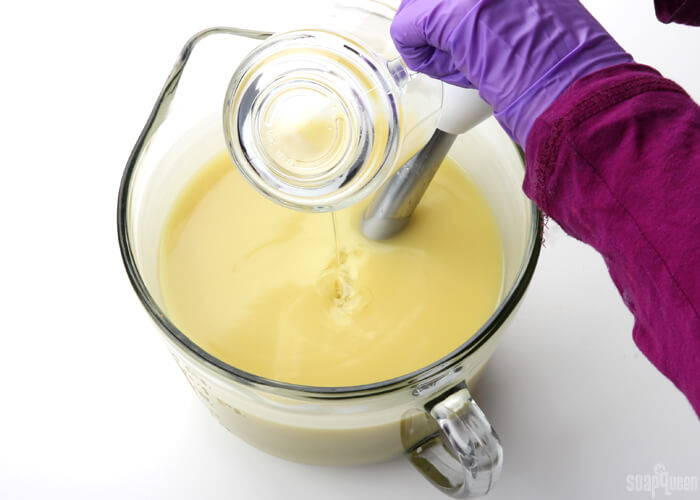
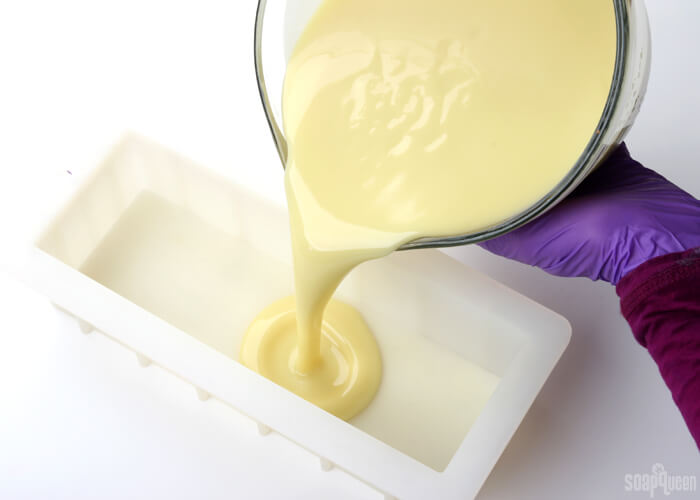
FOUR: Continue to stick blend until you reach a thin-medium trace. This can take several minutes. Pour the soap into the mold, and use a spoon or spatula to even out the top if necessary. Tap the mold on the counter to help get rid of any bubbles. Spritz the top with alcohol to help prevent soda ash. Cover the mold, and insulate the soap for 24 hours to help promote gel phase. Gel phase is not absolutely necessary, but it will help the soap unmold a little sooner!
Once the mold can be pulled away from the sides of the soap with little resistance, carefully remove from the mold and cut into bars. With a 20% water discount, sodium lactate and gelling, I was able to unmold and cut this soap in 2 days. Without one or all of these methods, this soap can take up to 2 weeks to remove from the mold, so be patient. =)
FIVE: Once the soap is cut into bars, use the Savon Soap Stamp to stamp the soap directly in the center. Check out this video for tips on stamping your soap. I found it was best to stamp these bars after right after unmolding. I also used the soap beveller to clean up the edges of these bars. Allow the bars to cure for 4-6 weeks, and enjoy! Some soapers prefer to allow Castile soap to cure for up to 6 months to a year! The longer the cure time, the more the lather will improve.
Simple Castile Cold Process Soap Tutorial
Ingredients
- 10 ″ Silicone Loaf Mold
- 35 oz. Olive Oil
- 4.5 oz. Sodium Hydroxide Lye
- 9.2 oz Distilled Water 20% water discount
- 2 oz. Tomato Leaf Fragrance Oil
- Savon Soap Stamp
- Optional but highly recommended!: Sodium Lactate
Instructions
SAFETY FIRST: Suit up for safe handling practices! That means goggles, gloves and long sleeves. Make sure kids, pets, and other distractions and tripping hazards are out of the house or don’t have access to your soaping space. Always soap in a well-ventilated area.
FRAGRANCE PREP: Measure 2 ounces of Tomato Leaf Fragrance Oil into a glass, fragrance oil safe container. Set aside.
- Slowly and carefully add the lye to the water and gently stir until the lye has fully dissolved and the liquid is clear. Set aside to cool. For this recipe, I highly recommend using sodium lactate. Sodium lactate will hep you remove the soap from the mold much faster. Use 1 teaspoon of sodium lactate per pound of oils in the recipe. For this recipe, you’d add about 2 teaspoons sodium lactate. Add the sodium lactate to the cooled lye water.
- Pour the olive oil into your mixing bowl, and heat to 120-130 degrees. Once the lye water and the oils have both cooled to about 130 degrees or below (and are ideally within 10 degrees of each other), add the lye water to the oils and stick blend until you reach a light trace. This may take a little longer than usual, since this recipe is 100% olive oil!
- Add the Tomato Leaf Fragrance Oil and use the stick blender to mix in. Continue pulsing the stick blender, and using it to stir until there is no longer streaks of fragrance oil. Don’t worry about over stick blending, this recipe gives you plenty of time to work with it!
- Continue to stick blend until you reach a thin-medium trace. Pour the soap into the mold, and use a spoon or spatula to even out the top if necessary. Tap the mold on the counter to help get rid of any bubbles. Spritz the top with alcohol to help prevent soda ash. Cover the mold, and insulate the soap for 24 hours to help promote gel phase. Gel phase is not absolutely necessary, but it will help the soap unmold a little sooner! Once the mold can be pulled away from the sides of the soap with little resistance, carefully remove from the mold and cut into bars. With a 20% water discount, sodium lactate and gelling, I was able to unmold and cut this soap in 2 days. Without one, or all of these methods, this soap can take up to 2 weeks to remove from the mold, so be patient. =)
- Once the soap is cut into bars, use the Savon Soap Stamp to stamp the soap directly in the center. Check out this video for tips on stamping your soap. I found it was best to stamp these bars after right after unmolding. I also used the soap beveller to clean up the edges of these bars. Allow the bars to cure for 4-6 weeks, and enjoy!