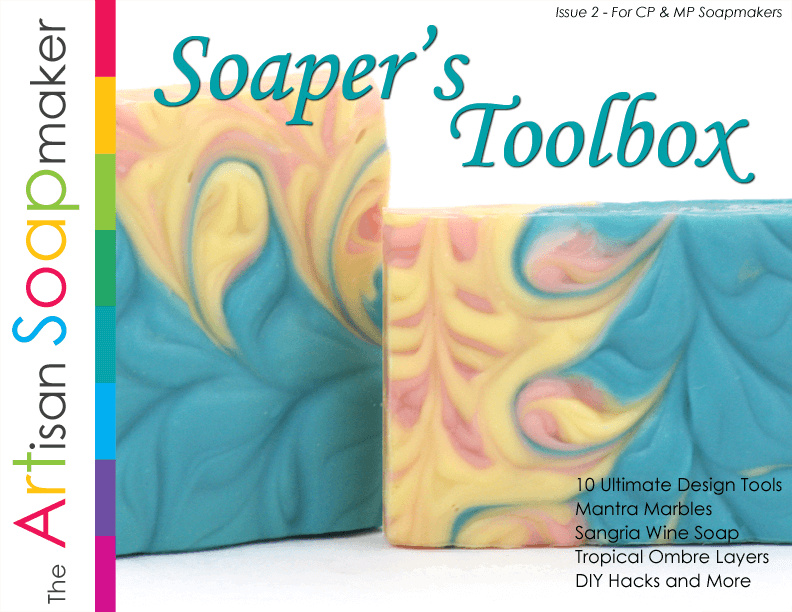
Today, Erica Pence of Bath Alchemy Lab is taking over the blog with an awesome cold process tutorial. This Minty Turkish Mocha Mantra Marble Cold Process Soap is made using Erica’s newest technique, Mantra Marbles. This technique was introduced by Erica in The Artisan Soapmaker Issue 2 eZine –Soaper’s Toolbox, a publication for cold process and melt and pour soapmakers. I love how this technique turns out, and can’t wait to try it myself! Erica is an accomplished teacher; to find more of her tutorials and techniques, check out her classes including the Gourmet Autumn Cold Process Soap Class, and the Spring Fling Cold Process Soap Class! -A.M.
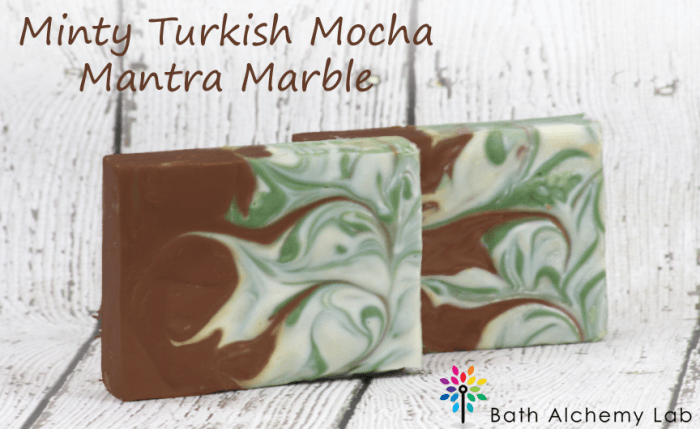
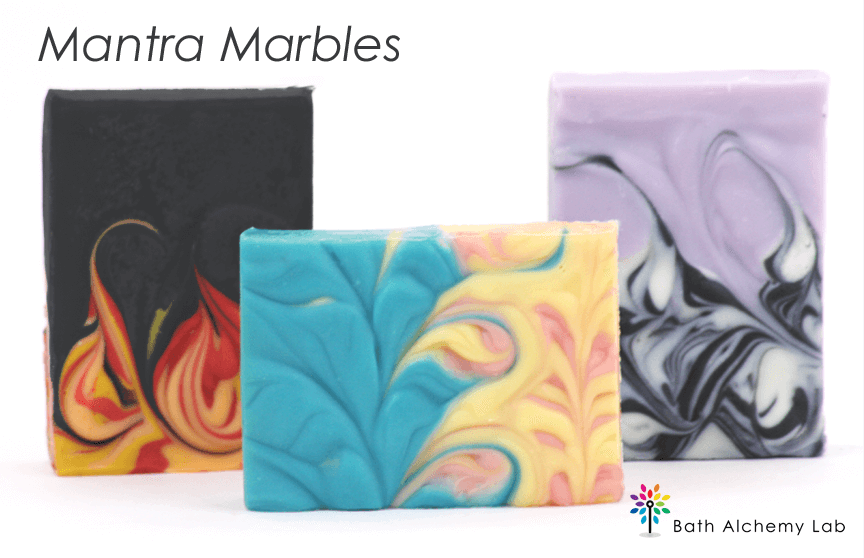
Hi, I’m Erica from Bath Alchemy Lab. Today I’m going to show you how to create cold process soap using the Mantra Marbles technique. There are multiple varieties and three are demonstrated in the ezine. This is one version using Bramble Berry products. A mantra swirl is an advanced design made in a log mold in which a divider and three colors are used to create a beautiful swirl. Our brand new design, Mantra Marbles, takes this concept a few steps further, incorporating a marble technique into a mantra swirl but using a slab mold instead of a log mold.
In the original mantra swirl, after the soap is divided into two colors and the divider is removed, a third color is added. Then, a figure-eight style design is swirled using a thin tool. In order to actually see the mantra on the front of a bar of soap, you must first cut the log of soap 1 inch deep horizontally, then slice the soap about every 3 or so inches vertically into bars. Only one third to one half of the bars have the mantra swirl – just the top few bars. The rest of the soaps will simply be two-toned.
So, how does one get all of the soap bars to have a true mantra swirl? The answer is simple. Use a slab mold with more dividers. Take that a step further and create a marble on one side of each set of dividers, and you have a Mantra Marble. Use a recipe and scent that will allow you to fully control your trace and at least 3 colors as shown below. Your trace and your manipulation tool will dictate the final design.
44 oz. Swirl Quick Mix Oils
Thin manipulation tool (fondant molding tool or the like)

Click here to add everything you need for this project to your Bramble Berry shopping cart!
SAFETY: Follow proper safety guidelines for making cold process soap including goggles, gloves and long sleeves. Kids, pets, and distractions should be away from work area.
MAKE MOLD DIVIDERS: Our soap boxes don’t accommodate the smaller, thicker cut of the bars made by the birchwood mold, so we chose not to use all of the dividers, creating larger bars that are one inch thick. If you use all 18 bar dividers, then you will need to modify these instructions to work lengthwise instead of width wise in the mold. If you like the larger bars, follow these directions. Place bar dividers in the mold so you know where to mark your mold for the mantra dividers. If making the larger bars, remove three of the five dividers that run widthwise as shown in the photo (the two outside dividers and the one in the center).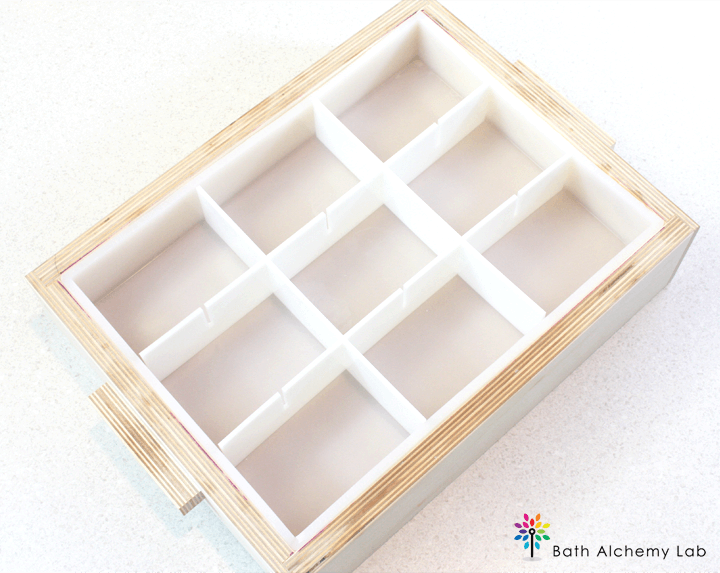 ONE: Using a small piece of colored tape (or a marker if you don’t mind a permanent indicator), mark the center of each divided section on each side. In the mold shown, tape was placed on the long sides so the mantra dividers run width wise. This will cut the bar design in the same direction as a traditional mantra made in a log mold. Since this mold will make three rows of three soaps, three mantra dividers are needed.
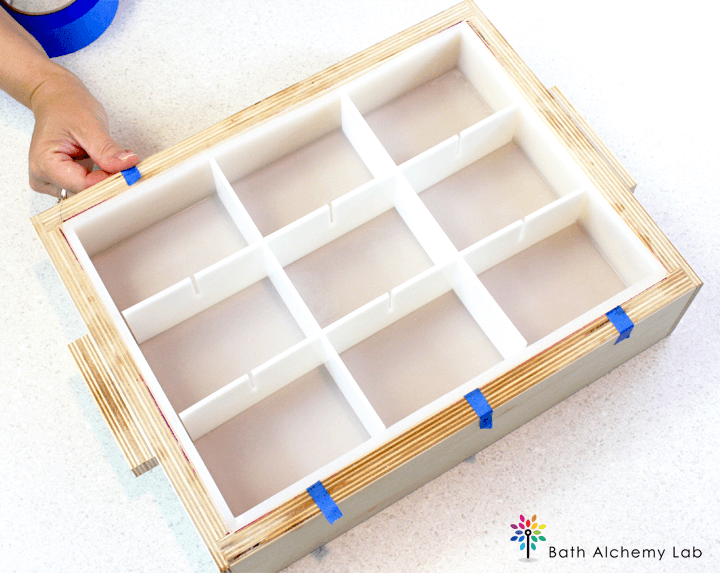 TWO: Cut dividers to fit the width of your mold. In this case, the dividers should be cut to a length of 9 inches and a width of 2.5 inches. If you want to use the dividers again, wrap them in plastic wrap and secure with tape. You can toss the plastic after use and reuse the dividers in the future.
In the example, foam board was cut to fit snugly. Each divider is placed so that each end lines up with its corresponding mark creating straight lines. Now that the dividers are made and inserted into the mold, set it aside. PREP COLOR AND SCENT: Under normal circumstances, scent can be combined at the prep phase and added to the soap at trace. Since we know that the Turkish Mocha fragrance will turn the soap brown, we only want it in half of the soap. The other half will be mint. Yes, you most definitely can mix essential oils and fragrance oils. You can also place the entire scent in just one half of a soap and it will be fine in the final product, but in this recipe, we kept the scents separate. Measure the Turkish Mocha and place in one small fragrance safe dish and do the same with the Peppermint Essential Oil in another dish. Pigments have a habit of remaining clumpy, so add about 1-2 tbsp. of your Quick Mix oils to one Easy Pour Container and blend with the green pigment using a mini-mixer to work out any clumps. Do the same with the brown pigment in another container. The final Easy Pour Container will be used to pour the uncolored (white) soap into the squeeze bottle. Set your ingredients aside.
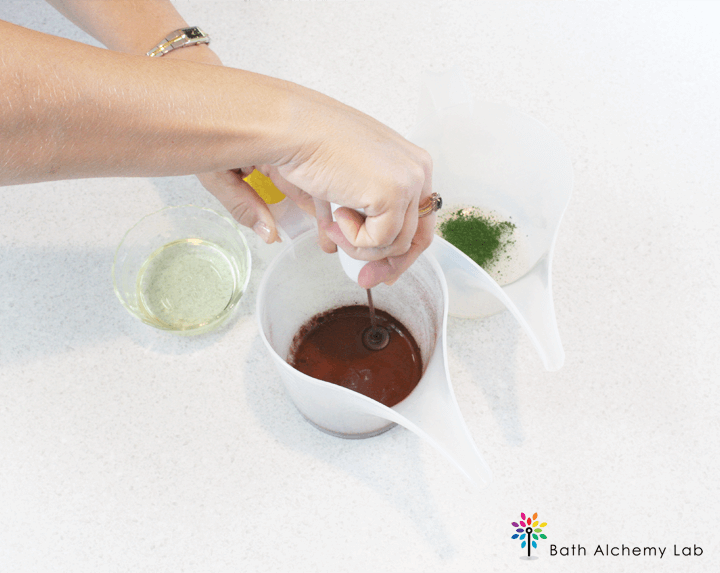
STEP ONE: Carefully add the lye to the water, stir until the lye is fully dissolved, and set aside to cool to about 100ºF or cooler.
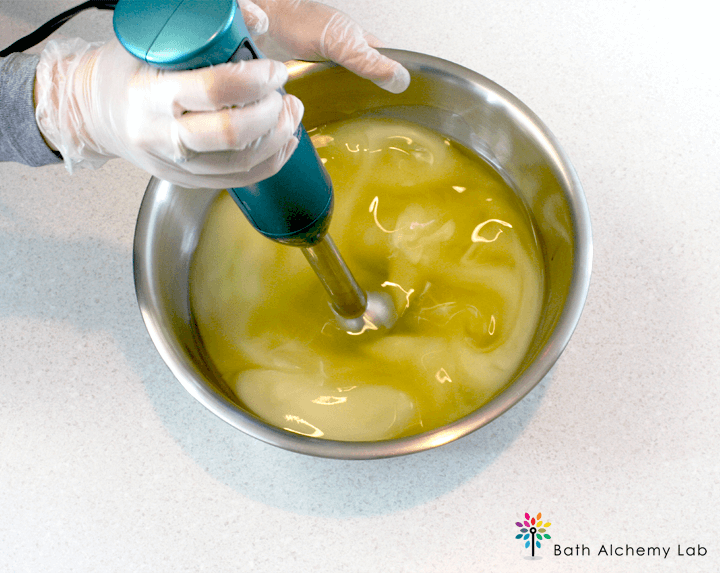
Melt the Quick Mix oils until clear. We do this in the microwave in 1 minute intervals with no cap on the bag. When the oil is clear (not cloudy), measure and place in a bowl. Cool to about 100ºF. The cooler temperatures will keep your trace thinner longer. Once the lye water and the oils have cooled to about 100ºF, add the lye water to the oils and stick blend to an emulsion or thin trace.

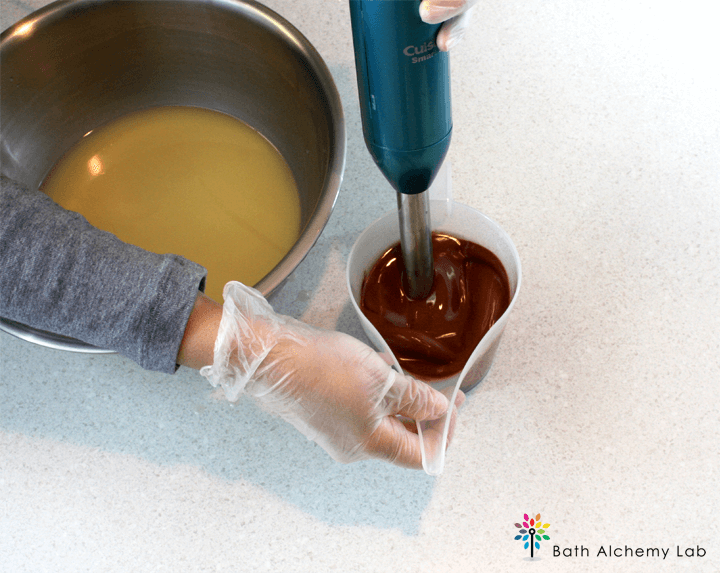
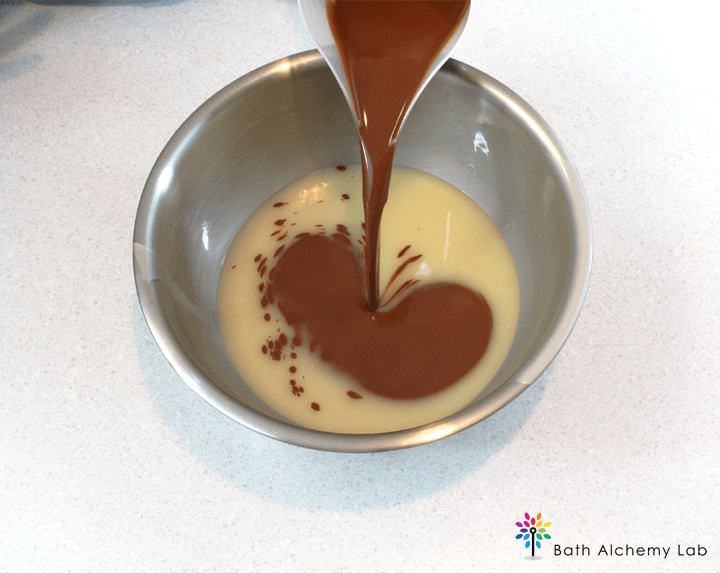
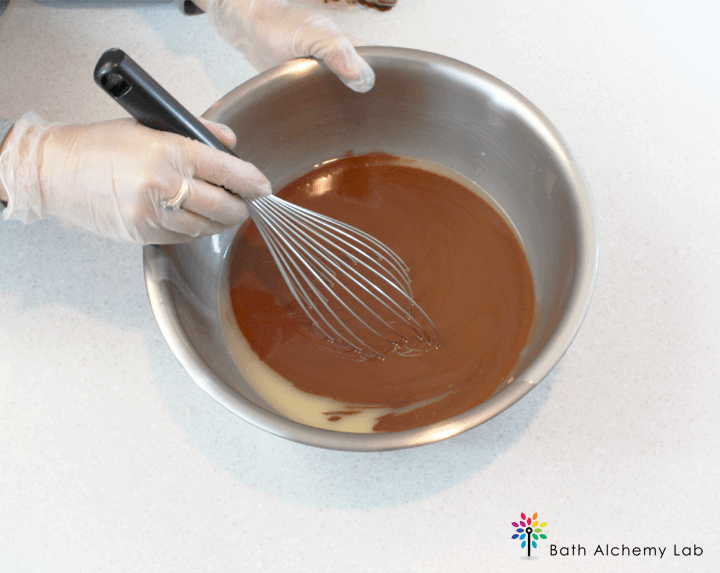
STEP TWO: Work quickly to keep the soap at a thin trace, but do not panic. Split the soap in half. One half will be colored brown and scented with the mocha. Add some of the soap to the brown container. Blend well with a stick blender. This is an extra step that ensures that all the pigment is completely blended smoothly in the soap. Pour the brown soap into the original halved bowl. Add the Turkish Mocha Fragrance Oil and blend with a whisk.
 Pour the brown soap into the original halved bowl. Add the Turkish Mocha Fragrance Oil and blend with a whisk.
 STEP THREE: The other half of the soap will be colored white and green and scented with peppermint. Add the Peppermint Essential Oil to the soap and blend with a whisk.
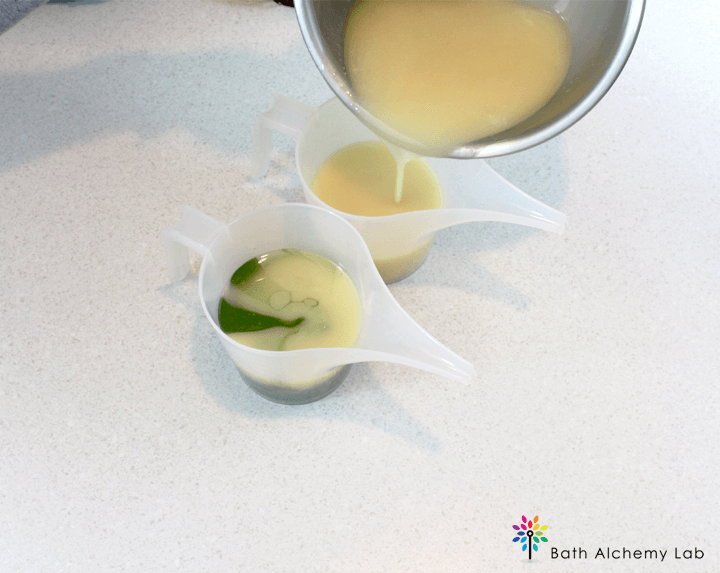
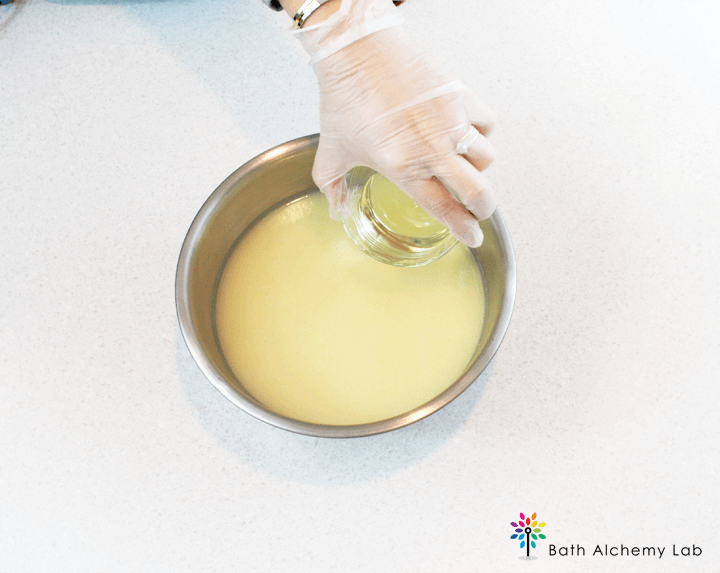 Pour half of the peppermint soap into the green container and the other half into the empty container (this one will remain uncolored). Blend the green with a stick blender to ensure the color is blended smoothly. Then, pour about ½ cup of white soap into one squeeze bottle and ½ cup of green soap into the other bottle. Set aside.
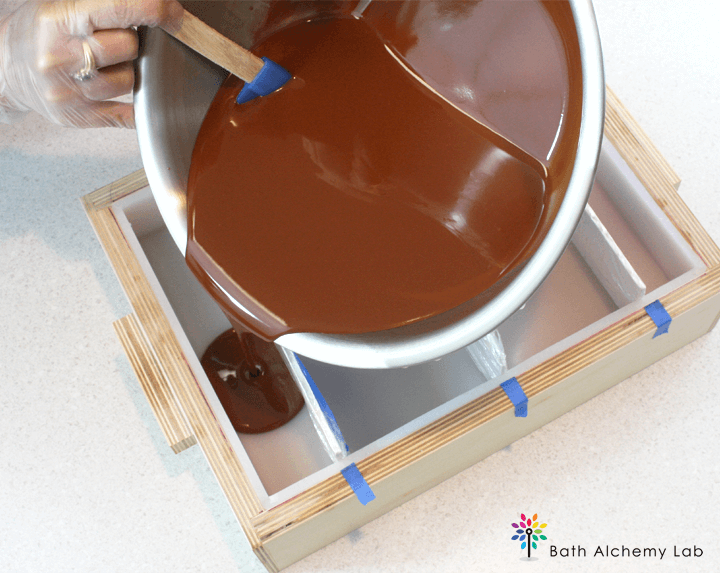
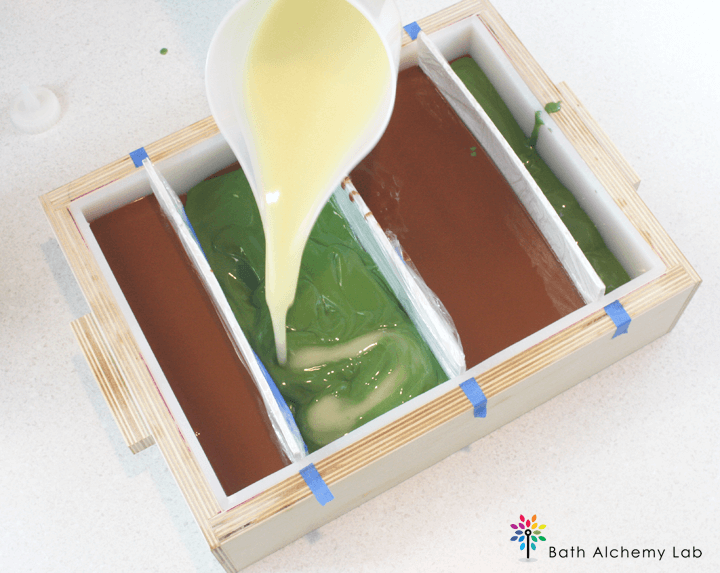
 STEP FOUR: Pour the brown soap into one narrow end section to about 1 inch depth. Skip a section and do the same in the next wide area. All the brown soap should be in the mold and about even in depth.
STEP FIVE: Pour the green and white soap into the remaining sections randomly but to an equal depth creating an in the mold swirl (just like a pot swirl). There is a variation for this in the ezine, but this is a quick and easy way to work fast and keep the thinner trace. Don’t overthink this, just dump the soap in evenly and quickly. The trace will be moving to a thin-moderate consistency, and this is fine.
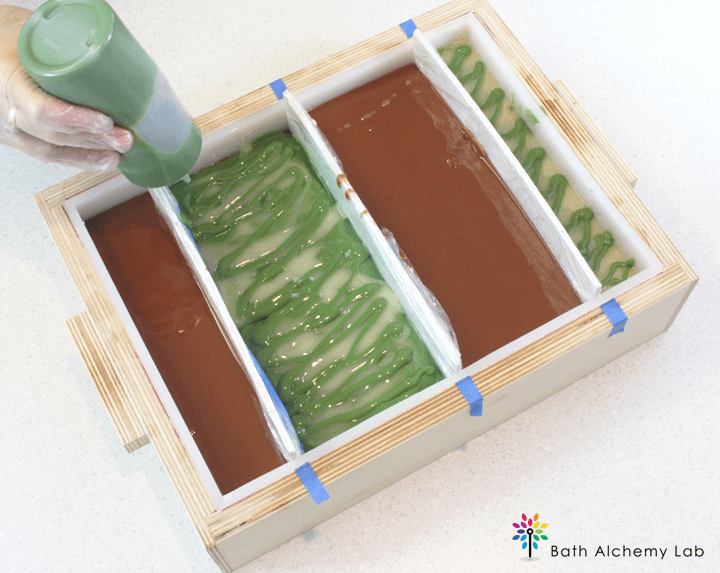
Using the green squeeze bottle, squirt the green soap in a snaking fashion (an “S” curve) back and forth from one end of the mold to the other on top of the green and white soap in both sections. Then, do this with the white soap. Repeat the process until you run out of soap.
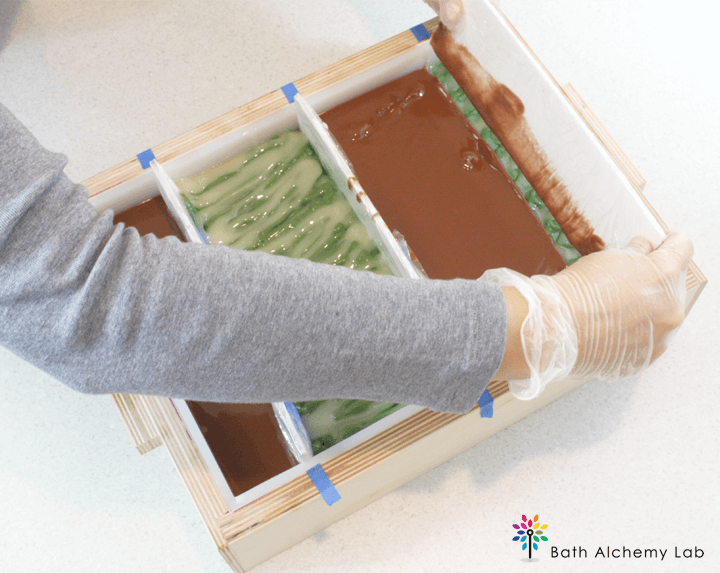
STEP SIX: Carefully remove your dividers by pulling straight up and set aside. Don’t waste time trying to scrape off the little soap on the dividers. You may inadvertently affect the design.
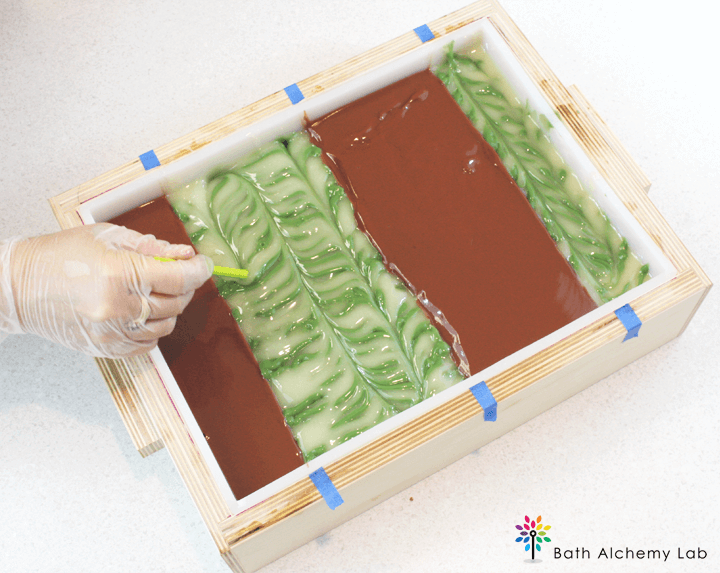
STEP SEVEN: Now create a linear swirl in the green and white sections. Starting in the narrow section, place the thin manipulation tool into the top of the mold about ½ inch from the edge. Drag the tool toward you perpendicularly through the lines created by the squeeze bottles.
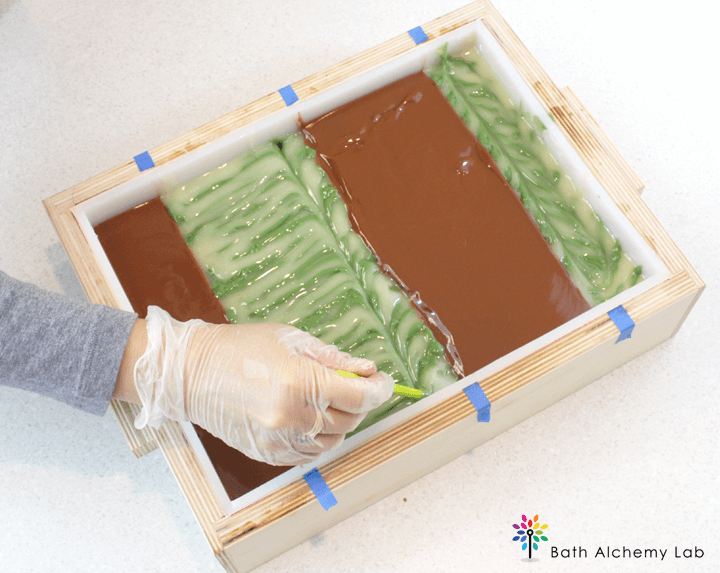
On the bottom of the mold, shift about ½ inch away from the first drag, then run the tool to the top of the mold. Repeat the process until you run out of space in one section, then do the same in the next green and white section. This creates a linear design through the green and white soap.
STEP EIGHT: Use the thin tool to draw your mantra swirl. This is a looping figure eight, as shown here.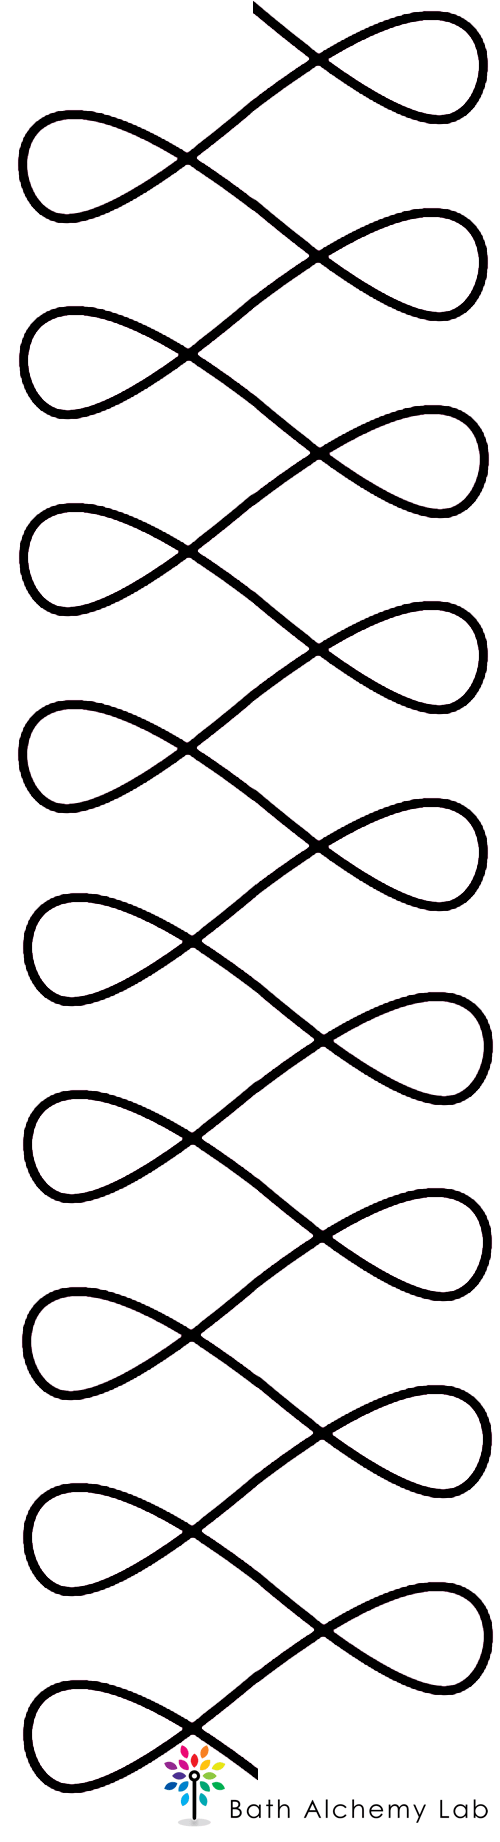 You need to envision where your bar dividers will be placed and keep your mantra swirl drawing within those areas. For the two narrow sections, your mantra design will be drawn all the way through the section from side to side, but in the wider sections, you are only dragging to the center of the striped or solid section. Place your thin tool into the top left corner of the mold and draw your mantra design through the soap from top to bottom while keeping the mantra at the halfway point of the solid section. Repeat this process for all divider sections.
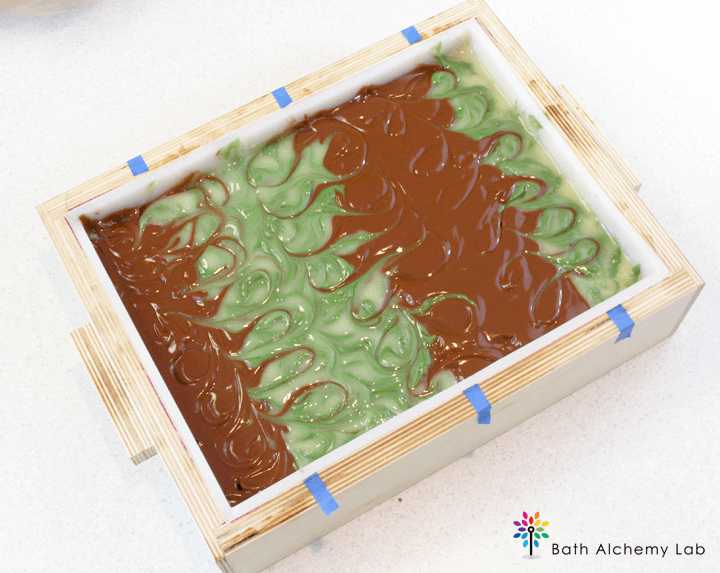
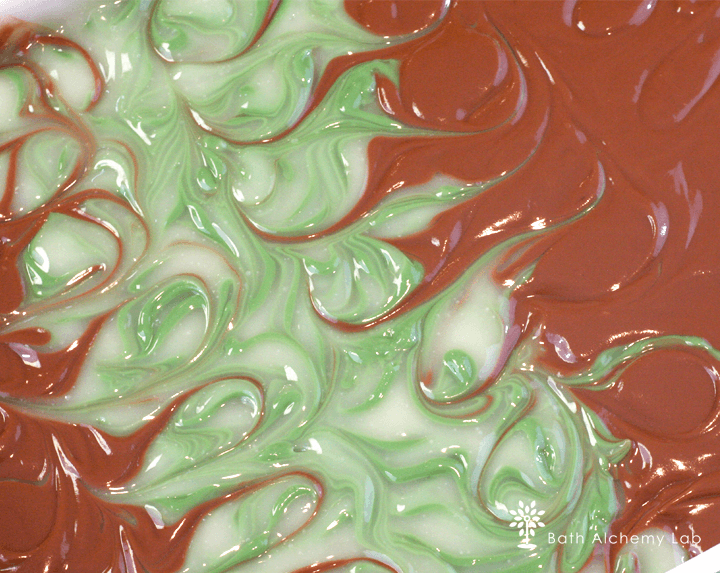
 This mold makes 3 rows with 3 bars in each section, so 3 mantra swirls were drawn. Here’s a close-up of the design.
 Place your dividers in the mold. Now you can see that your mantra design stays within each bar of soap.
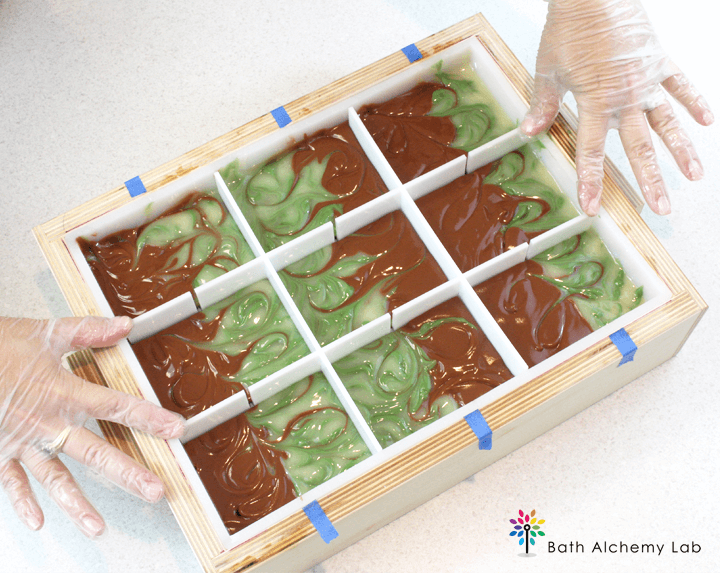
Spray the soap with 99% isopropyl alcohol to prevent soda ash. Allow to set at least 24 hours. Remove from mold and cure the bars for 4-6 weeks. Enjoy!
There are other variations of this new design shown in our ezine. We’d love to hear your feedback on this new design. Post your comments below or on our Facebook page. Feel free to submit photos of your take on this technique to Erica for feature on her blog and/or social media by contacting her at [email protected]. She is also happy to answer any questions.

Guest Post: Minty-Mocha Mantra Marble Cold Process Soap
Ingredients
- 44 oz. Swirl Quick Mix Oils
- 6.1 oz. Sodium Hydroxide Lye
- 18 oz. Distilled Water
- 1.5 oz. Turkish Mocha Fragrance Oil
- 1.5 oz. Peppermint Essential Oil 1st Distill
- ½ tsp Green Chrome Oxide Pigment
- ½ tsp Brown Oxide Pigment
- 18 Bar Unfinished Birchwood Slab Mold
- Silicone Liner for 18 Bar Mold
Instructions
SAFETY: Follow proper safety guidelines for making cold process soap including goggles, gloves and long sleeves. Kids, pets, and distractions should be away from work area.
MAKE MOLD DIVIDERS: Our soap boxes don’t accommodate the smaller, thicker cut of the bars made by the birchwood mold, so we chose not to use all of the dividers, creating larger bars that are one inch thick. If you use all 18 bar dividers, then you will need to modify these instructions to work lengthwise instead of width wise in the mold. If you like the larger bars, follow these directions. Place bar dividers in the mold so you know where to mark your mold for the mantra dividers. If making the larger bars, remove three of the five dividers that run widthwise as shown in the photo (the two outside dividers and the one in the center).
- Using a small piece of colored tape (or a marker if you don’t mind a permanent indicator), mark the center of each divided section on each side. In the mold shown, tape was placed on the long sides so the mantra dividers run width wise. This will cut the bar design in the same direction as a traditional mantra made in a log mold. Since this mold will make three rows of three soaps, three mantra dividers are needed.
- Cut dividers to fit the width of your mold. In this case, the dividers should be cut to a length of 9 inches and a width of 2.5 inches. If you want to use the dividers again, wrap them in plastic wrap and secure with tape. You can toss the plastic after use and reuse the dividers in the future. In the example, foam board was cut to fit snugly. Each divider is placed so that each end lines up with its corresponding mark creating straight lines. Now that the dividers are made and inserted into the mold, set it aside.
PREP COLOR AND SCENT: Under normal circumstances, scent can be combined at the prep phase and added to the soap at trace. Since we know that the Turkish Mocha fragrance will turn the soap brown, we only want it in half of the soap. The other half will be mint. Yes, you most definitely can mix essential oils and fragrance oils. You can also place the entire scent in just one half of a soap and it will be fine in the final product, but in this recipe, we kept the scents separate. Measure the Turkish Mocha and place in one small fragrance safe dish and do the same with the Peppermint Essential Oil in another dish. Pigments have a habit of remaining clumpy, so add about 1-2 tbsp. of your Quick Mix oils to one Easy Pour Container and blend with the green pigment using a mini-mixer to work out any clumps. Do the same with the brown pigment in another container. The final Easy Pour Container will be used to pour the uncolored (white) soap into the squeeze bottle. Set your ingredients aside.
- Carefully add the lye to the water, stir until the lye is fully dissolved, and set aside to cool to about 100ºF or cooler. Melt the Quick Mix oils until clear. We do this in the microwave in 1 minute intervals with no cap on the bag. When the oil is clear (not cloudy), measure and place in a bowl. Cool to about 100ºF. The cooler temperatures will keep your trace thinner longer. Once the lye water and the oils have cooled to about 100ºF, add the lye water to the oils and stick blend to an emulsion or thin trace.
- Work quickly to keep the soap at a thin trace, but do not panic. Split the soap in half. One half will be colored brown and scented with the mocha. Add some of the soap to the brown container. Blend well with a stick blender. This is an extra step that ensures that all the pigment is completely blended smoothly in the soap. Pour the brown soap into the original halved bowl. Add the Turkish Mocha Fragrance Oil and blend with a whisk. Pour the brown soap into the original halved bowl. Add the Turkish Mocha Fragrance Oil and blend with a whisk.
- The other half of the soap will be colored white and green and scented with peppermint. Add the Peppermint Essential Oil to the soap and blend with a whisk. Pour half of the peppermint soap into the green container and the other half into the empty container (this one will remain uncolored). Blend the green with a stick blender to ensure the color is blended smoothly. Then, pour about ½ cup of white soap into one squeeze bottle and ½ cup of green soap into the other bottle. Set aside.
- Pour the brown soap into one narrow end section to about 1 inch depth. Skip a section and do the same in the next wide area. All the brown soap should be in the mold and about even in depth.
- Pour the green and white soap into the remaining sections randomly but to an equal depth creating an in the mold swirl (just like a pot swirl). There is a variation for this in the ezine, but this is a quick and easy way to work fast and keep the thinner trace. Don’t overthink this, just dump the soap in evenly and quickly. The trace will be moving to a thin-moderate consistency, and this is fine. Using the green squeeze bottle, squirt the green soap in a snaking fashion (an “S” curve) back and forth from one end of the mold to the other on top of the green and white soap in both sections. Then, do this with the white soap. Repeat the process until you run out of soap.
- Carefully remove your dividers by pulling straight up and set aside. Don’t waste time trying to scrape off the little soap on the dividers. You may inadvertently affect the design.
- Now create a linear swirl in the green and white sections. Starting in the narrow section, place the thin manipulation tool into the top of the mold about ½ inch from the edge. Drag the tool toward you perpendicularly through the lines created by the squeeze bottles. On the bottom of the mold, shift about ½ inch away from the first drag, then run the tool to the top of the mold. Repeat the process until you run out of space in one section, then do the same in the next green and white section. This creates a linear design through the green and white soap.
- Use the thin tool to draw your mantra swirl. This is a looping figure eight, as shown here. You need to envision where your bar dividers will be placed and keep your mantra swirl drawing within those areas. For the two narrow sections, your mantra design will be drawn all the way through the section from side to side, but in the wider sections, you are only dragging to the center of the striped or solid section. Place your thin tool into the top left corner of the mold and draw your mantra design through the soap from top to bottom while keeping the mantra at the halfway point of the solid section. Repeat this process for all divider sections.
- Place your dividers in the mold. Now you can see that your mantra design stays within each bar of soap. Spray the soap with 99% isopropyl alcohol to prevent soda ash. Allow to set at least 24 hours. Remove from mold and cure the bars for 4-6 weeks. Enjoy!