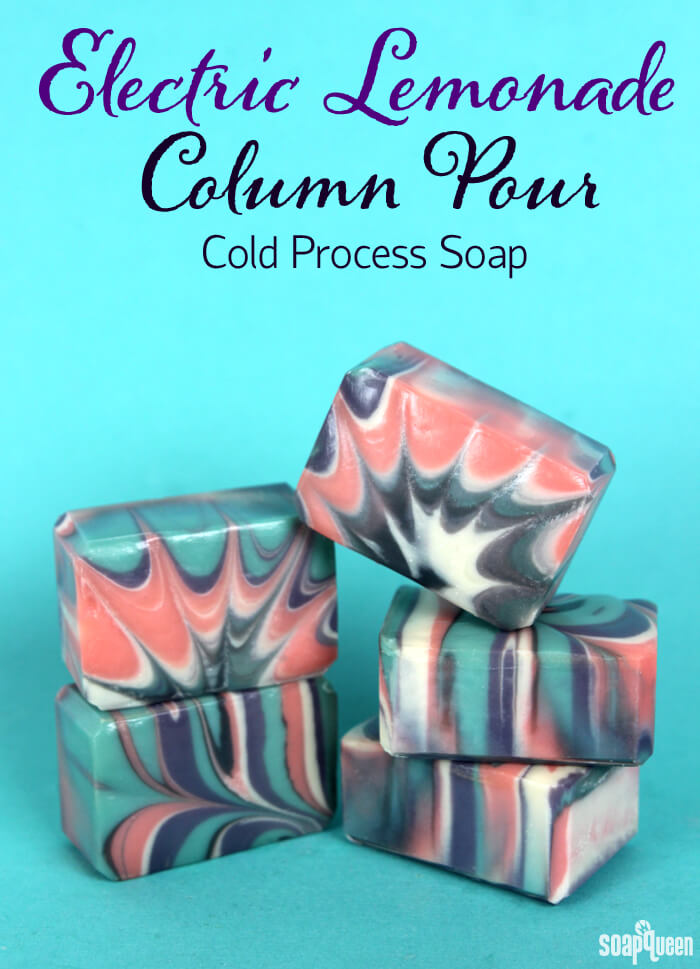
The column pour cold process technique involves pouring layers of soap on top of a column-shaped tool. As more layers are poured, the soap spreads throughout the mold creating fun patterns depending on the shape of your column tool. For this Electric Lemonade Column Pour Cold Process, we used squeeze bottles to creates circular layers of brightly colored soap. After pouring the layers, the soap can be swirled to make more complex designs. To see another example of this technique, check out the Neptune Column Pour Cold Process Tutorial.
Scented with Electric Lemonade Cocktail Fragrance Oil, this soap smells tart and juicy. These bars used the Swirl Quick Mix to ensure the soap stayed at a thin trace for a long period of time. Don’t want to use a swirl mix and want to create your own recipe? Make sure you have at least 60% liquid oils in the recipe to ensure you have enough time to get the column pour to really work well. For tips on creating your own recipe, click here. Also, be sure to use a fragrance oil that does not accelerate trace. Click here for more tips to avoid trace acceleration.
These bars were sent to the first 25 soap swap boxes that arrived to Bramble Berry; I hope those who received them love the fragrance and design! It was so fun to receive all the soap in this year’s cold process soap swap. The team and I were so impressed with the variety and skill in each project. If you’d like to be included in the next swap, be sure to sign up for our newsletter and keep your eyes on the blog and Bramble Berry Facebook page for future announcements.
 Just a few of the Soap Swap boxes ready and waiting to be swapped!
What You’ll Need:
36 Bar Unfinished Birchwood Mold
131 oz. Swirl Quick Mix
18.1 oz. Sodium Hydroxide Lye
43.2 oz. Distilled Water
10 oz. Electric Lemonade Cocktail Fragrance Oil
Neon Blue Raspberry Colorant
Tangerine Wow! Colorant
Ultramarine Violet Oxide Pigment
Titanium Dioxide
Black Oxide
Optional: 2 Squeeze Bottles

SAFETY FIRST: Suit up for safe handling practices! That means goggles, gloves and long sleeves. Make sure kids, pets, and other distractions and tripping hazards are out of the house or don’t have access to your soaping space. Always soap in a well-ventilated area.
COLOR PREP: To ensure that the Titanium Dioxide blends smoothly into the soap batter, we recommend micronizing it before dispersing it in oil. Please note this is an optional tip but it does help with the titanium dioxide clumping in the soap =) To micronize colorant, simply use a coffee grinder to blend the colorant to break up any clumps of color and prevent streaks of white from showing in the final soap. We like to use a coffee grinder that has a removable, stainless steel mixing area for easy cleaning. Then, disperse 3 teaspoons of each colorant into 3 tablespoons of sunflower or sweet almond oil (or any other liquid oil). Disperse 1 teaspoon Black Oxide into 1 tablespoon light weight liquid oil. Then disperse 3 teaspoons of Tangerine Wow! Colorant and Neon Blue Raspberry into 3 tablespoons light weight liquid oil in separate containers. Finally, disperse 4 teaspoons Ultramarine Violet Oxide Pigment into 4 tablespoons lightweight liquid oil. Use a mini mixer to get clumps worked out smoothly. Prepping your colors in the beginning will allow you to work quickly and give you more time to work with your soap.
MOLD & COLUMN PREP: Before you begin, be sure to line the mold with freezer paper. Click here to learn how to line the mold yourself. If you choose to use the squeeze bottle to create the column pour, remove the caps from the squeeze bottles. Wrap the top of each bottle with tape to cover the opening. Try to make the tape as smooth and even as possible, as large creases could effect the design as the soap moves down the bottles. If you don’t have squeeze bottles, you can use any other cold process safe column shape. Just keep in mind that the size and shape will affect the patter and size of the layers. You may want to weight the bottles down. I found it a bit easier when they were heavier to pour over them.
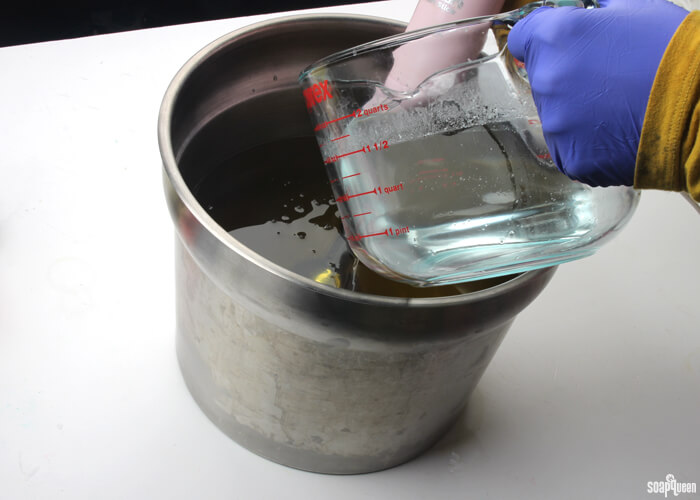
ONE: Slowly and carefully add the lye to the water and gently stir until the lye has fully dissolved and the liquid is clear. Set aside to cool.
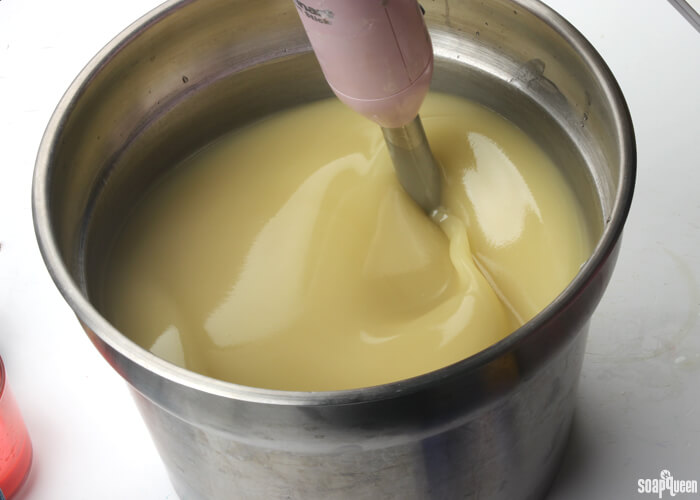
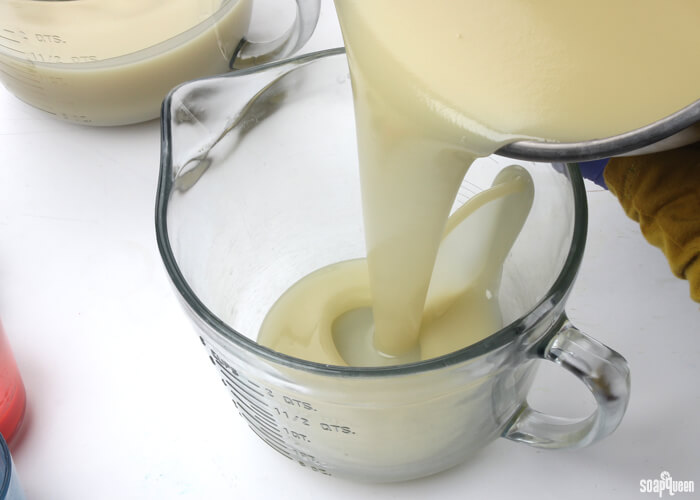
TWO: Fully melt the Swirl Recipe Quick Mix and pour into a large container that holds 200 oz. Once the lye water and the oils have cooled to 130 degrees or below (and are ideally within 10 degrees of each other), add the lye water to the oils and stick blend until thin trace. If you’d like a harder bar of soap that releases faster from the mold, you can add sodium lactate to the cooled lye water. Use 1 teaspoon of sodium lactate per pound of oils in the recipe. For this recipe, you’d add about 8 tsp. sodium lactate.
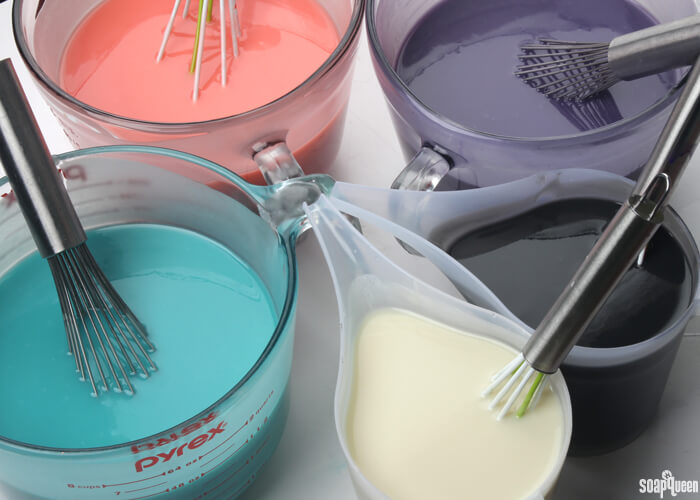
THREE: Once you’ve reached a thin trace, split the batter into three large containers of about 5.5 cups each. Then, split off the remaining soap into two smaller containers of about 900 mL each. To these containers, whisk in the dispersed colorants using the amounts below.
- Container A (5.5 cups): 3 Tbs. Tangerine Wow! Colorant
- Container B (5.5 cups): 3 Tbs. Neon Blue Raspberry Colorant + 1 tsp. Titanium Dioxide
- Container C (5.5 cups): 4 Tbs. Ultramarine Violet Pigment + 1/4 tsp. Black Oxide
- Container D (900 mL): 3 Tbs. Titanium Dioxide
- Container D (900 mL): 1 tsp. Black oxide
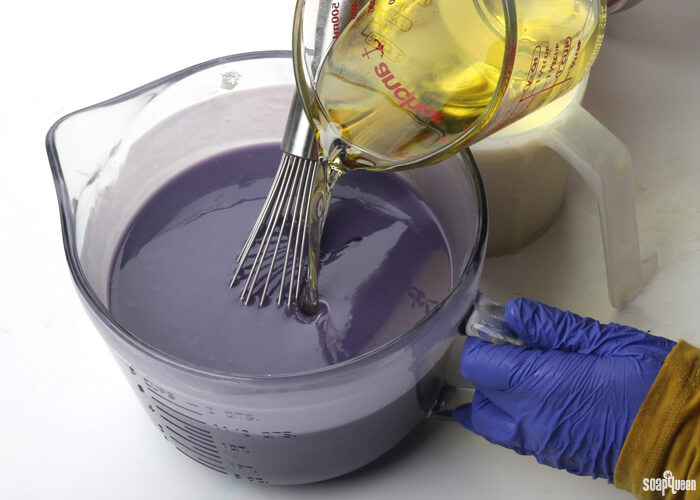
FOUR: Add the fragrance oil proportionally into each container of soap. It’s okay to eyeball it! Use a whisk to thoroughly mix in the fragrance oil.
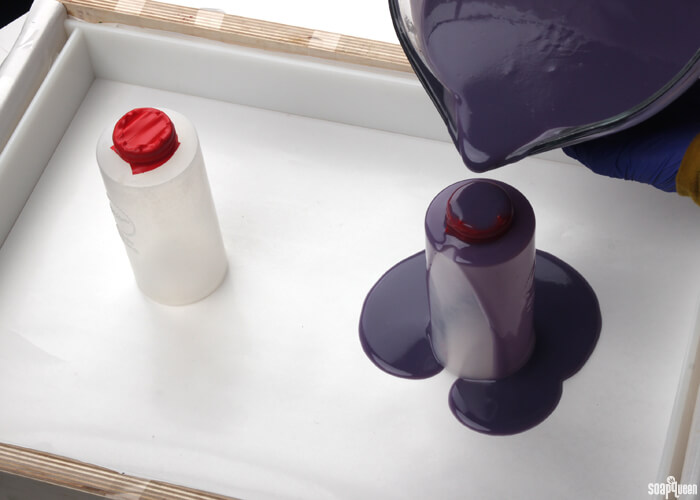
FIVE: Decide on a color order and stick with it for the entirety of the pour. The order that I used was purple, white, orange, black, and blue. Pour the first color in the center of the squeeze bottles while counting to 3. Repeat this step with the other colors, again counting to three during each pour to keep the layers a similar size. Repeat the process until the containers have been emptied. Whisk each color after a few pours to help keep the soap fluid and avoid any graininess.
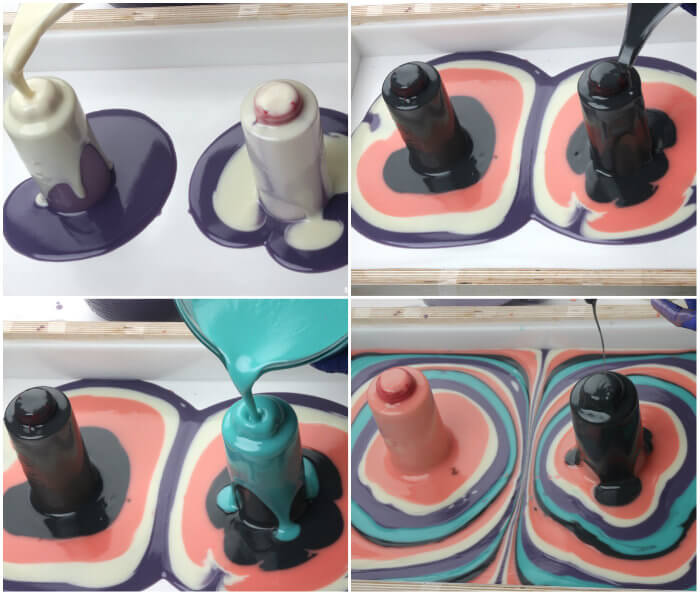
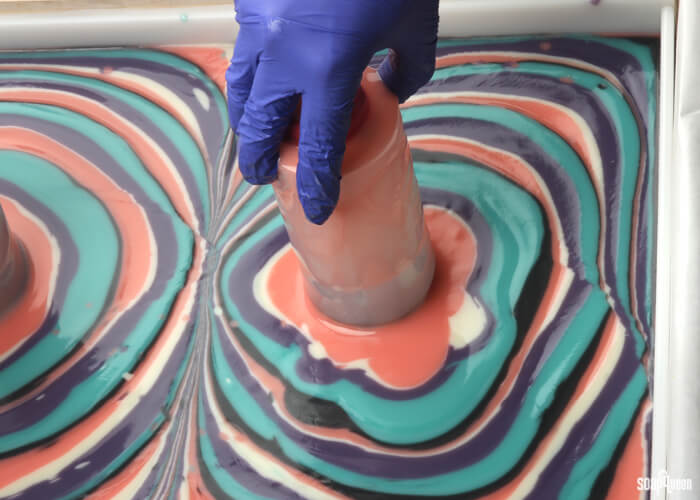
SIX: Once all the soap has been poured, slowly and carefully remove the squeeze bottles from the soap. Have a container waiting nearby to set the bottles in. Once the bottles have been removed, firmly tap the mold on the counter to help settle the soap. Because the mold is so large, you may want a soapy helper for this! Finally, if you have a few drops of white soap leftover, add a dollop of white soap in the center of the layers. This is optional, but the white soap on top gives a nice contrast.
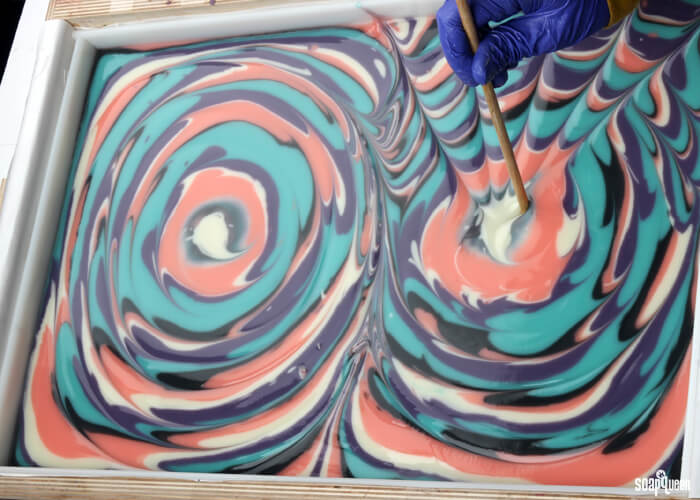
 SEVEN: Insert a dowel or chopstick into the center of each column pour, and swirl outward in a circular motion. Do not insert the dowel or chopstick all the way through the soap, only swirl the top. Once you reach the end of the circle created by the pour, swirl the other circle.
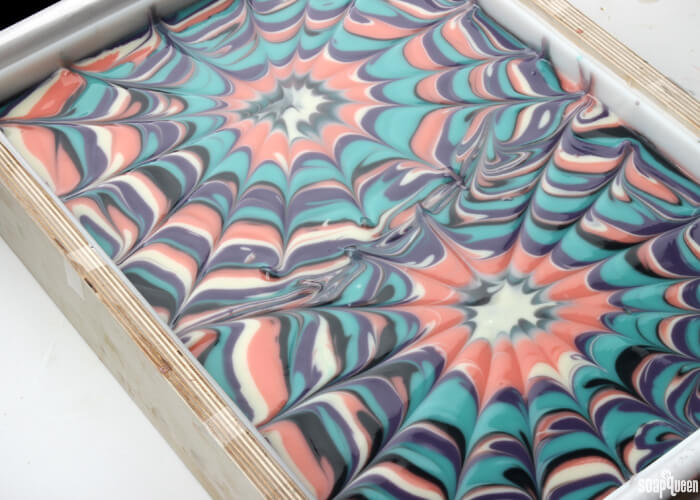
 EIGHT: Clean off your chopstick or dowel, and insert it into the center of each circular pattern. Do not insert the swirling tool all the way through the soap, only swirl the top. Drag the dowel straight to the edges of the mold. Repeat this process for the other circular pattern created by the pour.
 NINE (optional): Finish the soap by inserting the 36 bar divider set. Click here to learn how to assemble the divider sets for birchwood soap molds.
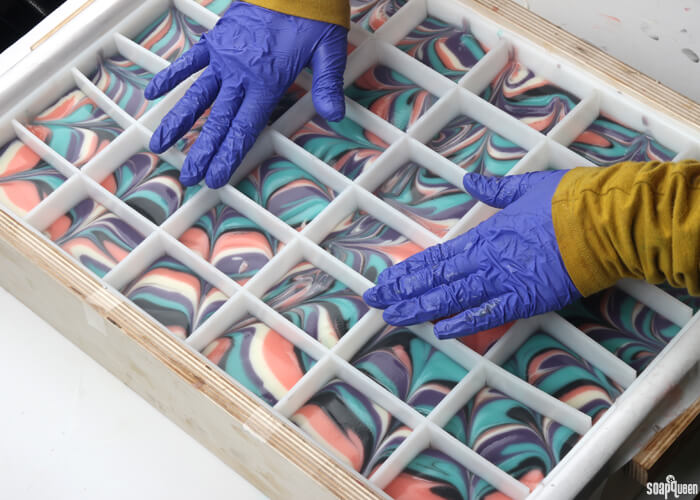 TEN: Spray the soap with 99% isopropyl alcohol to prevent soda ash. To help the colors pop, we promoted gel phase by placing the lid onto the mold, and setting the mold on a heating pad set to medium for 30 minutes. Learn more about gel phase here.
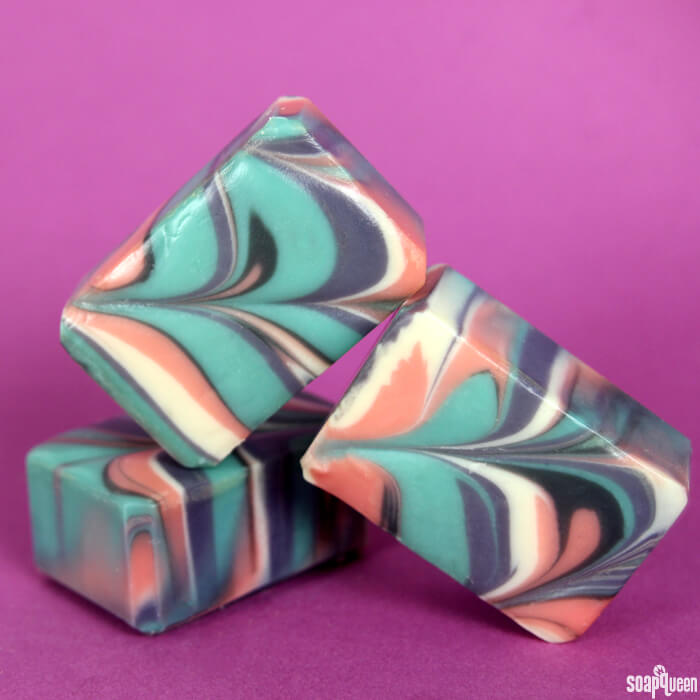
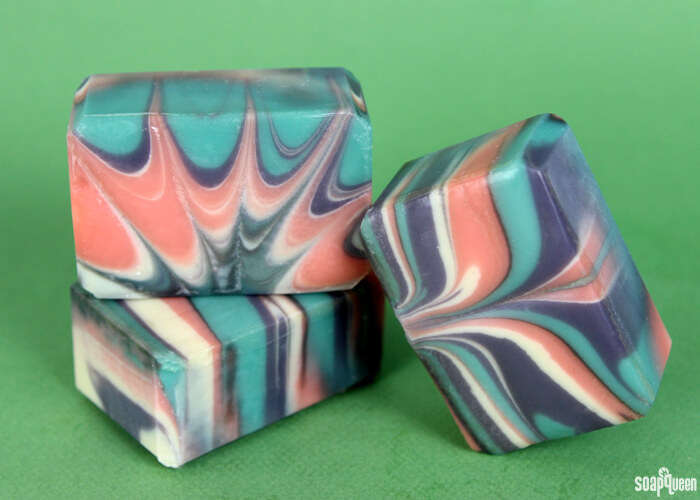
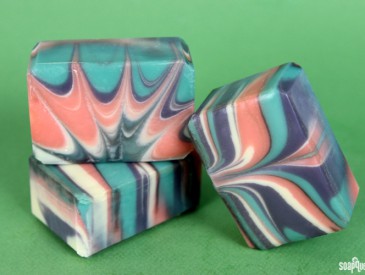
Have you tried the column-pour technique? I love the design it creates!
Electric Lemonade Column Pour Tutorial
Ingredients
- 36 Bar Unfinished Birchwood Mold
- 131 oz. Swirl Quick Mix
- 18.1 oz. Sodium Hydroxide Lye
- 43.2 oz. Distilled Water
- 10 oz. Electric Lemonade Cocktail Fragrance Oil
- Neon Blue Raspberry Colorant
- Tangerine Wow! Colorant
- Ultramarine Violet Oxide Pigment
- Titanium Dioxide
- Black Oxide
- Optional: 2 Squeeze Bottles
Instructions
SAFETY FIRST: Suit up for safe handling practices! That means goggles, gloves and long sleeves. Make sure kids, pets, and other distractions and tripping hazards are out of the house or don’t have access to your soaping space. Always soap in a well-ventilated area.
COLOR PREP: To ensure that the Titanium Dioxide blends smoothly into the soap batter, we recommend micronizing it before dispersing it in oil. Please note this is an optional tip but it does help with the titanium dioxide clumping in the soap =) To micronize colorant, simply use a coffee grinder to blend the colorant to break up any clumps of color and prevent streaks of white from showing in the final soap. We like to use a coffee grinder that has a removable, stainless steel mixing area for easy cleaning. Then, disperse 3 teaspoon of each colorant into 3 tablespoons of Sunflower or Sweet Almond Oil (or any other liquid oil). Disperse 1 teaspoon Black Oxide into 1 tablespoon light weight liquid oil. Then disperse 3 teaspoons of Tangerine Wow! Colorant and Neon Blue Raspberry into 3 tablespoons light weight liquid oil in separate containers. Finally, disperse 4 teaspoons Ultramarine Violet Oxide Pigment into 4 tablespoons light weight liquid oil. Use a mini mixer to get clumps worked out smoothly. Prepping your colors in the beginning will allow you to work quickly and give you more time to work with your soap.
MOLD & COLUMN PREP: Before you begin, be sure to line the mold with freezer paper. Click here to learn how to line the mold yourself. If you choose to use the squeeze bottle to create the column pour, remove the caps from the squeeze bottles. Wrap the top of each bottle with tape to cover the opening. Try to make the tape as smooth and even as possible, as large creases could effect the design as the soap moves down the bottles. If you don’t have squeeze bottles, you can use any other cold process safe column shape. Just keep in mind that the size and shape will effect the patter and size of the layers.
- Slowly and carefully add the lye to the water and gently stir until the lye has fully dissolved and the liquid is clear. Set aside to cool.
- Fully melt the Swirl Recipe Quick Mix and pour into a large container that holds 200 oz. Once the lye water and the oils have cooled to 130 degrees or below (and are ideally within 10 degrees of each other), add the lye water to the oils and stick blend until thin trace. If you’d like a harder bar of soap that releases faster from the mold, you can add sodium lactate to the cooled lye water. Use 1 teaspoon of sodium lactate per pound of oils in the recipe. For this recipe, you’d add about 8 tsp. sodium lactate.
- Once you’ve reached a thin trace, split the batter into three large containers of about 5.5 cups each. Then, split off the remaining soap into two smaller containers of about 900 mL each. To these containers, whisk in the dispersed colorants using the amounts below.
Container A (5.5 cups): 3 Tbs. Tangerine Wow! Colorant
Container B (5.5 cups): 3 Tbs. Neon Blue Raspberry Colorant + 1 tsp. Titanium Dioxide
Container C (5.5 cups): 4 Tbs. Ultramarine Violet Pigment + 1/4 tsp. Black Oxide
Container D (900 mL): 3 Tbs. Titanium Dioxide
Container D (900 mL): 1 tsp. Black oxide - Add the fragrance oil proportionally into each container of soap. It’s okay to eyeball it! Use a whisk to thoroughly mix in the fragrance oil.
- Decide on a color order and stick with it for the entirety of the pour. The order that I used was purple, white, orange, black, and blue. Pour the first color in the center of the squeeze bottles while counting to 3. Repeat this step with the other colors, again counting to three during each pour to keep the layers a similar size. Repeat the process until the containers have been emptied. Whisk each color after a few pours to help keep the soap fluid and avoid any graininess.
- Once all the soap has been poured, slowly and carefully remove the squeeze bottles from the soap. Have a container waiting nearby to set the bottles in. Once the bottles have been removed, firmly tap the mold on the counter to help settle the soap. Because the mold is so large, you may want a soapy helper for this! Finally, if you have a few drops of white soap leftover, add a dollop of white soap in the center of the layers. This is optional, but the white soap on top gives a nice contrast.
- Clean off your chopstick or dowel, and insert it into the center of each circular pattern. Do not insert the swirling tool all the way through the soap, only swirl the top. Drag the dowel straight to the edges of the mold. Repeat this process for the other circular pattern created by the pour.
- (Optiona) Finish the soap by inserting the 36 bar divider set. Click here to learn how to assemble the divider sets for birchwood soap molds.
- Spray the soap with 99% isopropyl alcohol to prevent soda ash. To help the colors pop, we promoted gel phase by placing the lid onto the mold, and setting the mold on a heating pad set to medium for 30 minutes. Allow to stay in the mold for 3-4 days, and cure for 4-6 weeks.